|
Now, I am not a professional. I couldn't tell you what flowers belong together or the appropriate amount. Florists of the world may cringe at my work... I apologize. My intentions in building this window box are less then decorative, though that is a bonus. I've mentioned before that I do wildlife photography. A few years ago we had sparrows make a nest in our window box and it was a very exciting experience to watch those little ones grow up. My hope is that if I redo the window box they will return. With that being said if my flowers don't look amazing together, I'm not too worried. YOU WILL NEED:
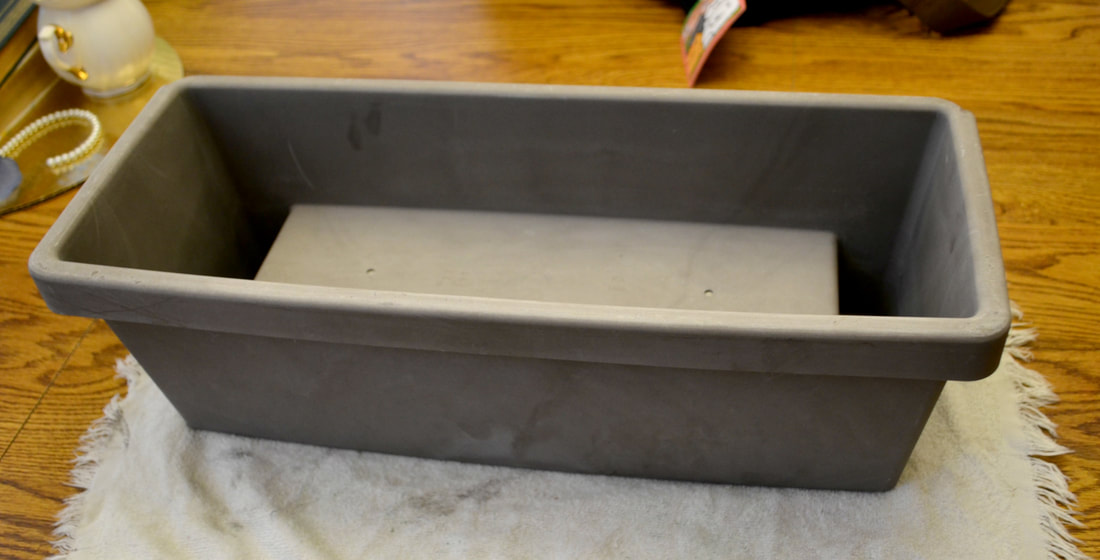 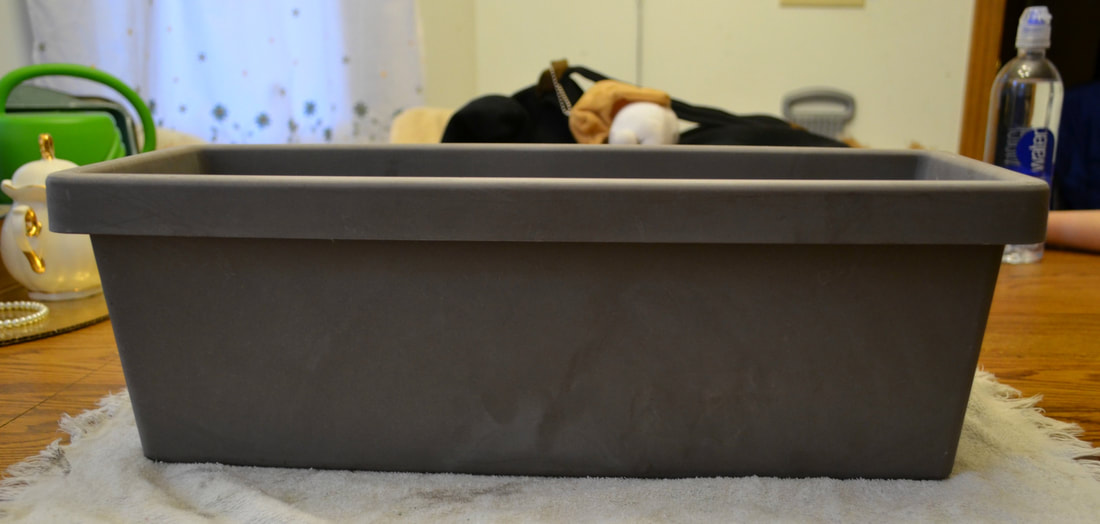 The shed we have has windows all around it and came with this little window box, but you can get ones like this at Lowe's for $8. (Not sponsored, just did a quick google search.) I washed ours out since it was covered in spider webs and fall leaves. I also measured it to be 17" wide and got the appropriate amount of foam to fit that width. You can buy craft foam for flowers at any craft store. I got mine at Michaels for $4.99 a pack. 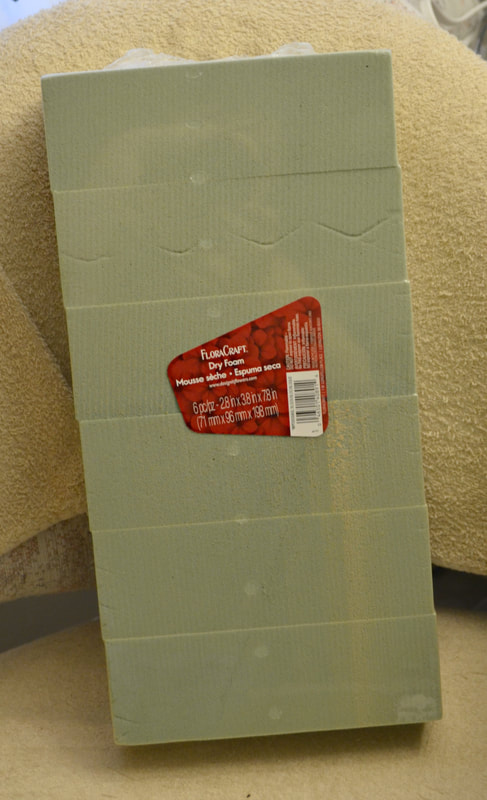 To start the foam I placed two chunks of the foam in the window box unaltered. They were however too thick to put in the front of the box without cutting them in half. I used a cutting board and regular steak knife to cut them into the appropriate sizes to fill the box. 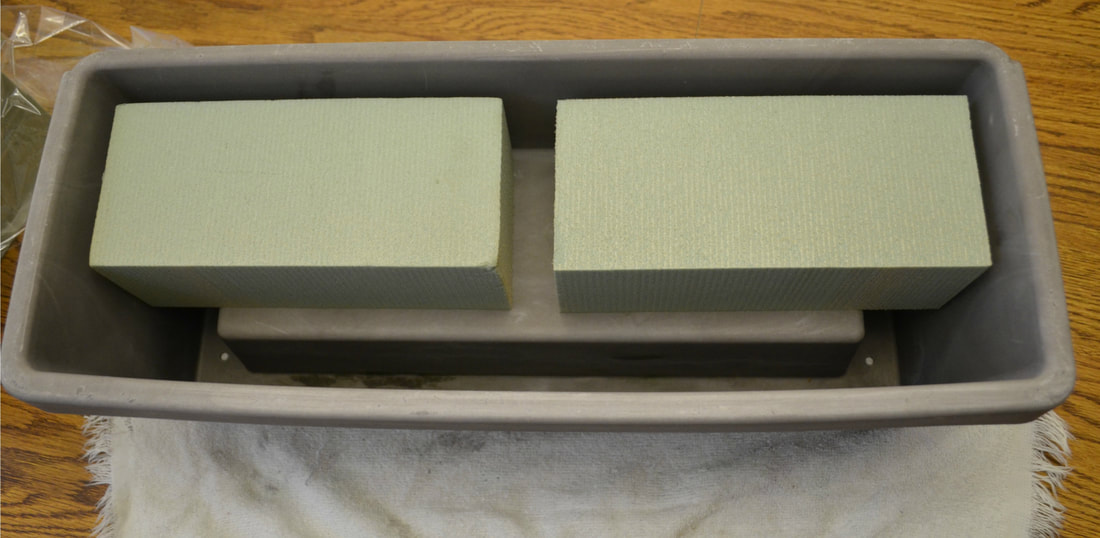 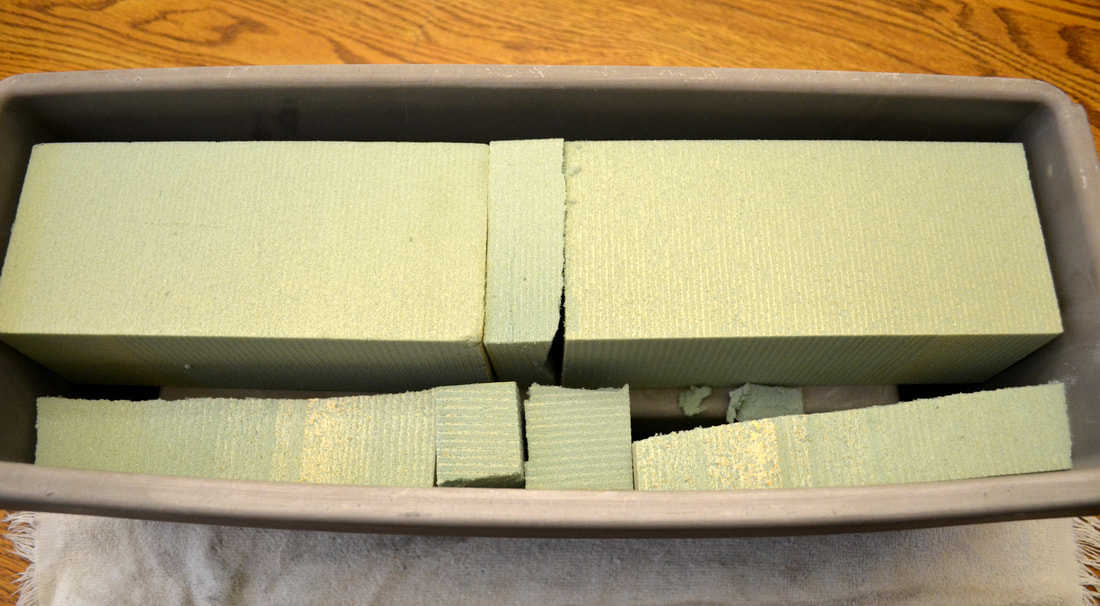 Now onto the flowers. If you're doing these for the outside of your house these flowers will be worn down by the weather over time. And in my situation they're probably going to get pooped on, lol. Sooo, I sought out the cheapest flowers I could. I went to Dollar Tree and picked a bunch of flowers in a similar color scheme and got 10 bouquets for $10.70 I set them in the window box to get an idea of where I want the various flowers in the design. 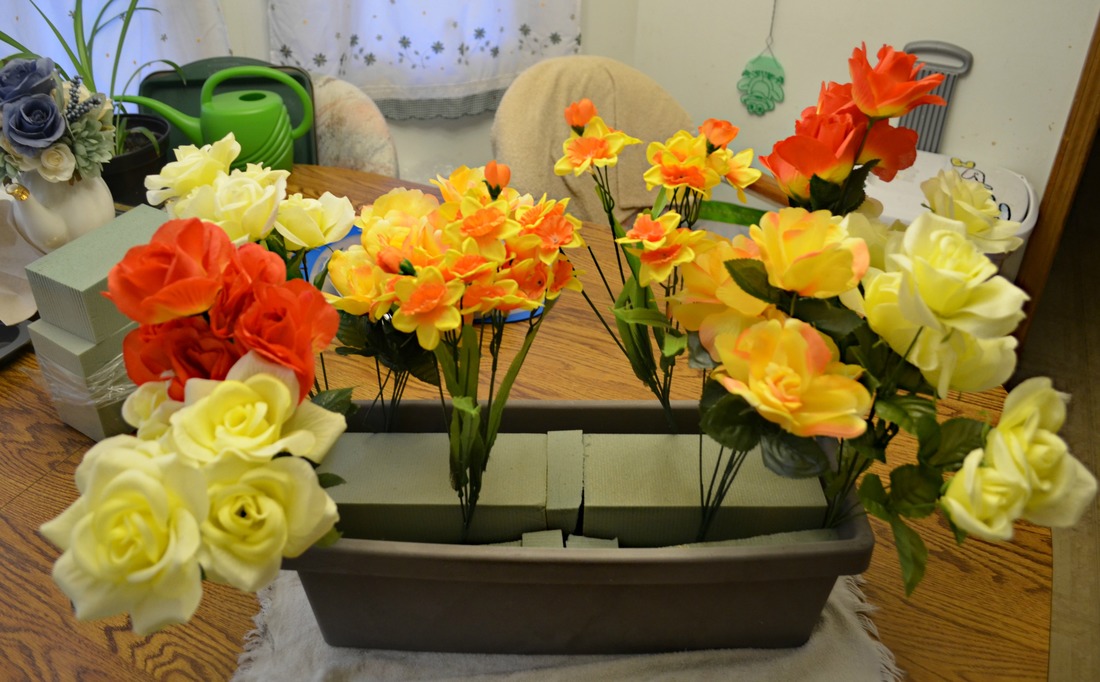 When you've got an idea of how you want these set up, remove their tags, and get your wire cutters. Trim the flowers down to the proper length for your window box. If the stems are too long it will poke through the foam and push things out of place. 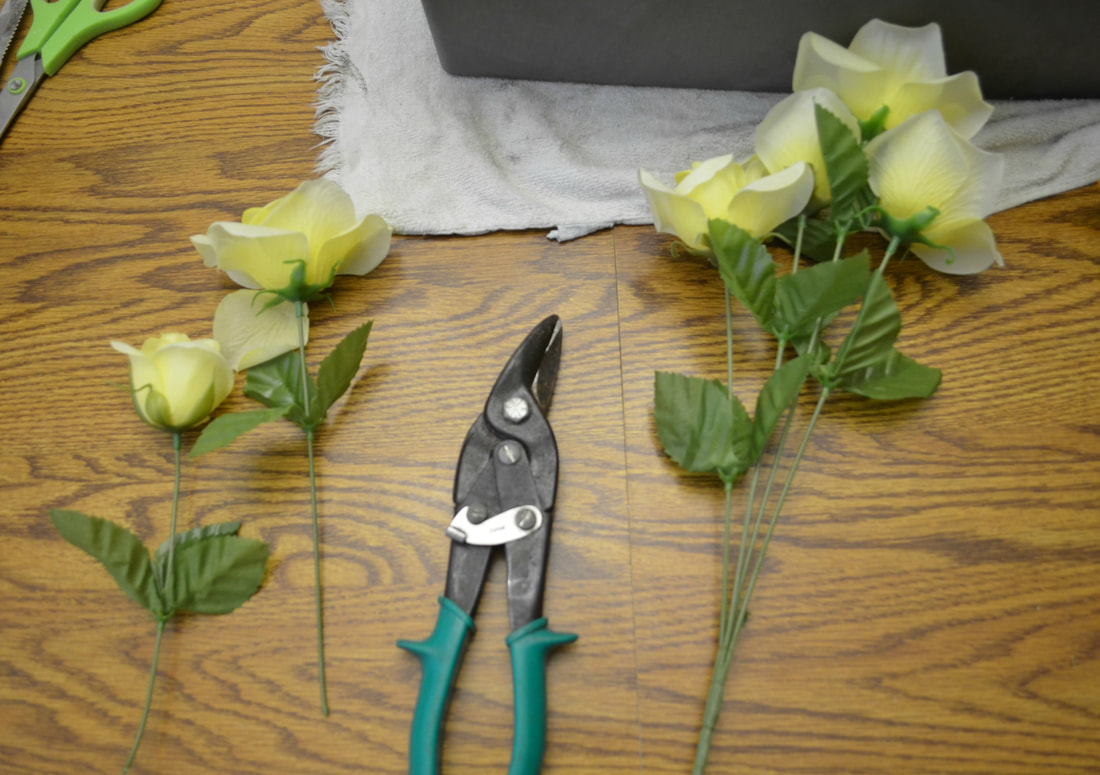 Then simply place your flowers into the foam. Now, you can go the extra step and hot glue the flowers into the foam. For centerpieces and bouquets, I would do that, but for this I'm not too concerned with it staying perfectly in place. 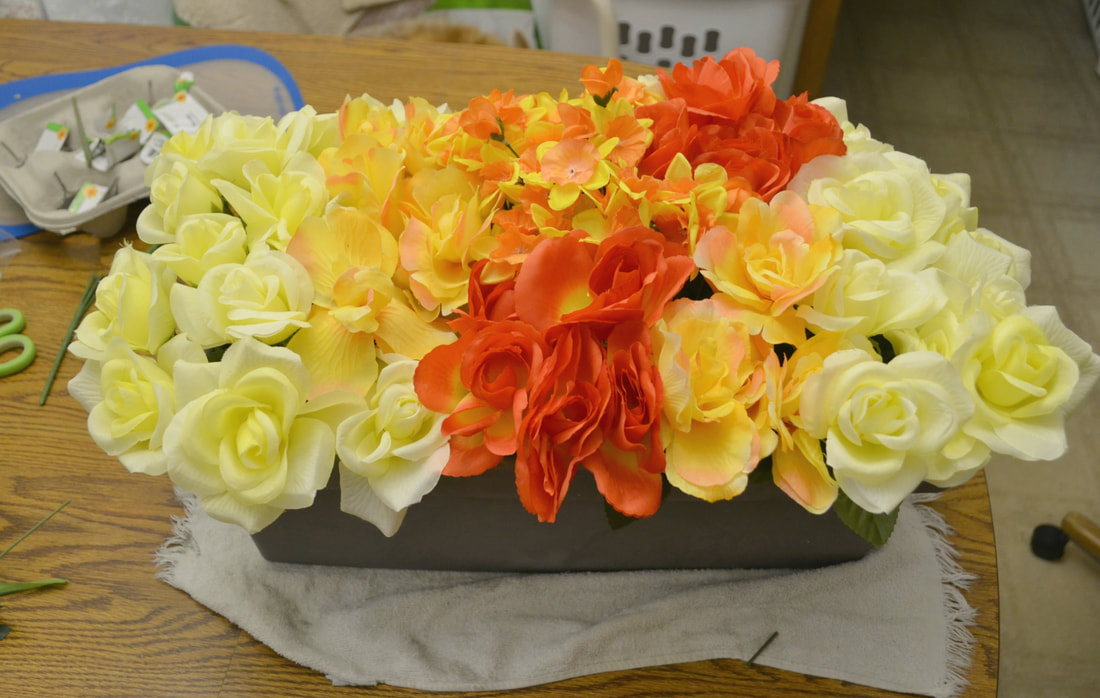 For less than $20 I made this lovely box. If birdies do nest in it- WONDERFUL. But if not the shed has a lovely added splash of color and the neighbors will have something to enjoy. 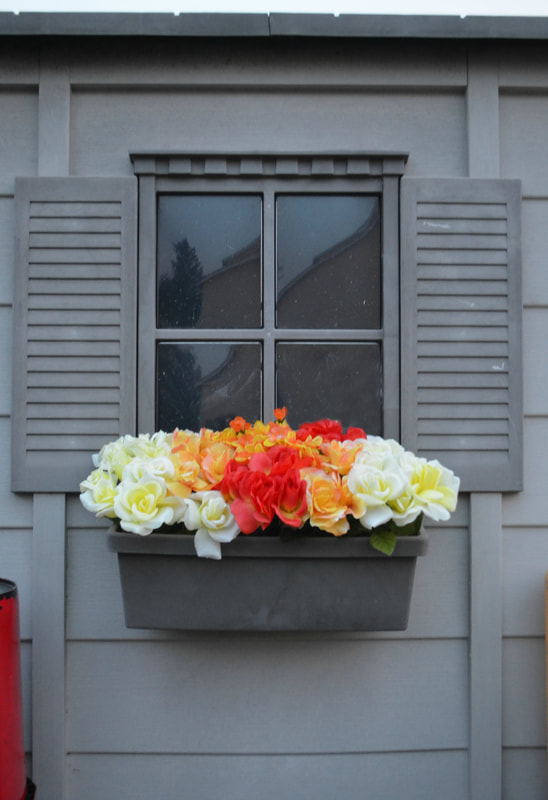
0 Comments
For the past four years we've dyed our easter eggs with shaving cream. It's always been a lot of fun.... but also a lot of clean up. THIS year I wanted to try something new. We wanted to try dying our eggs with rice, but a lot of family friends told us it didn't work for them. So while you may find tons of articles of dyeing eggs with rice, I thought I'd throw my hat in the ring and tell you how we did it. I mean, look at how pretty this egg is! 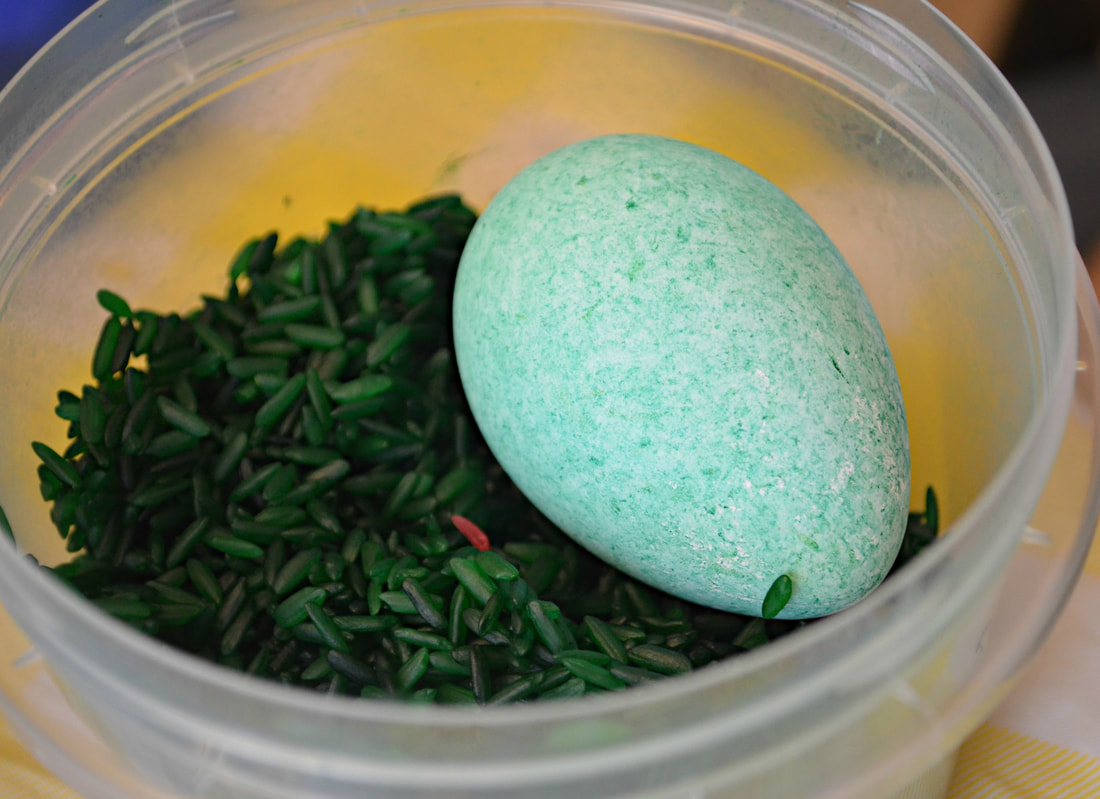 YOU WILL NEED:
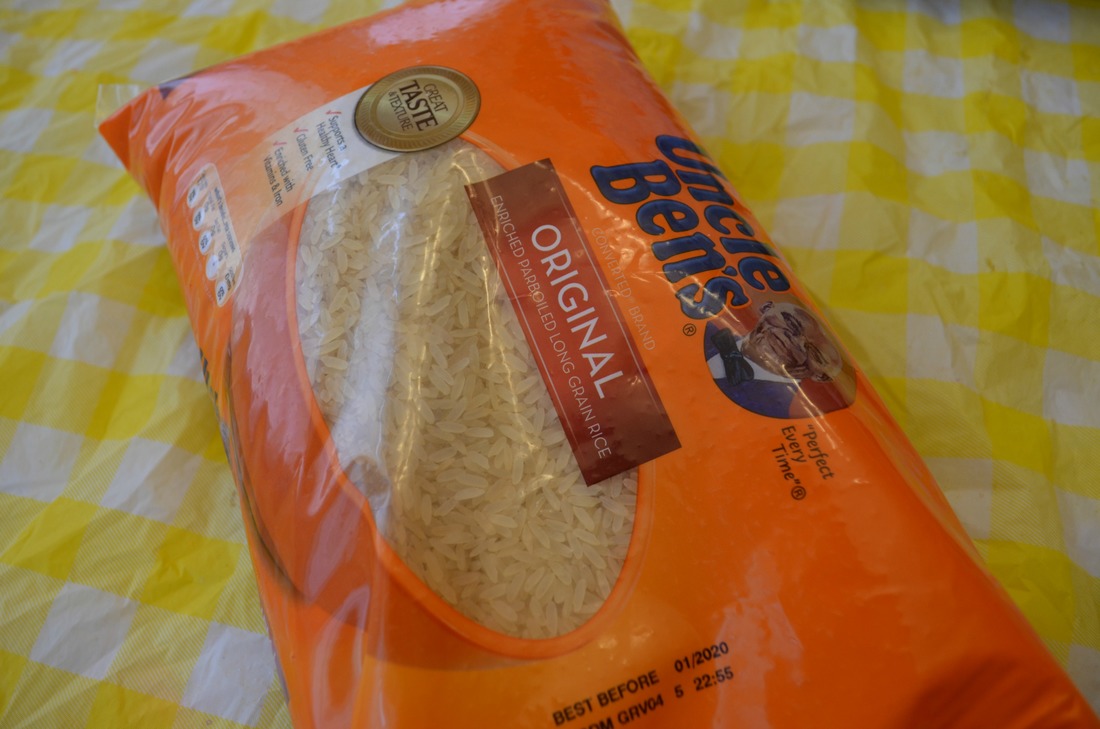 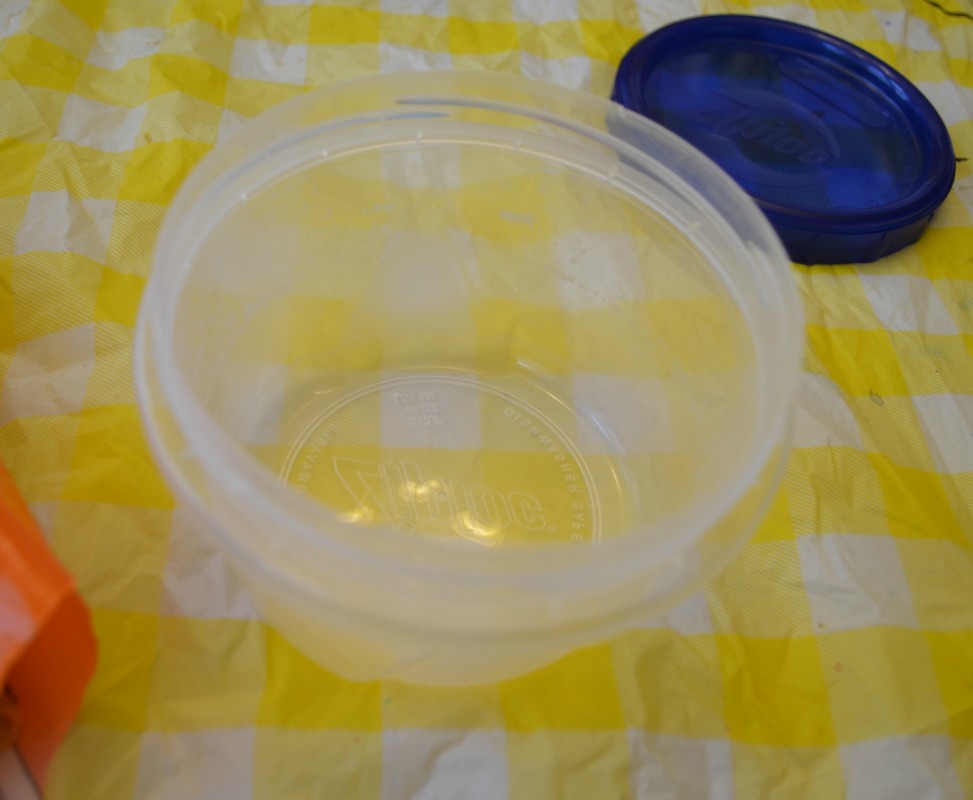 My husband and I bought our favorite brand of rice, and several Ziploc Medium Round Containers with the twist on lids. I don't know if it's just our house but Tupperware is ALWAYS disappearing, so it doesn't hurt to have more! You're going to want to pour some rice into each container. Enough to fill the bottom but not so full that your egg won't have any room to move. So far, so good, everything is going according to every tutorial I found on Pinterest. I filled my containers and added my liquid food dye. The basic stuff you find in grocery stores. 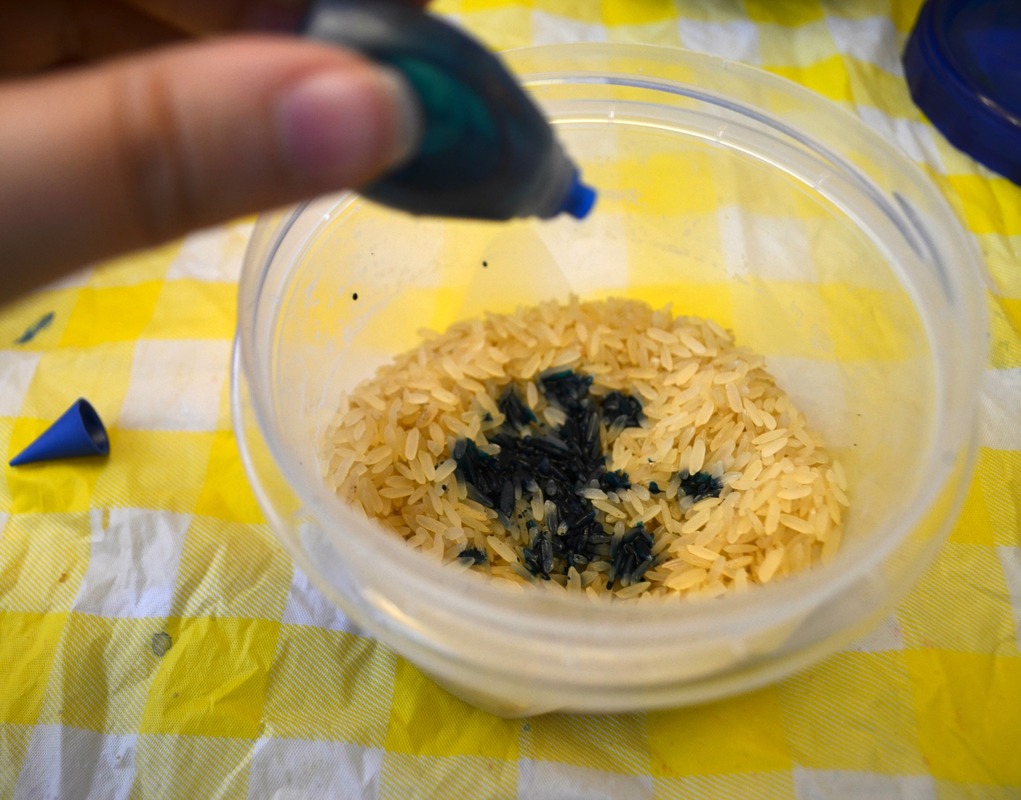 NOW I SHOULD ALSO MENTION THAT I USE FAKE EGGS. That's right, fake eggs. You can get them at Walmart for $2 a dozen, they're completely recyclable, perfect for keeping 'babies first easter egg', etc, etc. We started using these when Jenna was really little so we didn't have to worry about her breaking any eggs, but we found that they held the dyes better than hard boiled eggs, and we haven't looked back since. BUT I DO USE REAL EGGS LATER TO TEST A THEORY- so stick with me. So I get my rice all mixed up, add my egg, pop the lid on and shook it like a maraca, and this is what I get...  Yeah, a whole lot of nothing! I was so disappointed but I added more liquid... too much, and gave the egg another shake. This time the egg came out ALL blue but when we put the third egg into the rice, even less residue came off onto the egg. WHICH, brings us to the 'supply list' item: Patience. You may just need to add more dye and/or a PINCH of water to keep the color flowing. I wish other people had mentioned that in their blogs! 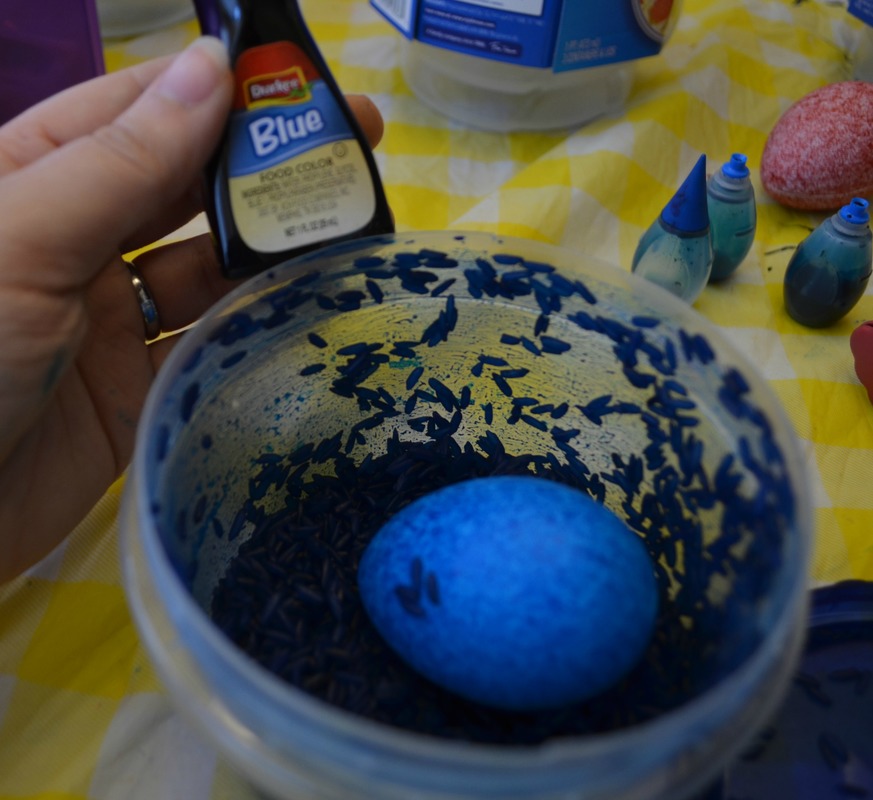 As you can see in the above photo I was using A LOT of that generic food dye and, minus that particular egg, I didn't have much to show for it! BUT I did discover that when we used Wilton Color Right Food Dyes (they're still a liquid dye but thicker than the ones you get in the basic baking section) not only were we able to make several eggs but we were able to make a medley of shades! And when a dye started to come up dry, we added a pinch of water and shook it up! Just like you saw in the first photo I posted with the beautiful light green egg. We also found that we could easily dye an egg one color and then add it to another color to make beautiful color speckle effects. 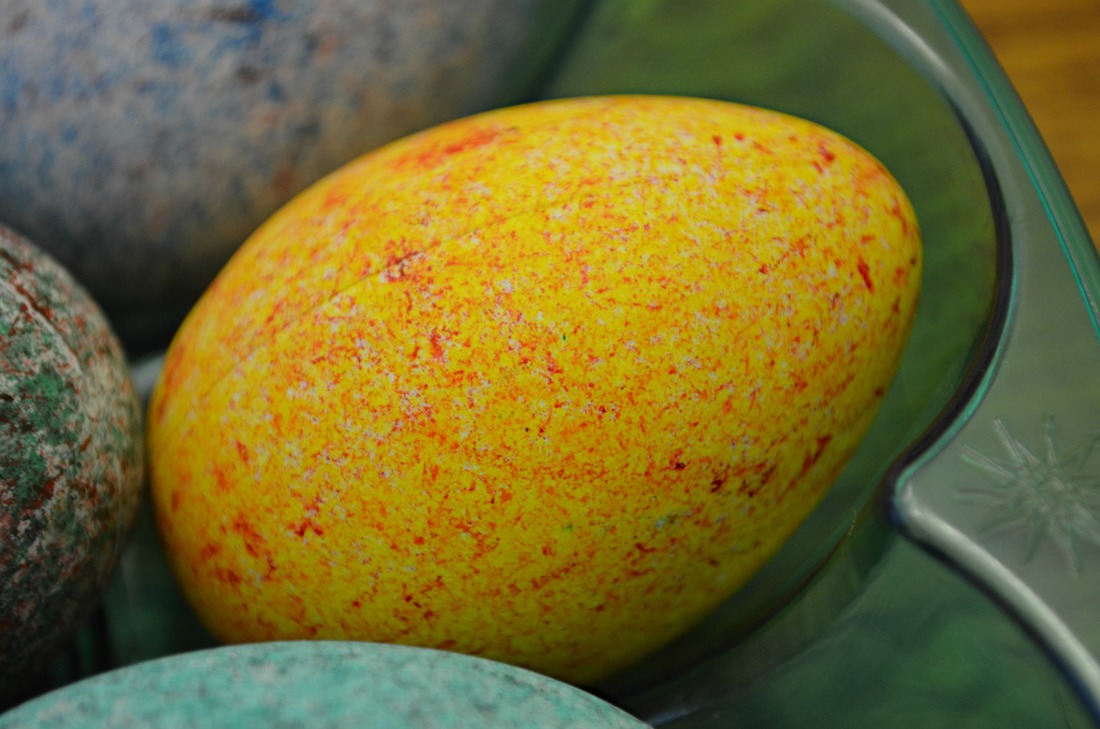 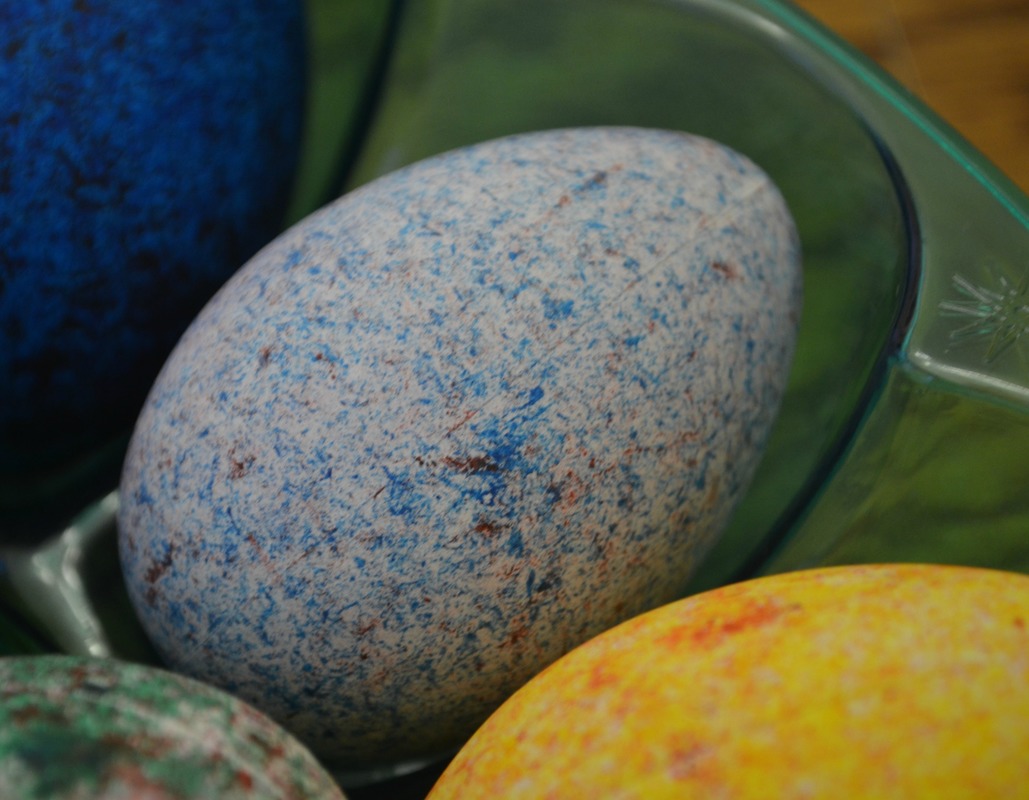 And in case you thought I forgot, we did try this with hard boiled eggs JUST to make sure that it wasn't our fake eggs making this project work so well. It worked just fine, though it did make us nervous to shake the eggs, lol. We also bought one of those Eggmazings, if you didn't see it on Shark Tank I'll list a link to it below. Jenna had a lot of fun messing with it, BUT I was able to incorporate it into the egg dying process. We used non-toxic crayola markers, our eggmazing, and made random lines on our eggs. THEN speckled them with the rice. 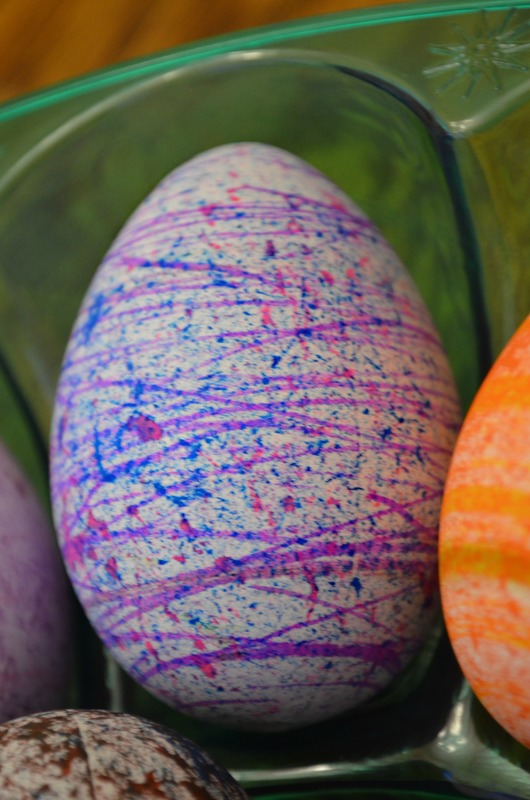 This was a very interesting project and I'm so glad my husband and I were persistent in trying different ways to make it work. ESPECIALLY because I know so many people who were disappointed that the rice technique didn't work at all for them. I truly hope this tutorial helped someone out there! And as always if you ever want to share how your eggs turned out I'd love to see them! I'm going to include more pictures of our eggs so you can get an idea of the shades and techniques you can use with your Wilton dyes and rice. And a link to the Eggmazing can be found in the button below. 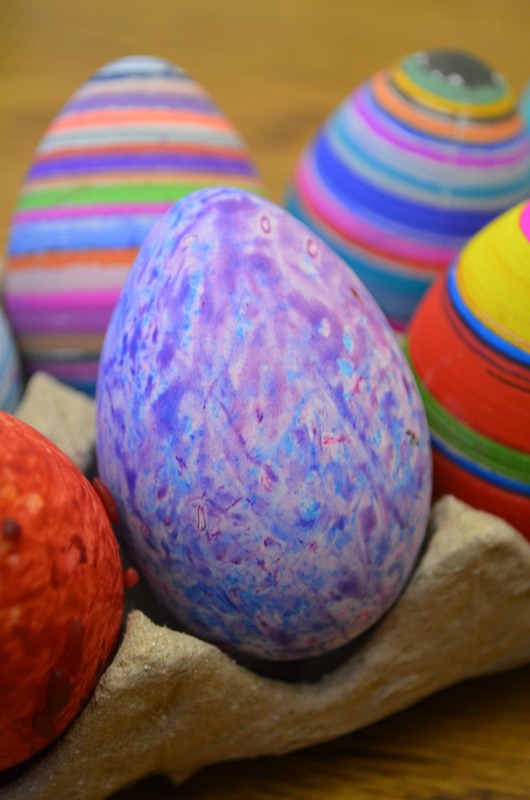 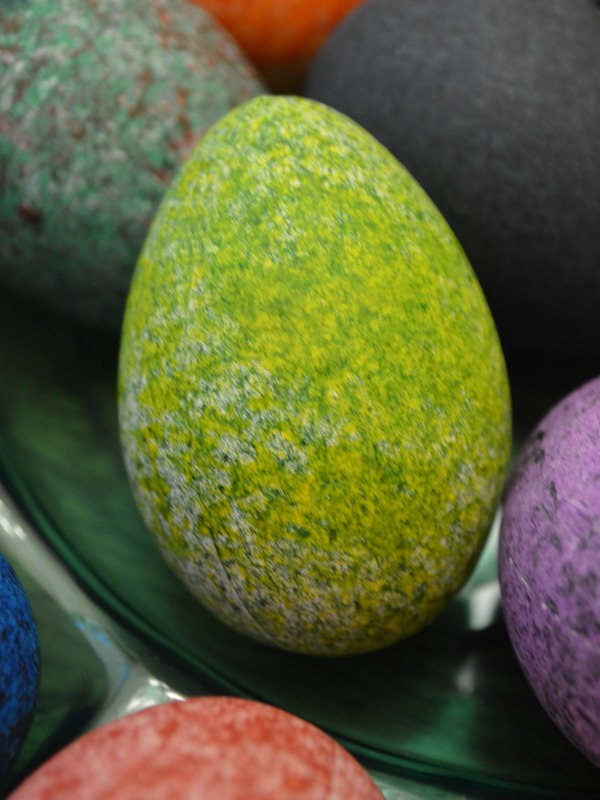 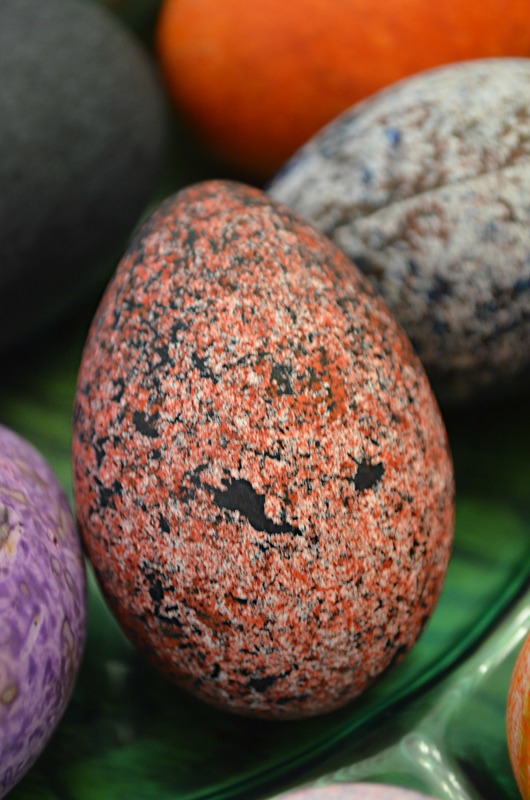 In the garland tutorial I mentioned that I was worried about chasing off the birds. But it also gave me the idea to put up feeders in the yard. Jenna loves making these with me and the birds love coming to them. But how could I make it Easterish? Well that's how I came up with this tutorial. You Will Need:
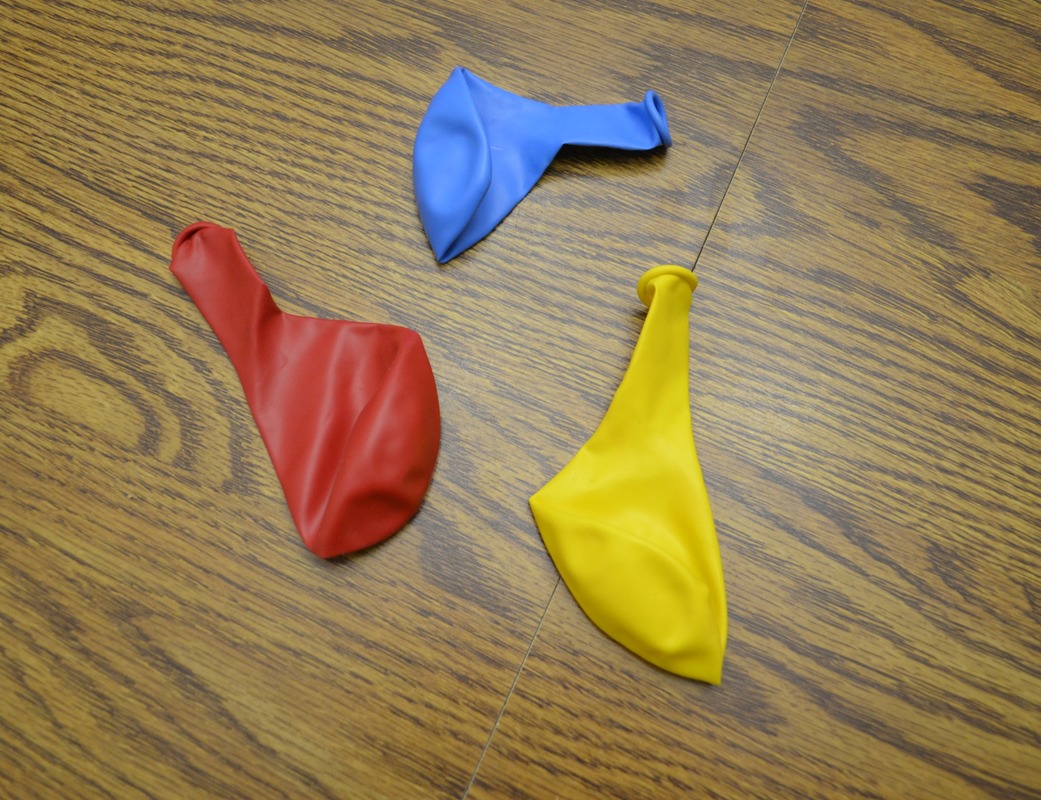 Starting with your balloon, you're going to blow it up however large you want your bird feeder to be. Keep in mind that they'll need to be able to get their heads into it to get the seed or whatever you put in there. I know some people use fruit for the non-seed eating birds. We however use wild bird seed. Once you've blown the balloon up you'll notice it has a bit of an egg shape. Perfect. Now, I used decoupage... and honestly I'm wondering if soaking the yarn in fabric stiffener would have been the easier route to go. BUT this is how I did it. And yes it took a lot of patience. Using a brush I applied the string to the balloon with decoupage. 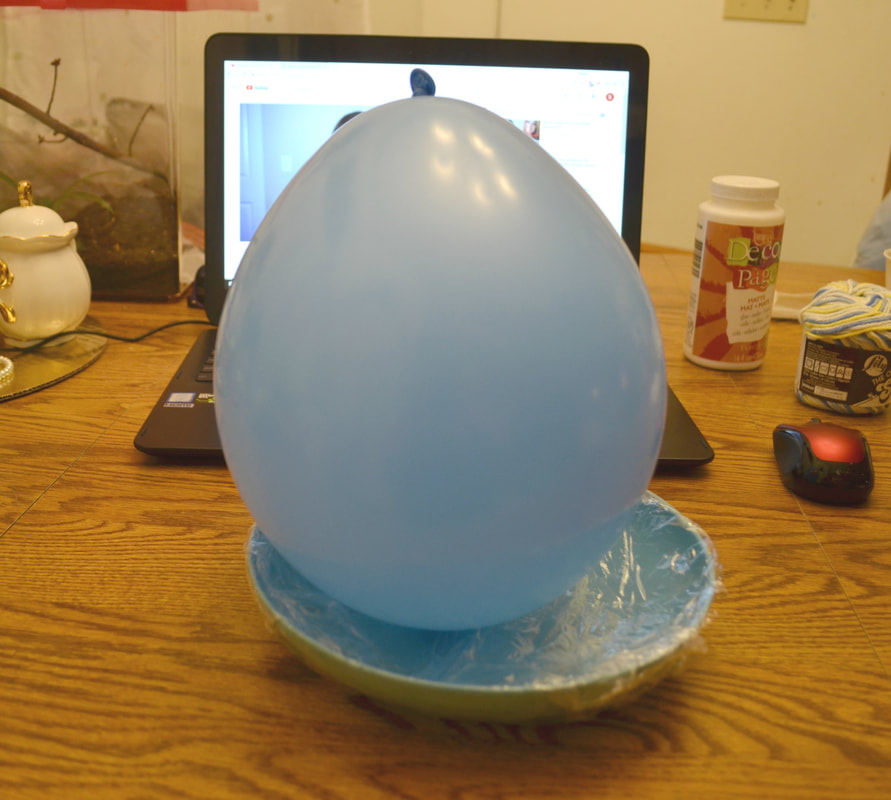 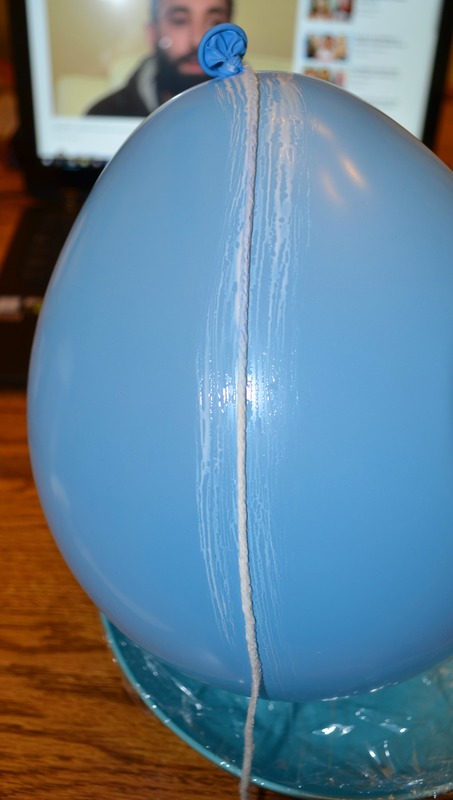 You're just going to continue wrapping your balloon in your string. If you're doing it the way I did, you'll just keep applying decoupage and if you're going in the direction of fabric stiffener, you're basically just going to soak your string and then start wrapping this puppy. I'll admit that at a certain point I just got super frustrated with this and poured decoupage on the table and then just rolled my balloon and strings through it. That balloon got COATED. I don't recommend doing that... but I had definitely given up hope that it was working the way I was doing it. I also was going for a super thick wrapping so it ended up looking like this. 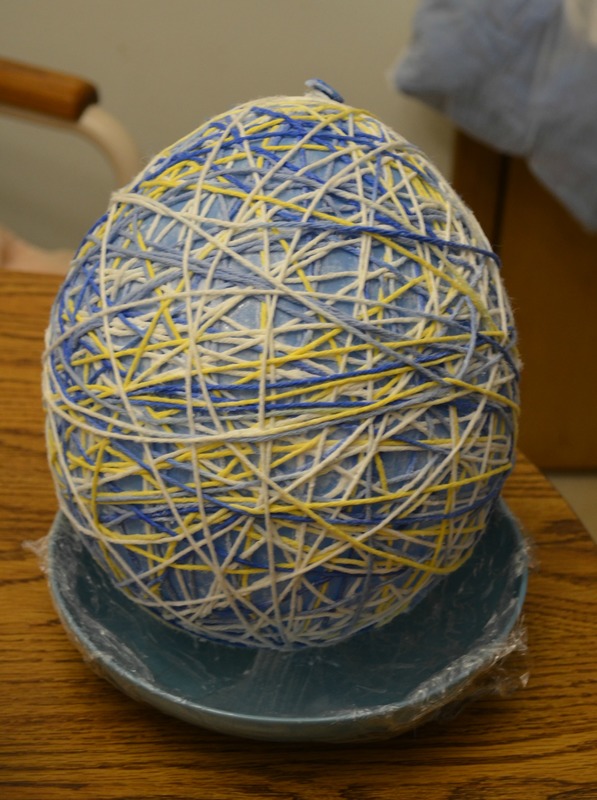 When you're content with the wrapping set it aside and let it dry. Once the yarn starts to stiffen you're supposed to pop your balloon. I actually didn't do it that way because of how coated it was. By the time the yarn had stiffened I was already asleep. So the next morning I prepared to pop it. 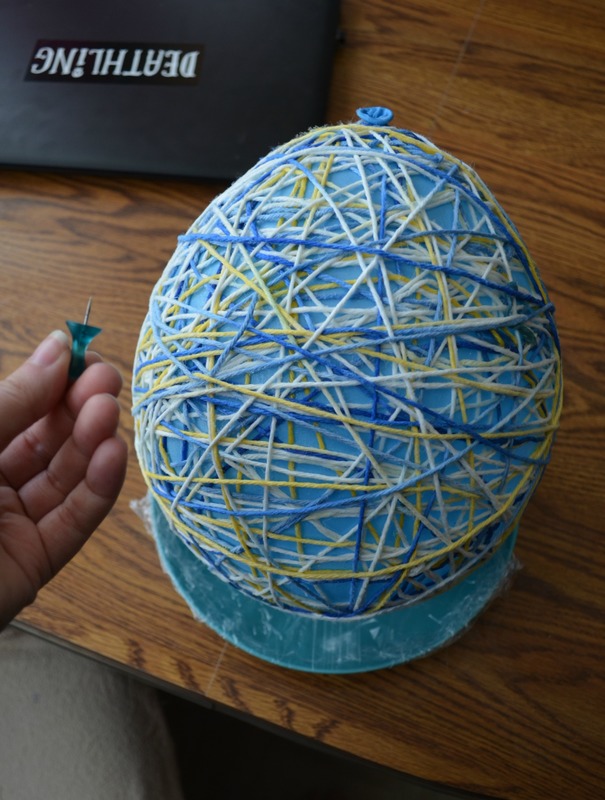 Now, the balloon didn't 'pop'. It did form a hole where I had popped it but the balloon itself stayed stretched out because it was being held by the glued yarn. Once we started cutting our opening the balloon shriveled up and was able to be collected. Just letting you guys know so that no one panics if they're balloon doesn't pop. 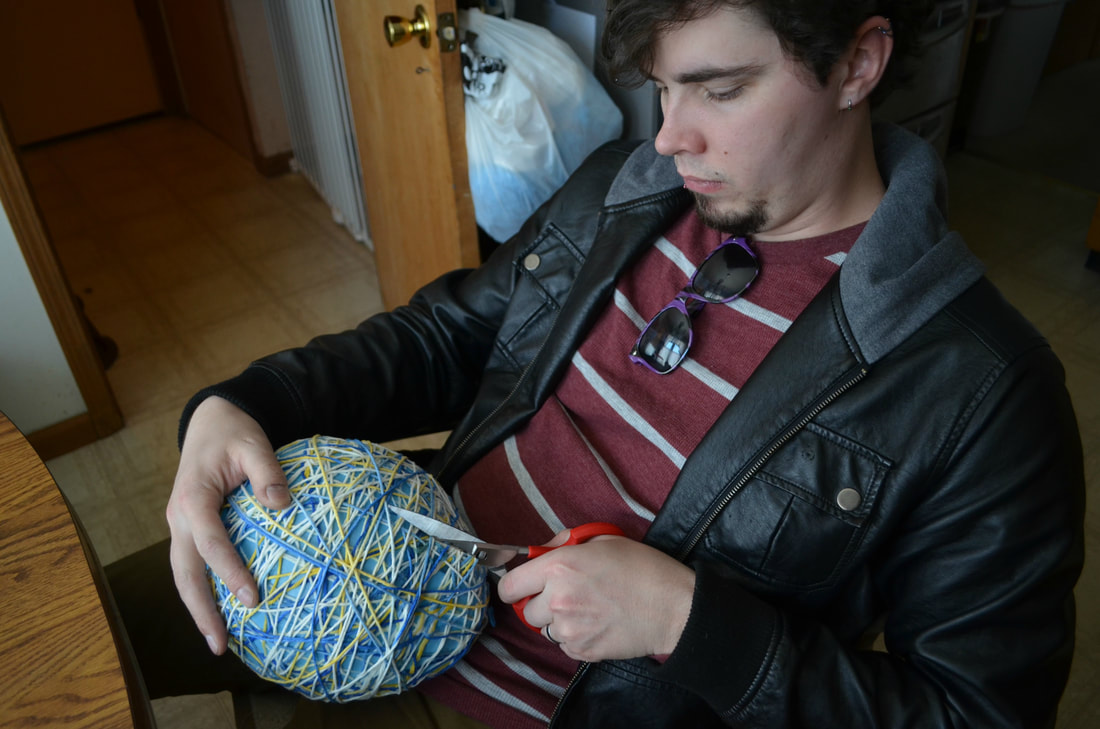 My wonderful husband took over that cutting for me. It was easy to cut through but he's always eager to help me so he happily cut out the egg shaped opening. When we had the opening cut out I decided to add some decoration to the edges of the opening. This is strictly cosmetic and you don't need to do this. So you can skip this step all together. But I took hot glue and some lace ribbon and covered the edges of the opening. 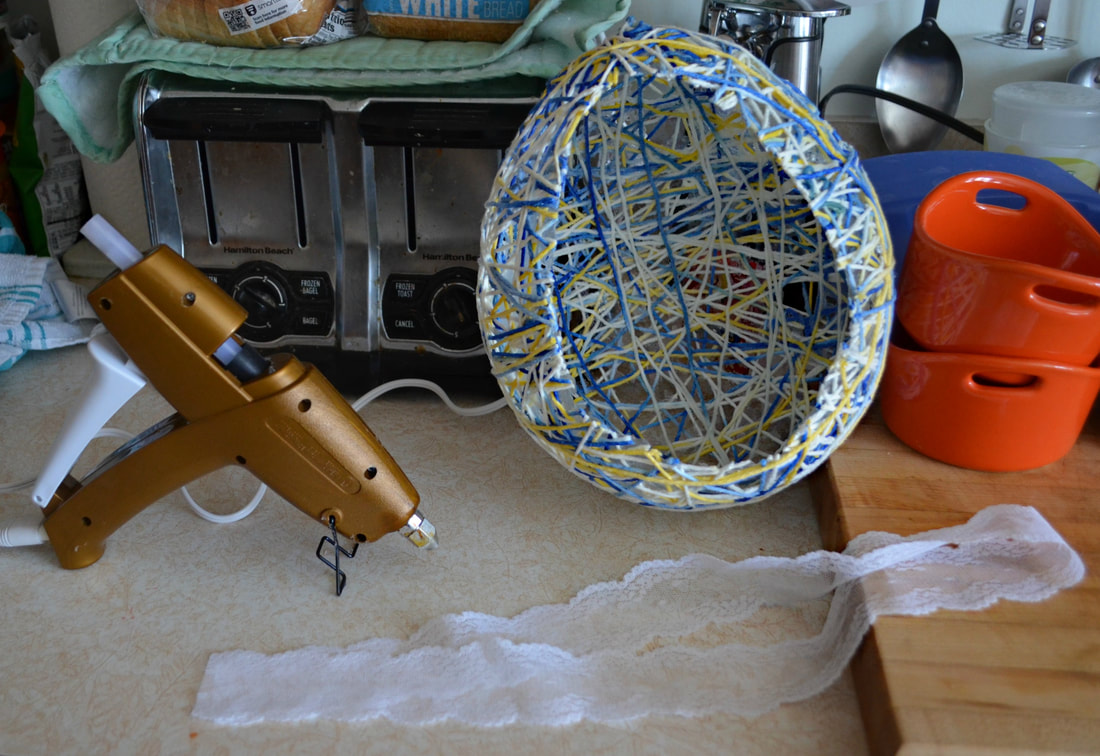 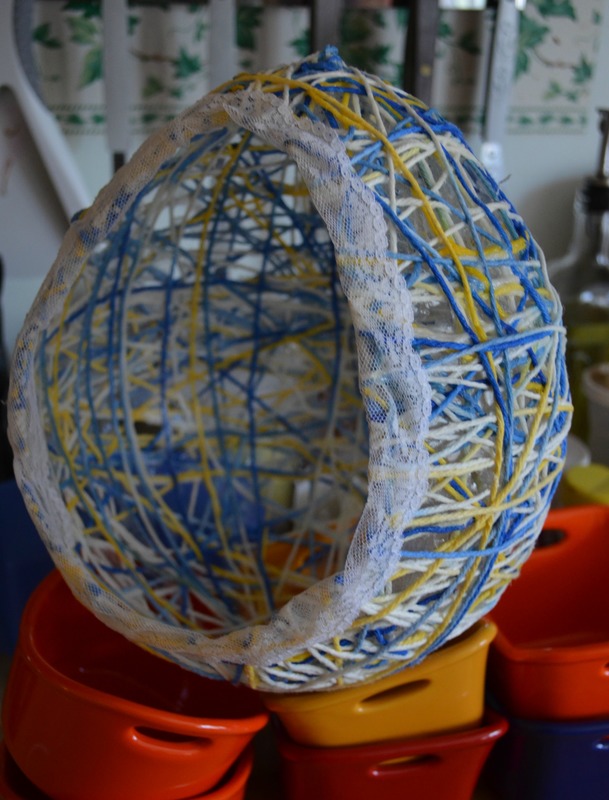 Where the balloon neck/opening lip stuck out of your yarn wrapping, is going to be a little hole. 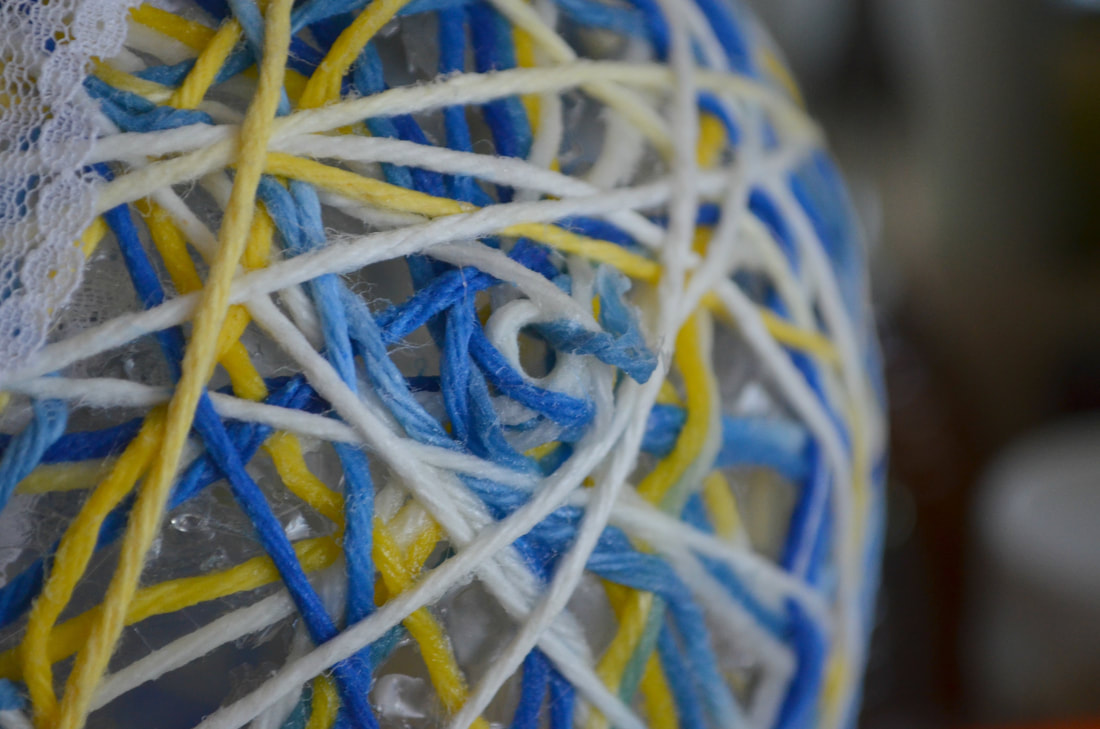 I used ribbon and doubled it up and pushed it through the hole to create a loop the egg could be hung from. I did measure my loop to make sure it would be large enough to fit over the branches where I was placing this. Once I had the ribbon through I used my hot-glue gun to attach it on the inside and the top. You don't have to do this that way. You could probably just take your yarn and tie it into knots but I wanted to be really sure it would hold in place. 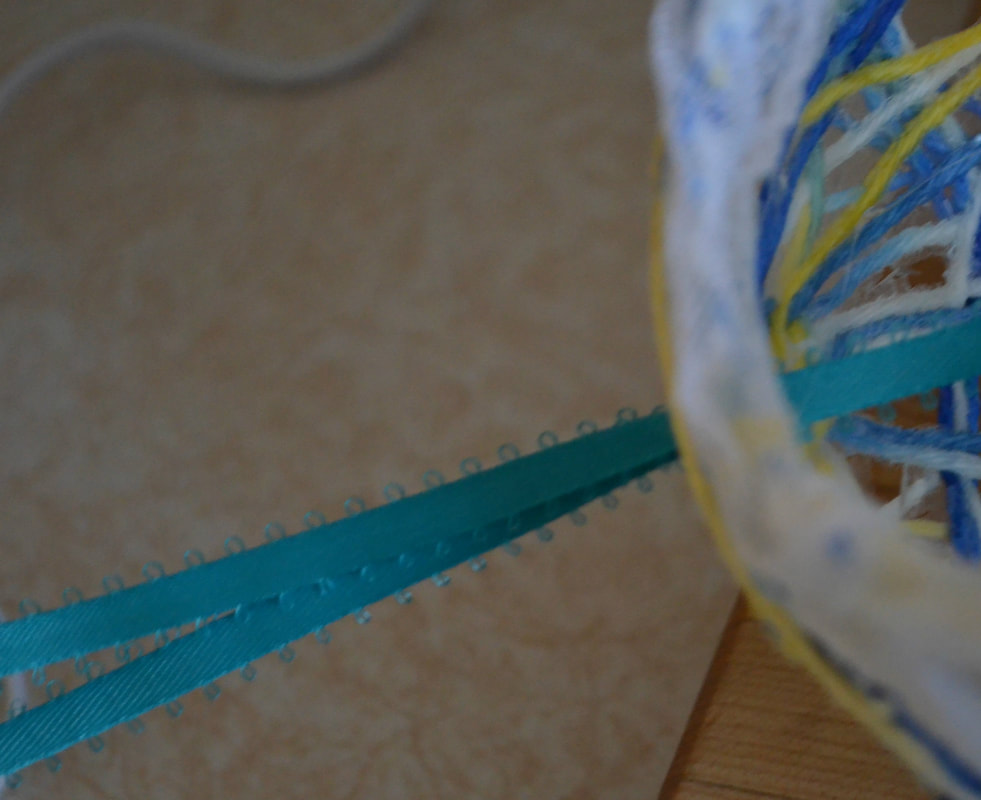 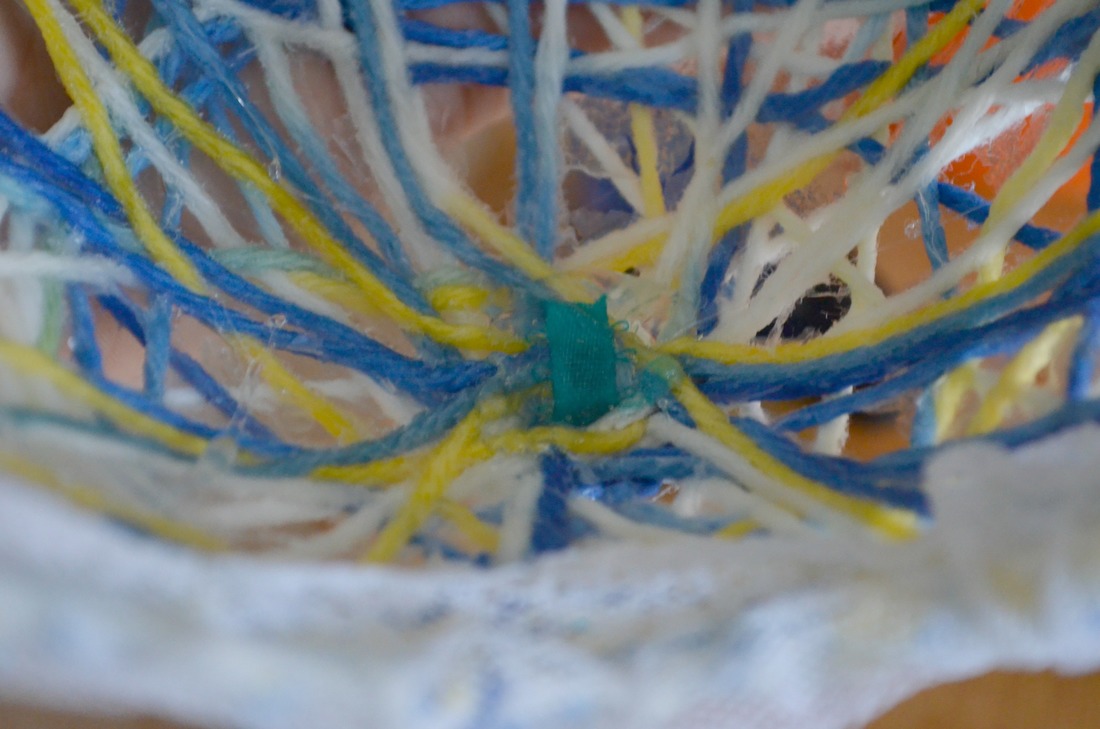 Now we were ready to fill our bird feeder. Using a paper bowl we cut the edge off the bowl so that it would better fit inside our bird feeder. Then I used peanut butter to line the bowl so that the seed would stick. We poured our wild bird seed into the bowl and placed it into the feeder. 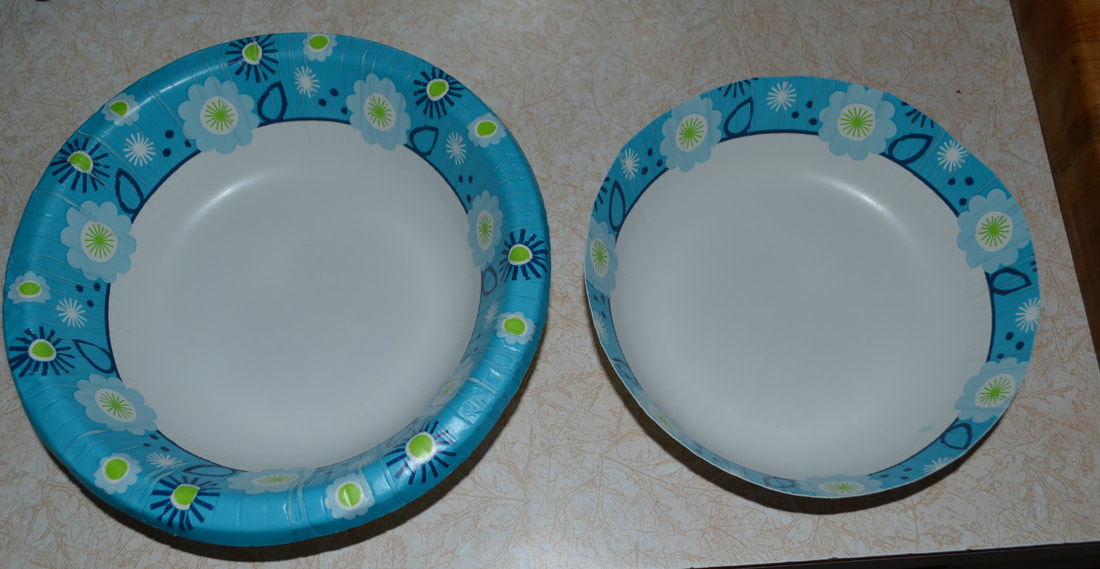 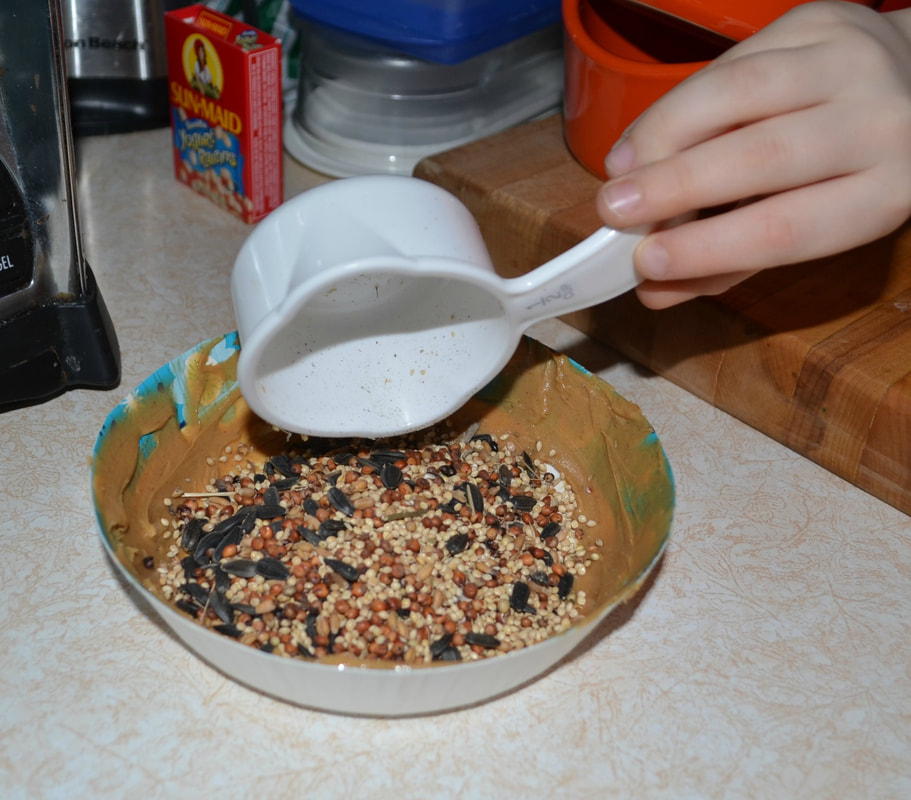 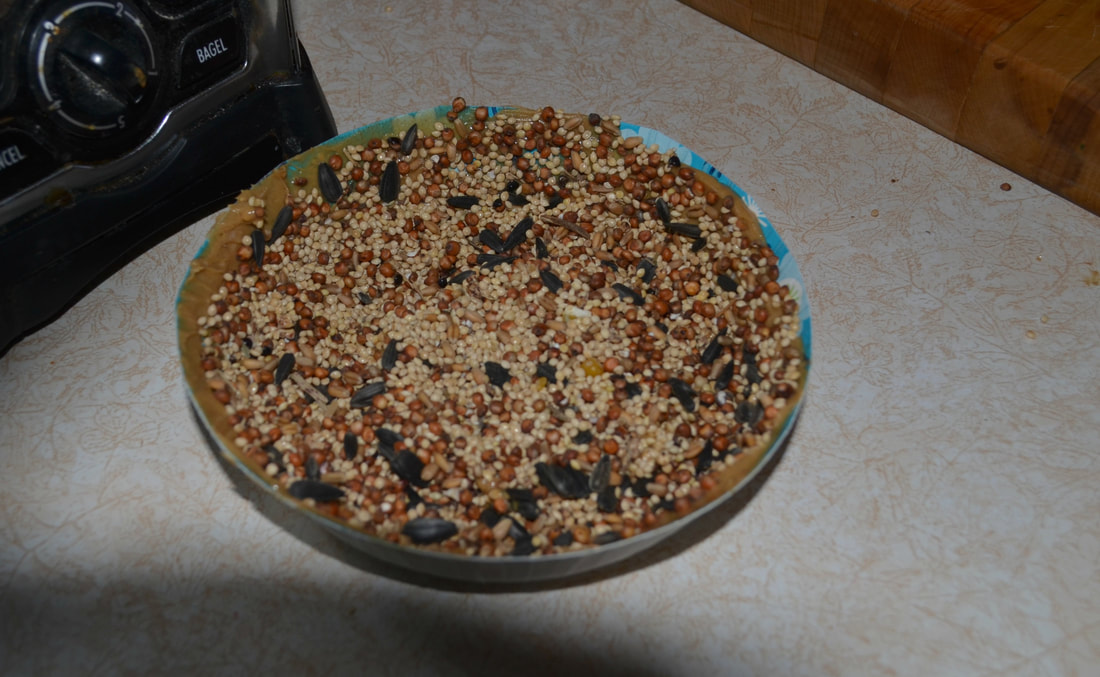 When you're all ready go hang it in your tree! So far we've seen a lot of chickadees in our tree but I haven't been able to see if they're inside the feeder yet or not. Our only tree in the backyard is ALLLL the way in the back. It's pretty hard to see the feeders from our house. 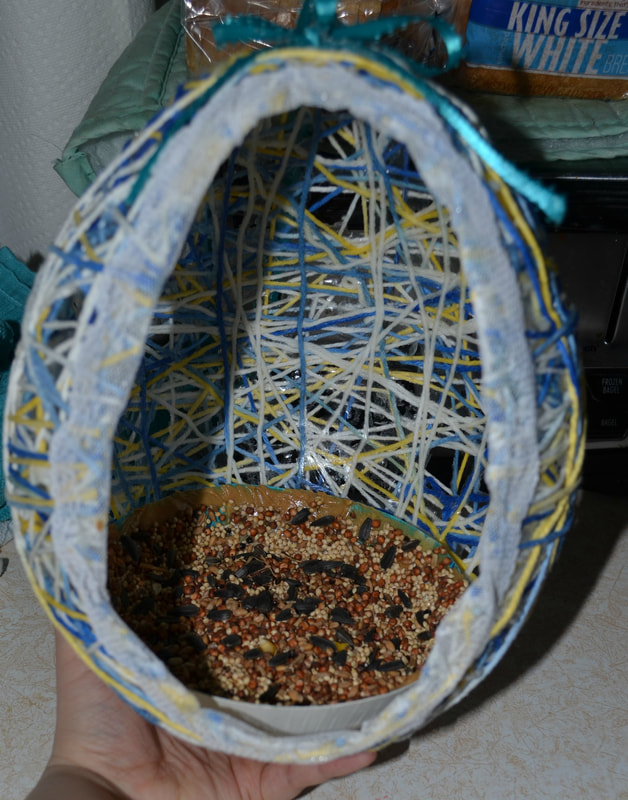 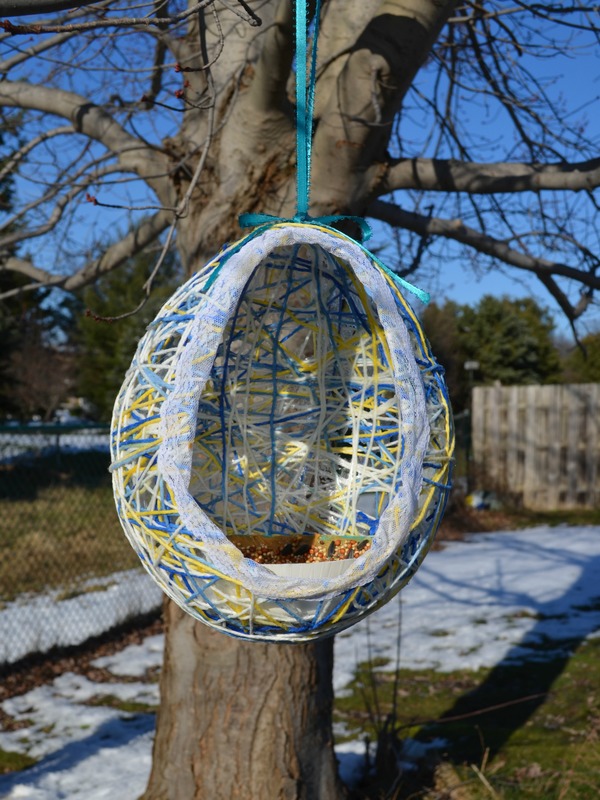 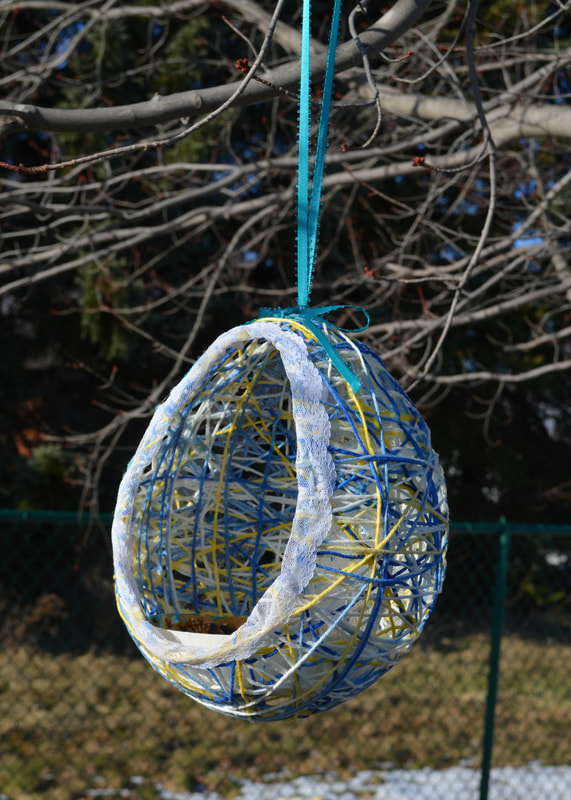 Minus the frustration of the decoupage this was a really fun project and this egg feeder is so stinking cute!! I want to make more but I'm probably going to try and different technique. I hope you guys enjoyed this project and if you decide to try it out be sure to share your finished project. I'd also love to hear how you did with the decoupage, lol. In the past year Jenna's really started to enjoy those 18 inch dolls (American Girl, My Life, Our Generation, etc.) And we buy her plenty of things for them but that can get a little expensive. I had the idea to give her something for her dolls for Easter. You Will Need
When we bought the felt eggs I've been using for other Easter projects, they also had mini felt eggs. I could just buy sheets of felt and cut out the eggs shapes. But in the long run this was going to be faster and cheaper. However, if you can't find pre-cut eggs I recommend just going to Michaels. 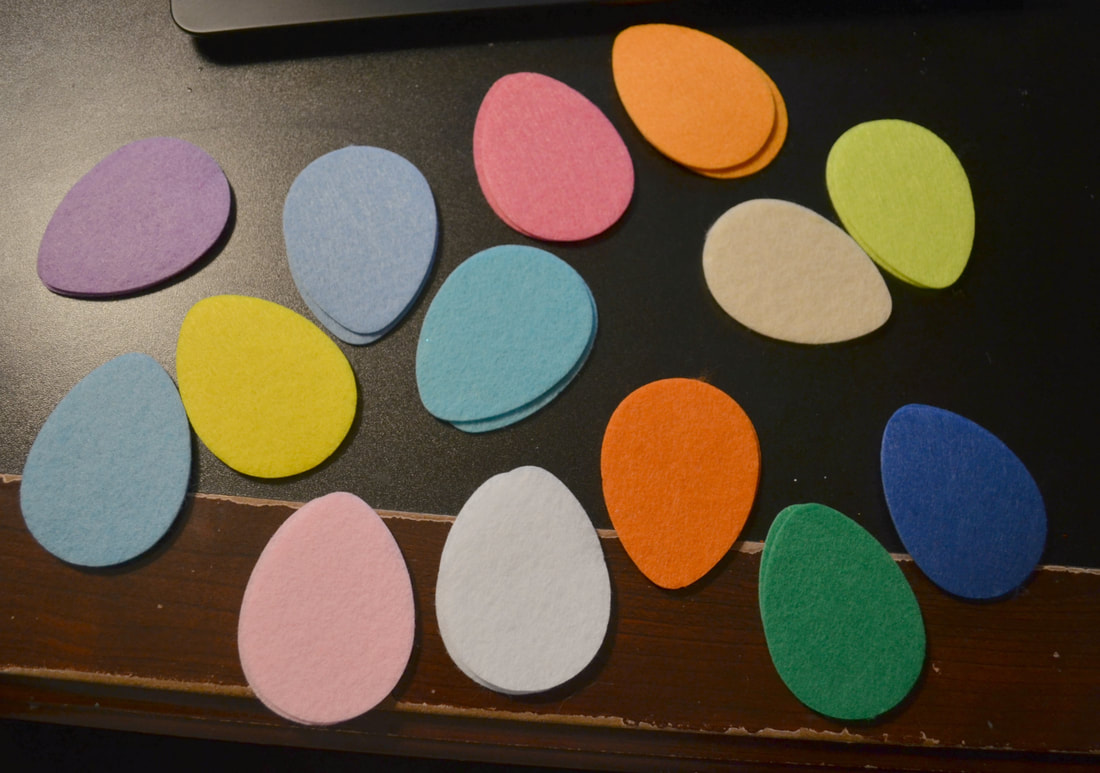 Honestly, the beauty of these packs is that there are two of each color. This was great for sewing them together. 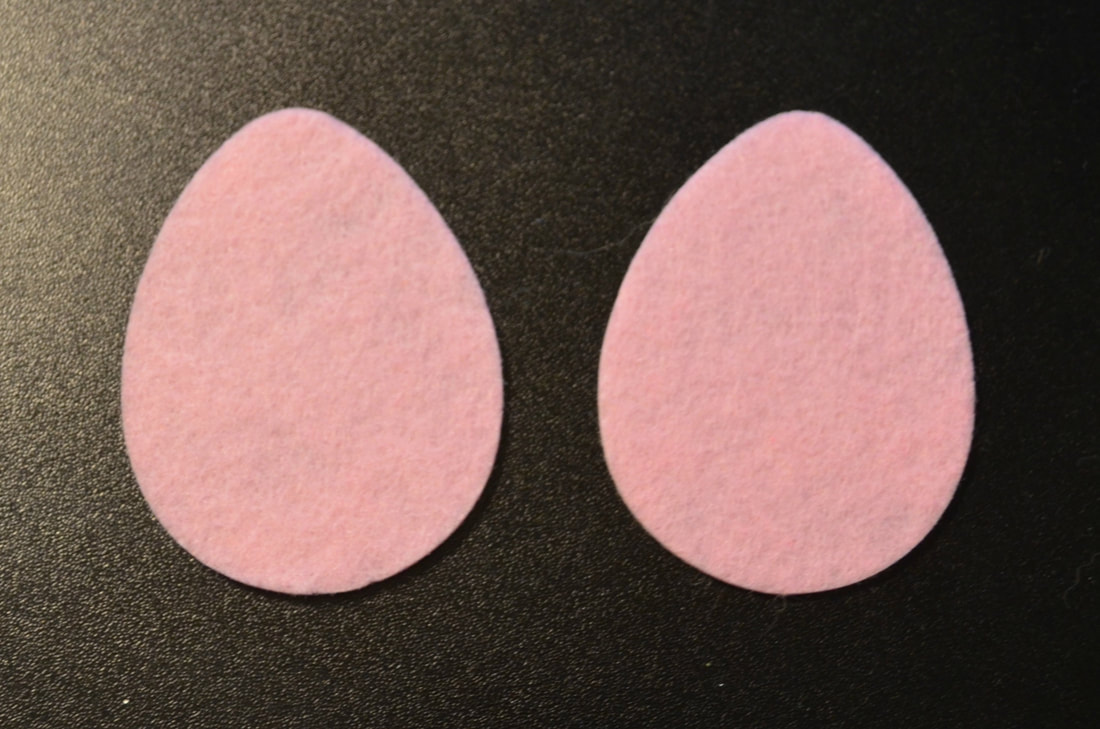 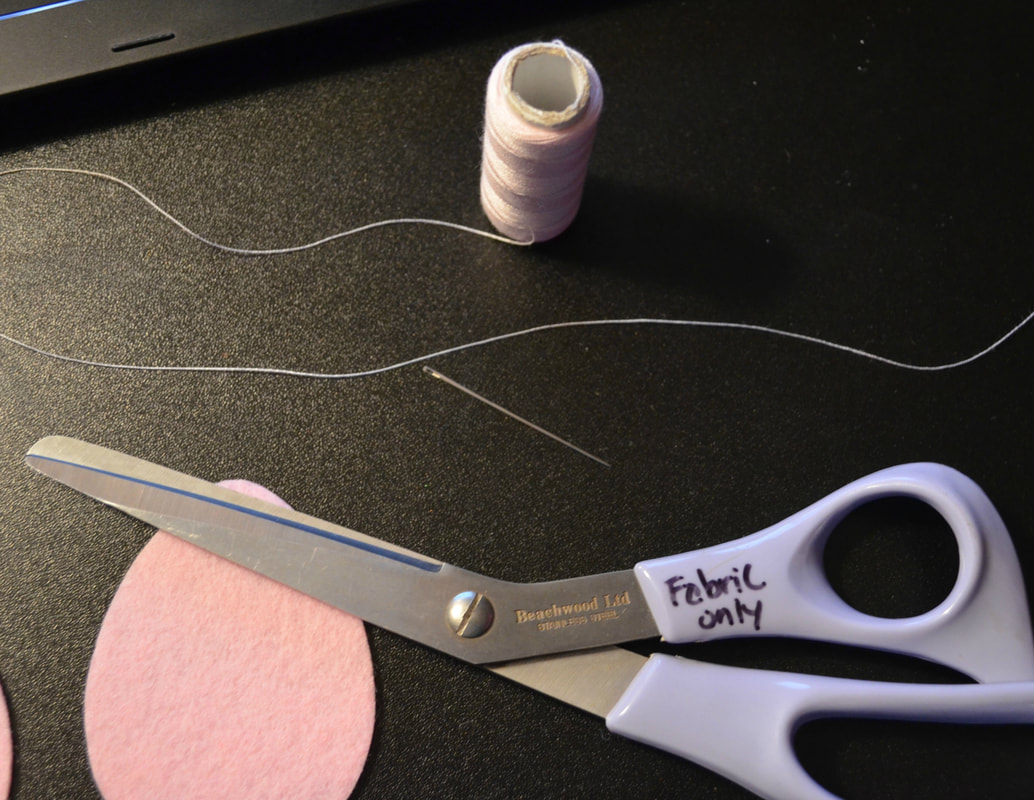 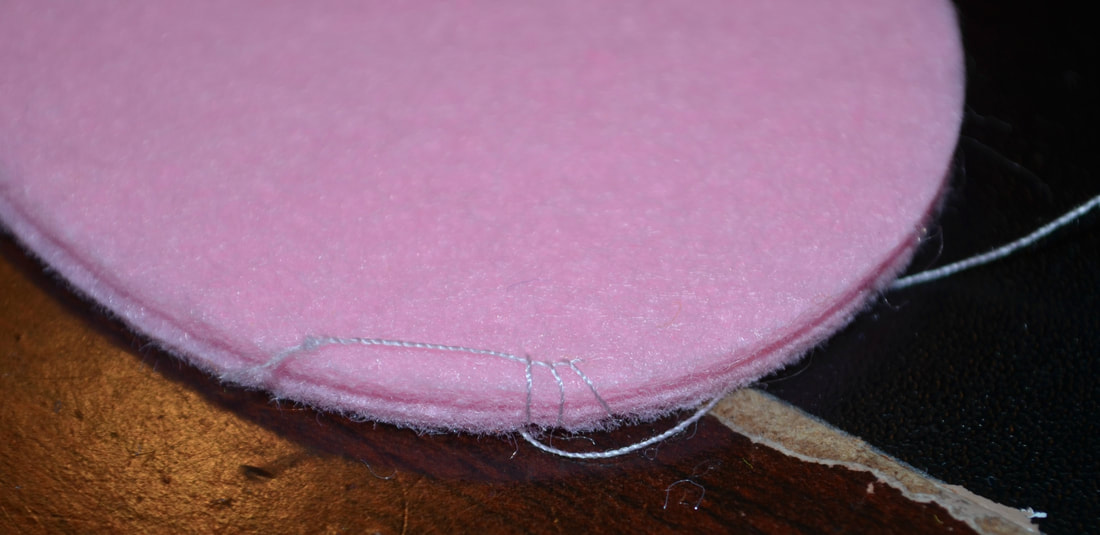 Once you've gotten them sewn mostly together remember to flip them inside out. The hole I made was too small for this stiff material to turn without pulling the stitches. I had to make bigger holes. 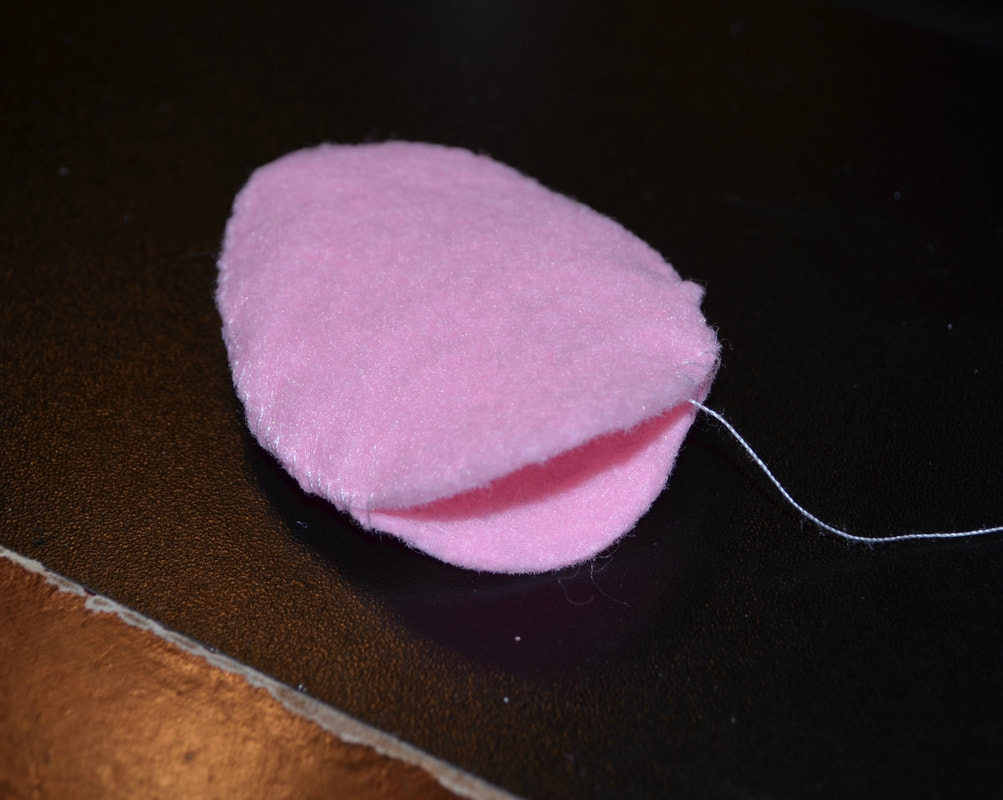 Stuffing them gives them a 3D appeal. If you don't have stuffing or don't want to pay for a bag of stuffing a little pro-tip is that cotton balls will work for something this small. 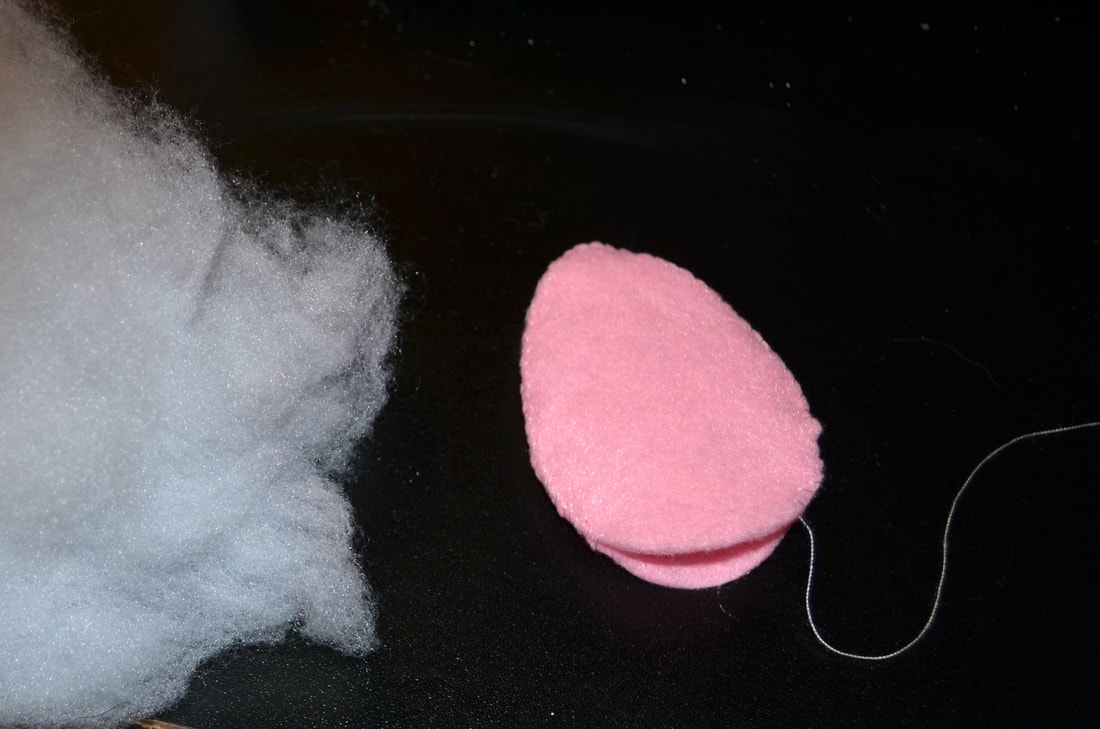 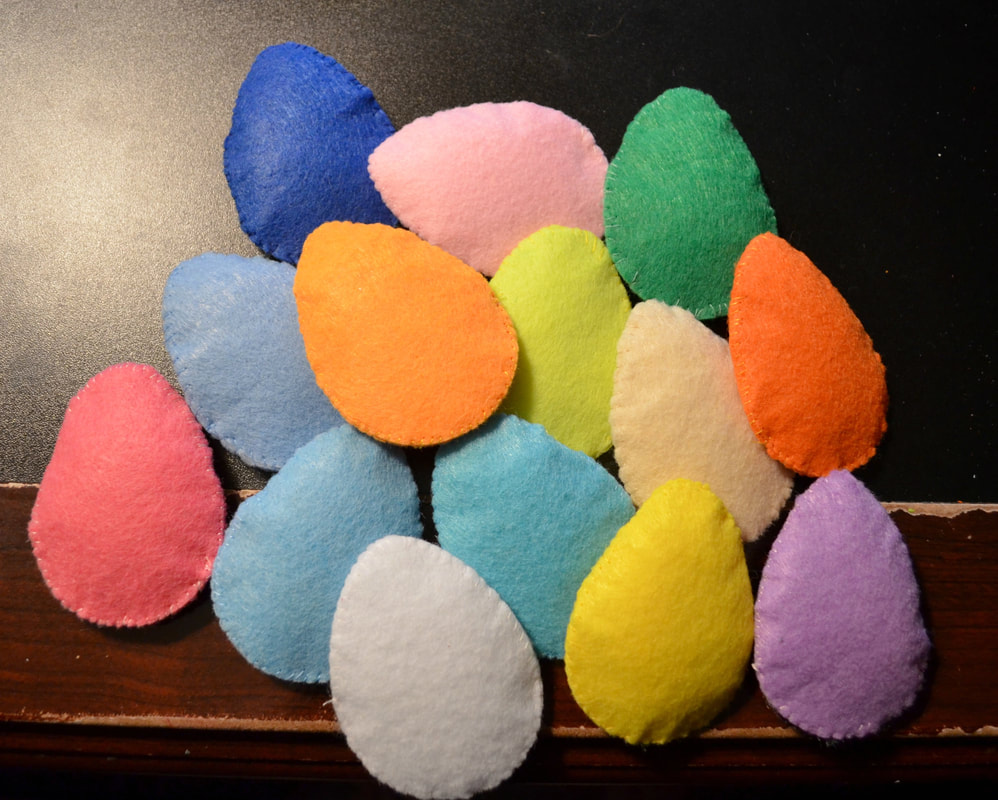 Now this next part is totally optional. You could use markers, paint, glitter and glue, or just leave them plain. But since I was painting these I didn't decorate them until after they were sewn together. That way I didn't have to wait for them to dry or have any stitches ruin the painting. 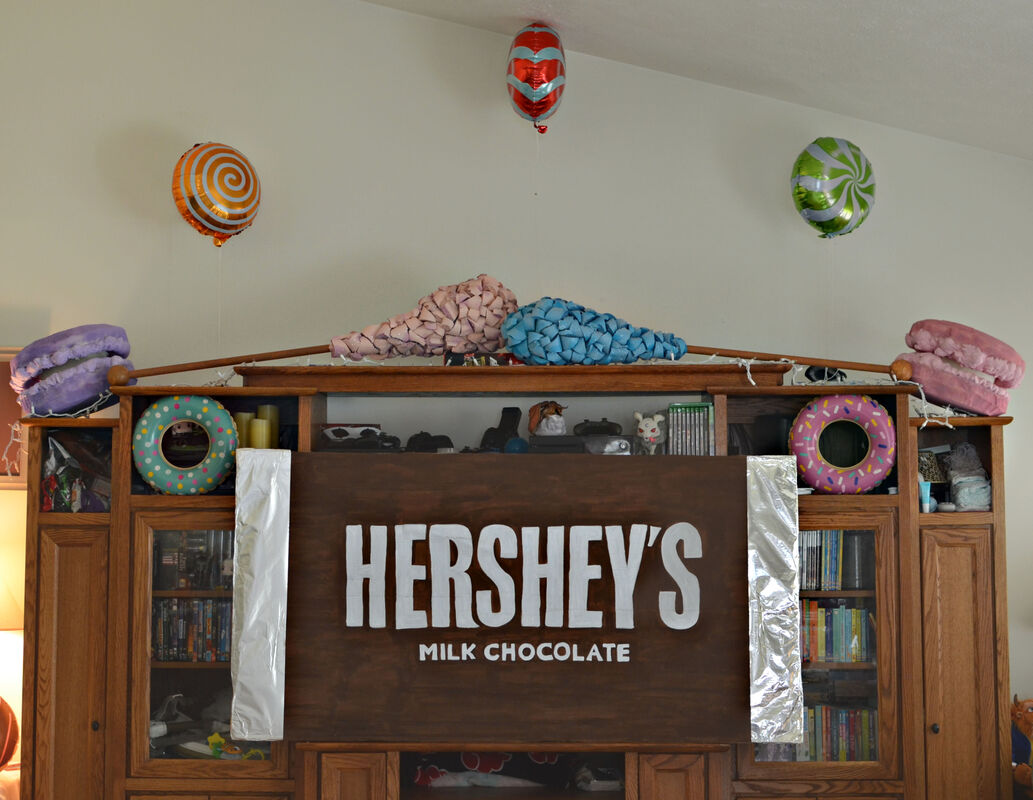 And how cute are these with her little doll? Let's face it, kids don't like the easter egg hunt to be over. With these they can have someone hide the eggs and they can find them with their dolls. Or they can hide them with friends and siblings. 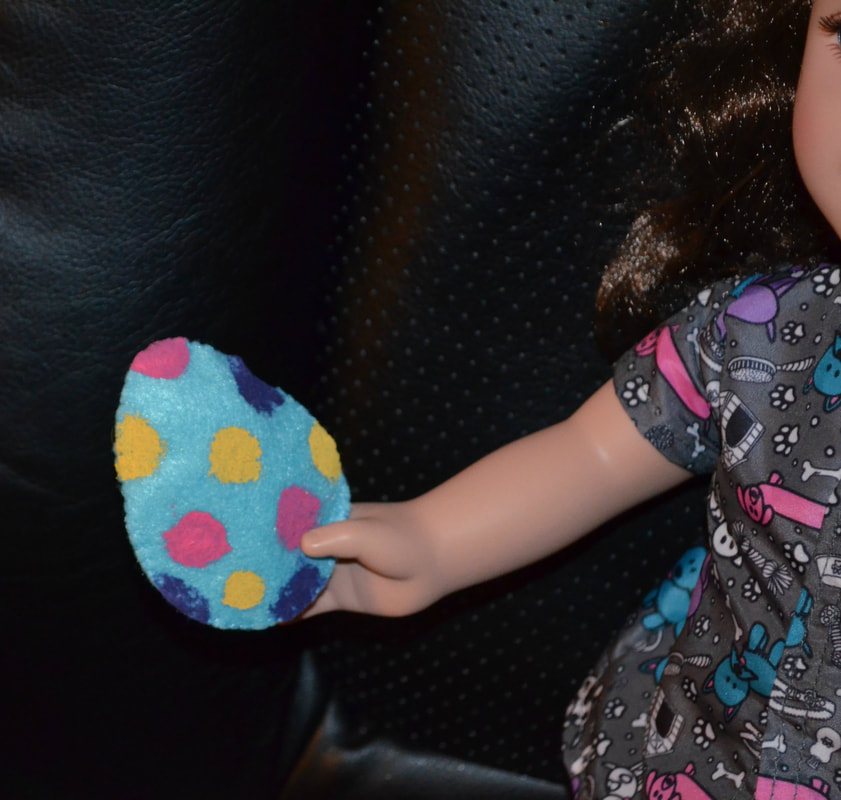  This is a very old project in my home. When I was a child my mother would do this with me every Christmas. I don't remember the age she quit doing it, but I remember missing it terribly. So when Jenna came along I started this project up again. It used to be a Christmas project but now we do it for Halloween and Easter too. Sometimes it's just me and Jenna, sometimes my husband joins us, and sometimes our roommate joins in. You'd actually be surprised the family members who want to be a part of this. It really is a fun family craft. You Will Need:
Now, in the original project we took construction paper and cookie cutters, traced a shape that was christmasy, and then did the rest of the project. But as I said we've been doing this for multiple holidays so sometimes I buy felt or foam mini shapes and we decorate those. It really is up to you and how you want to do it. For this project I found felt Easter Egg shapes at Target and bought those. 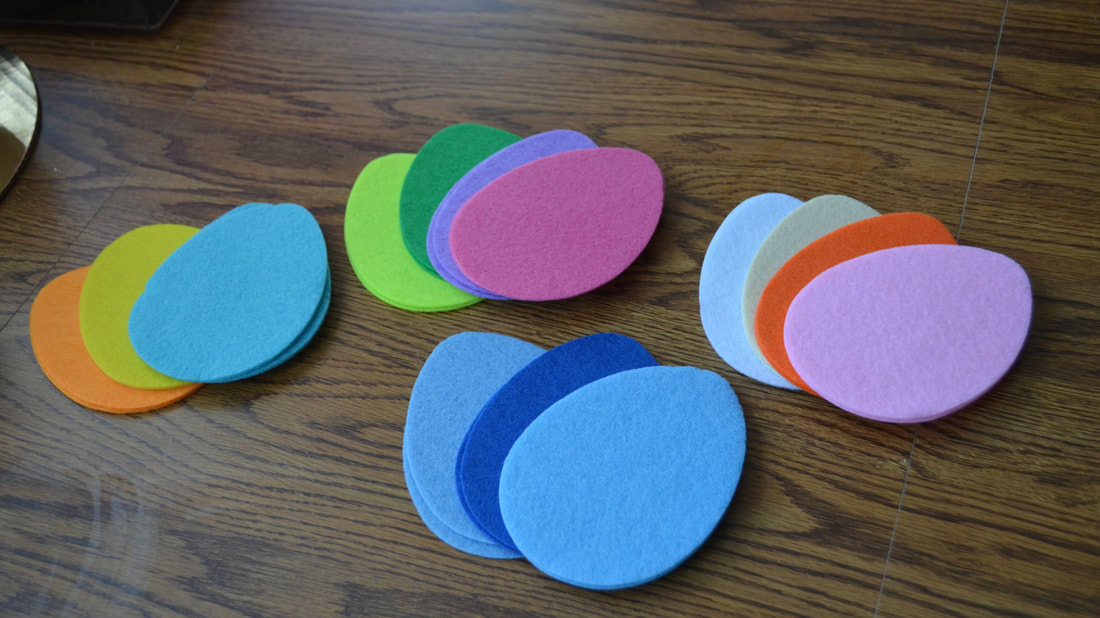 Elmer's glue works well on paper crafts but for felt and other fabrics I prefer Aleene's Clear Gel Tacky Glue. It doesn't soak in the same way Elmer's does. Using your glue you just draw designs on whatever you're going to decorate. MAKING SURE YOU HAVE A PAPER PLATE UNDER YOUR ITEM, pour glitter over the glue. Let this sit briefly and then carefully picking up your egg shake off the glitter onto your paper plate. Then using the taco-technique (gently fold your paper plate in half) you pour the glitter back into it's container. 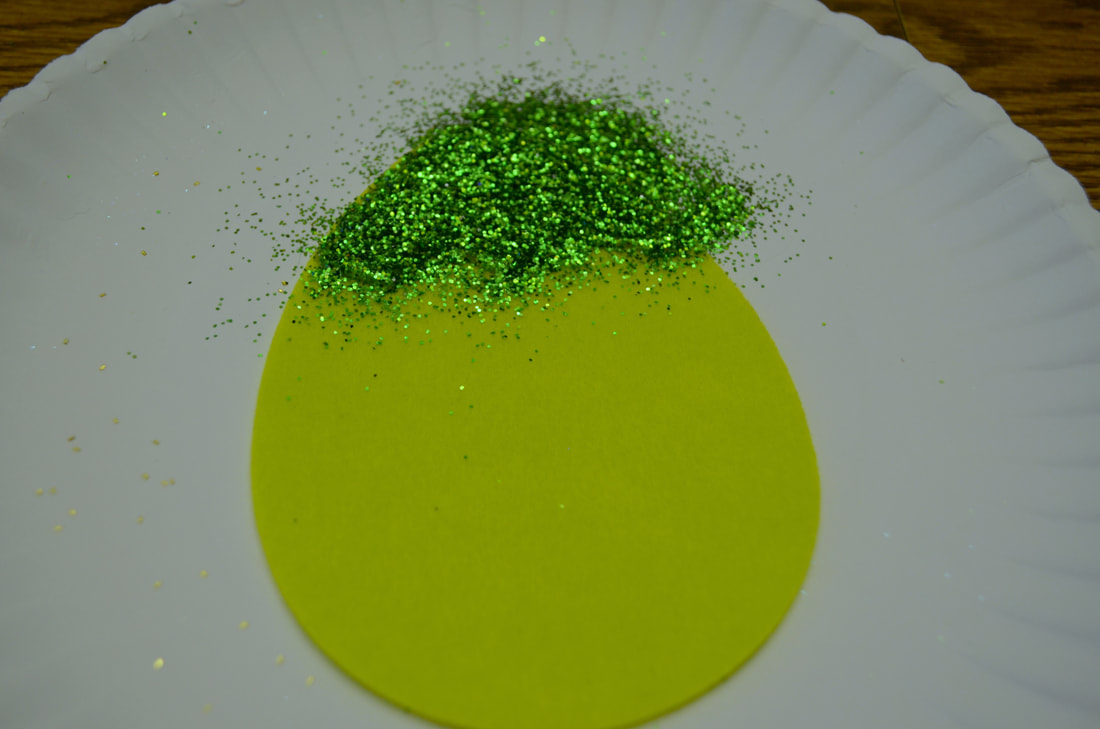 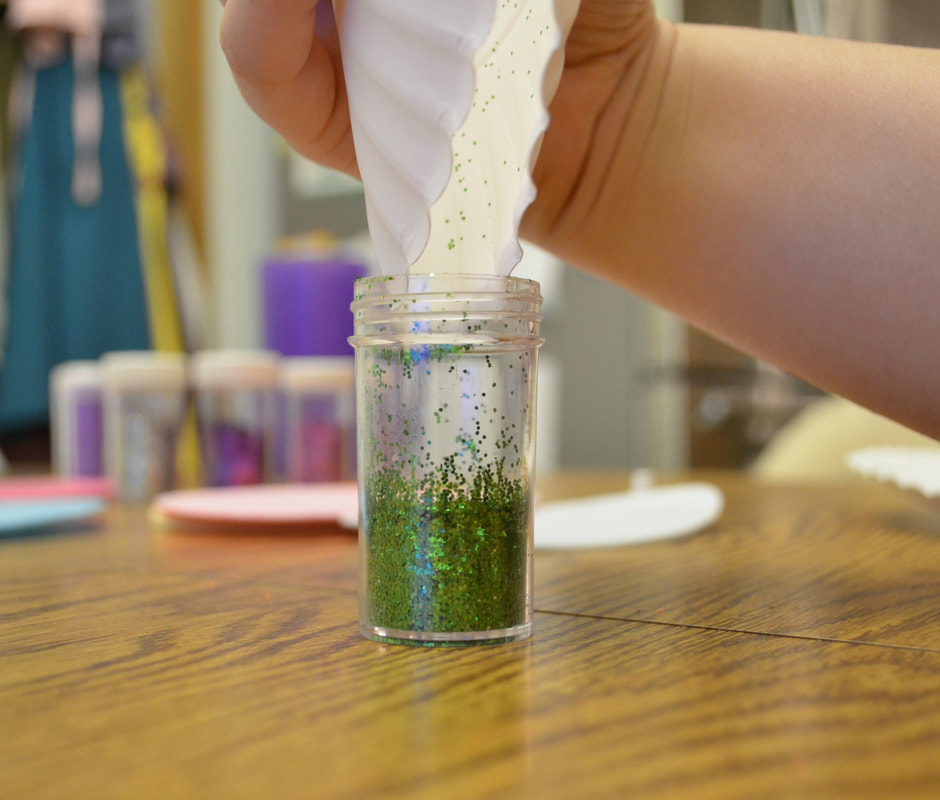 I mean glitter isn't cheap and you want it to last as long as it can. Just continue decorating your shapes until they're all finished. You may need to let them sit and dry before moving onto the next step. When they're all finished take your glittery shape and attach it to your paper doilies. Now when we're doing paper shapes I can generally use double sided tape or a glue stick to attach them. Because felt and foam sit heavier I use Hot Glue to attach them. 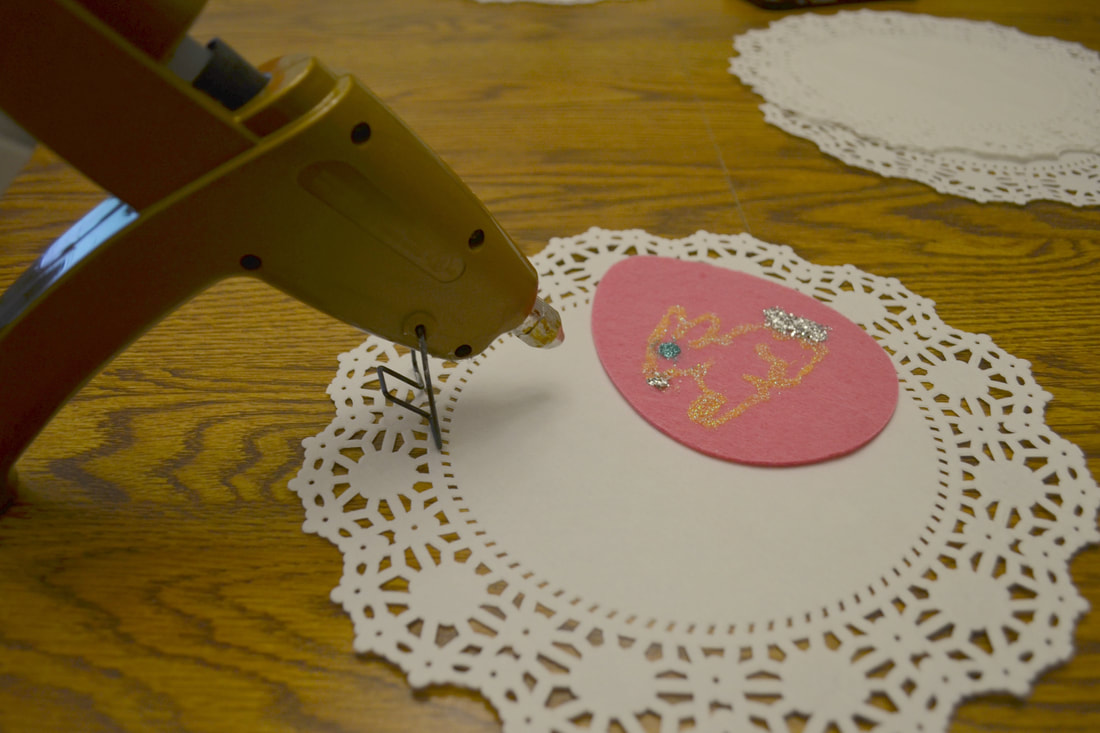 When they're all set use a little bit of scotch tape and attach them to your kitchen cupboards. These make for a great family activity. Plus a good opportunity to show your creativity. And there's also a lot of pride your kids and family take in seeing them displayed every day. And guests ALWAYS have something to say about them. If we're nearing a holiday season and people come over, they always tell us they were excited to see if we had decorated yet. It's something I am definitely going to continue doing in my life time and for my own children. I hope that it can be an event they look back on with the same happy fondness that I do. And now from my home to yours I pass this on. I truly hope ya'll enjoy this and build happy memories of you own. I know, I know, felt eggs again?! whyyyyyy?! Well, simply put, I wanted to get as much use out of them as I could. But going back to the 18 inch dolls, I thought it would be cute to make little purses with the last four eggs I had left. You Will Need:
 Taking these eggs I took the top egg and painted a design on them. Again you don't need to do that. And there are plenty of other ways to add designs to it. 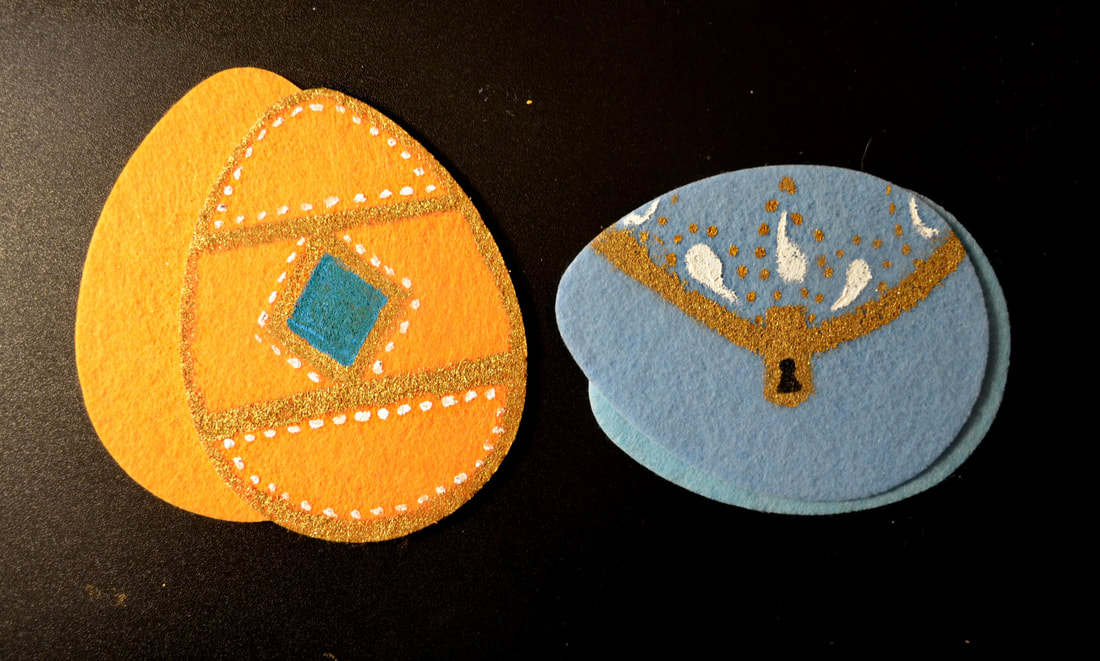 There are actual faberge egg purses and I used those to give me an idea for making these purses. I wanted one standing up and one that was long ways like a duffel purse. Flipping the top egg over mark little spots where you want the ribbon to be attached. Measure out the string to see how long you need to to be on your doll. I figured out that 13 inches was just right. Using Hot Glue, attach your ribbon to the egg purse. 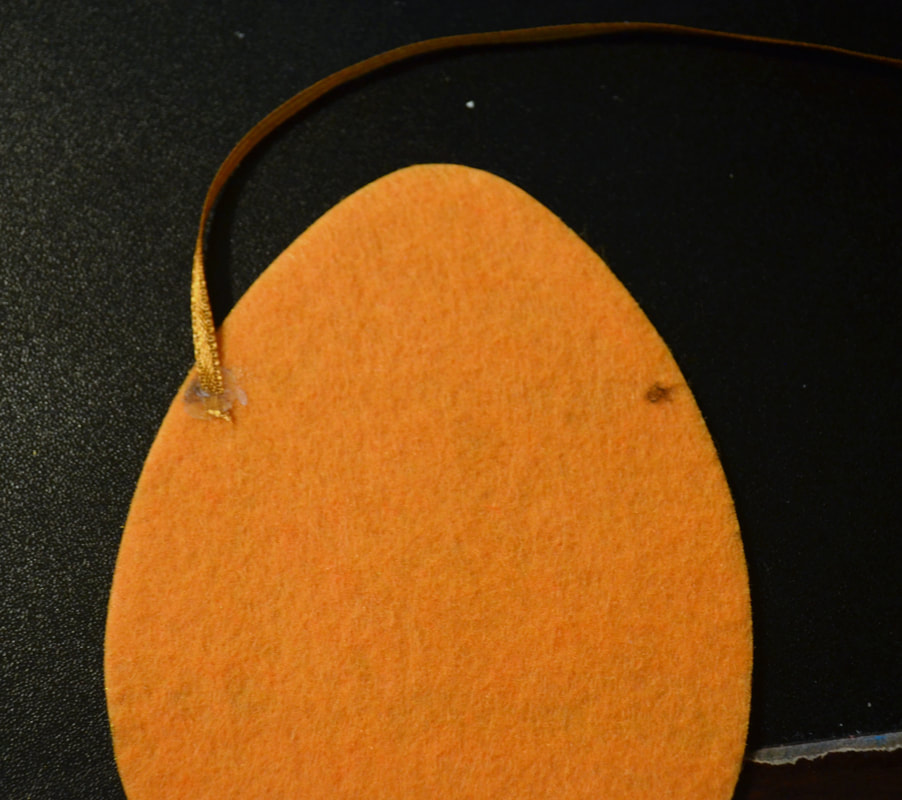 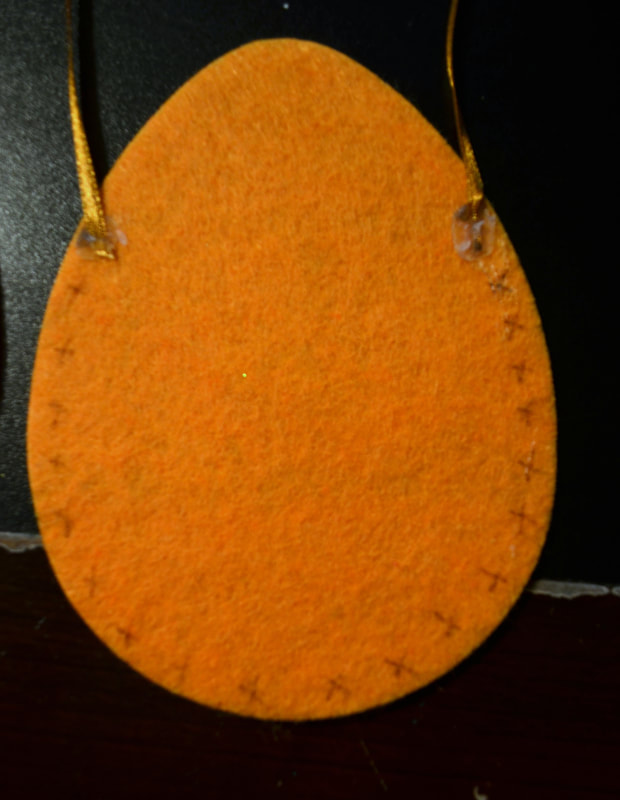 I marked little x's all over the edge to show you where you're going to apply your hot glue. Once you put the glue down, match the other egg.  I filled the egg purses with chapstick to show how much room is actually in there. But there you go, simple no sew doll purses. 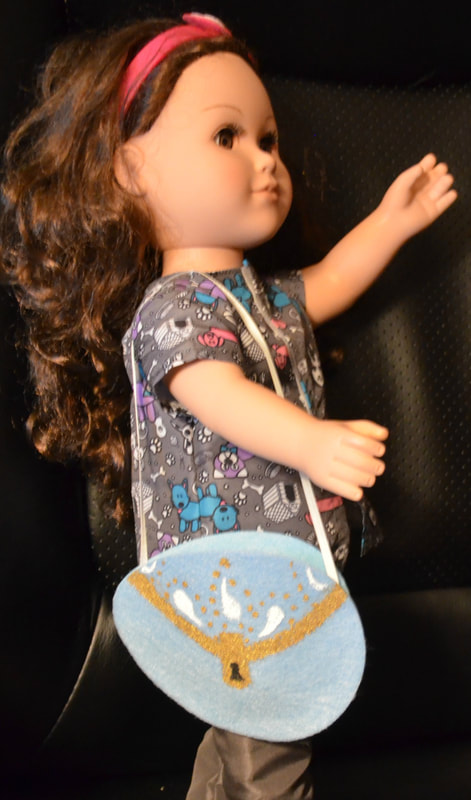 This was just one of those crafts to pass the time and occupy the kids. It's not perfect and I admit there are flaws to the design. Feel free to just ignore this craft. You Will Need
I had some leftover felt eggs from a previous project. And idk about you but I have Disney on the brain, a lot. These colors just made me think of Disney posters- specifically minimalist ones.  I sketched designs on them and then painted them. 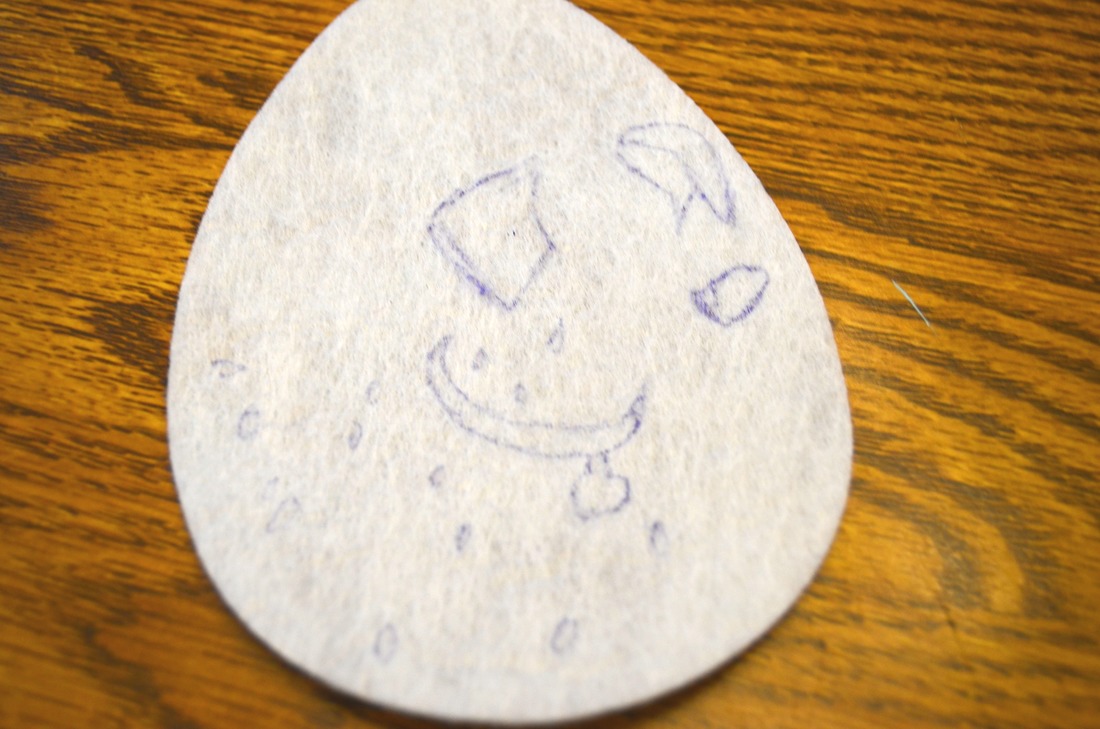 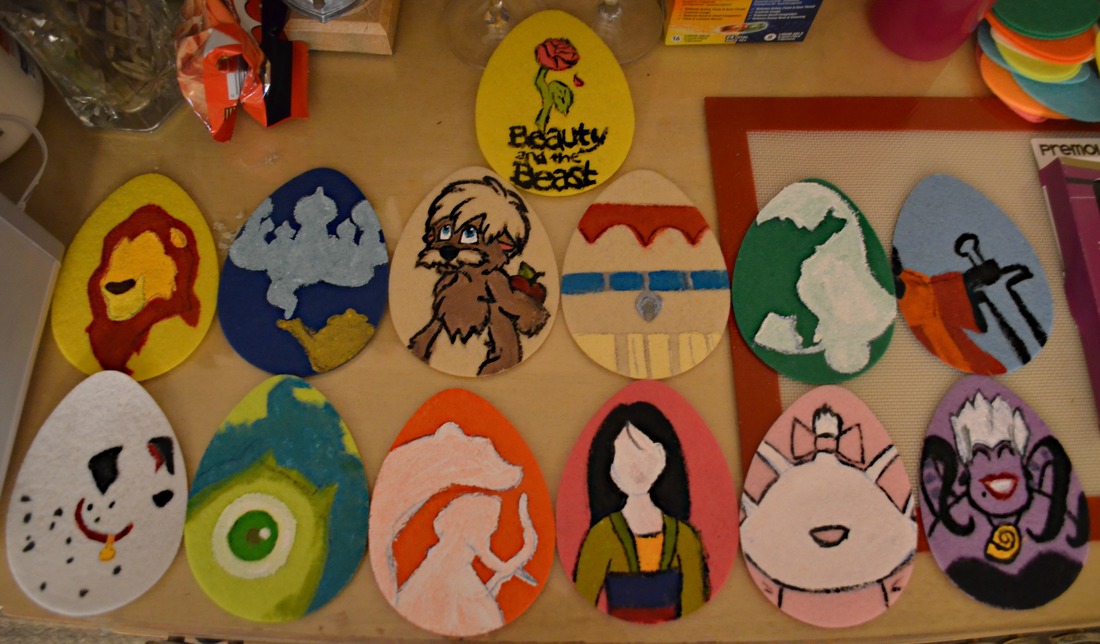 While they dried we took a cake board and drilled holes in them (with a screw driver). These holes were placed to hang our decorations from. 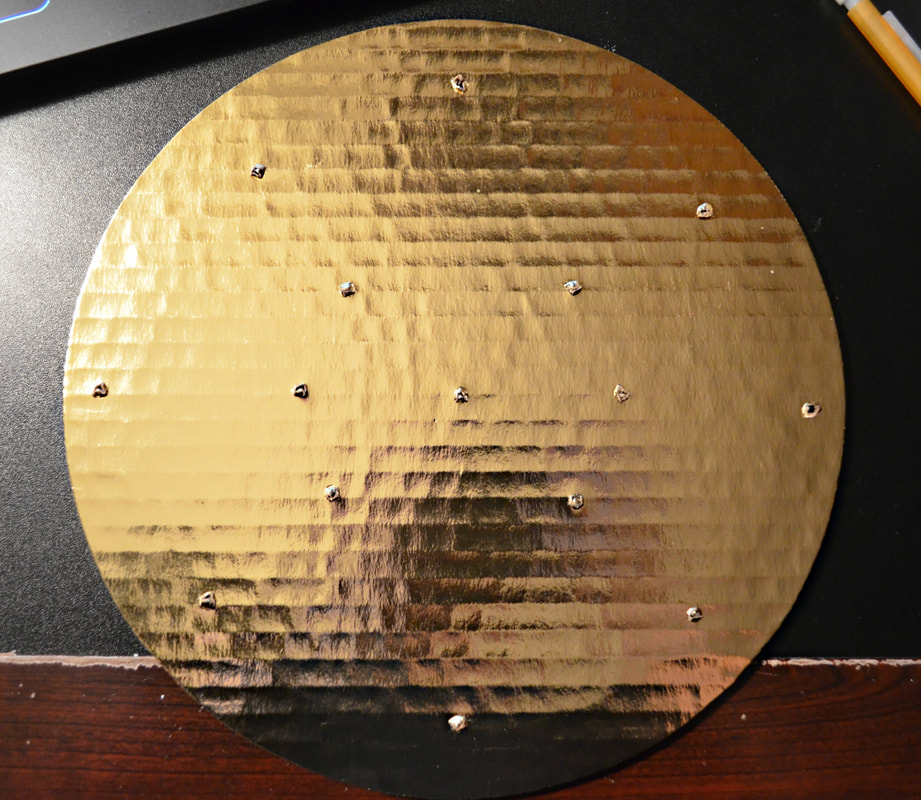 Now the string will have to be hung at various lengths in order to get the mobile look. The middle string was 16 inches long. Then the middle section 11 inches long. And the final outer holes were 6 inches long. 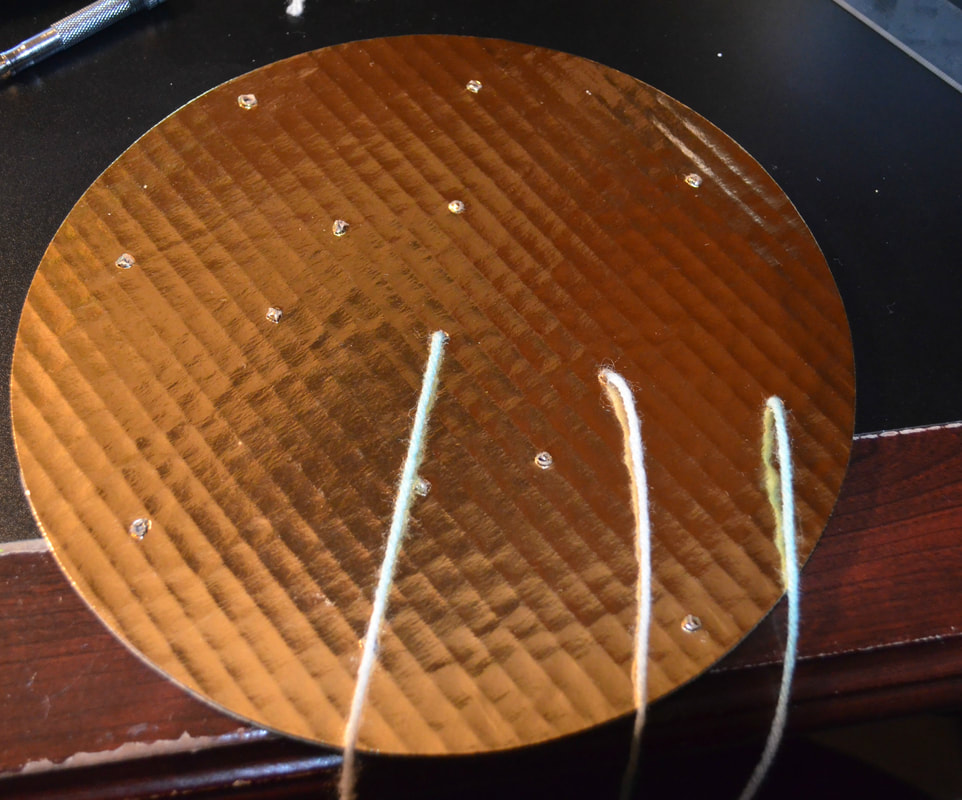 Here's where your hot glue gun comes into play. Using the hot glue gun attach the strings to the back of the decorations. AND the hot glue gun is also used to secure the yarn on the other side of the cake board. In my experience this works better than tying knots in the yarn but to each their own. 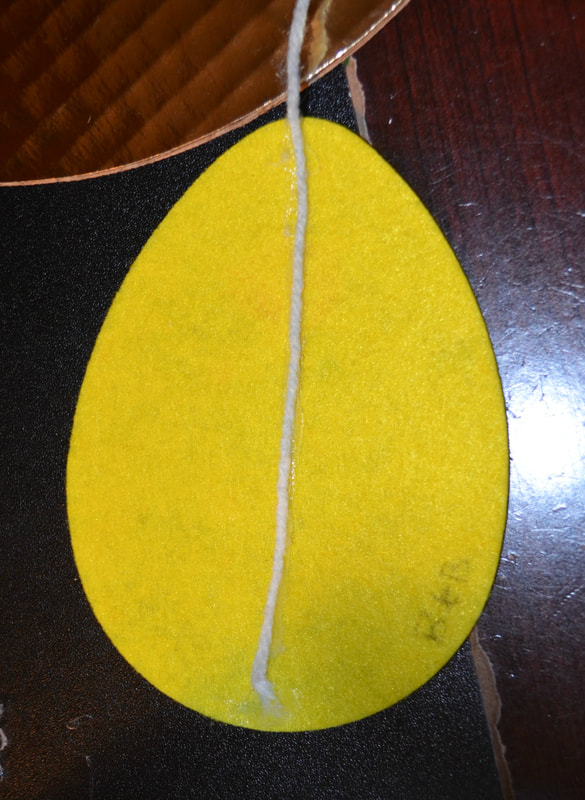 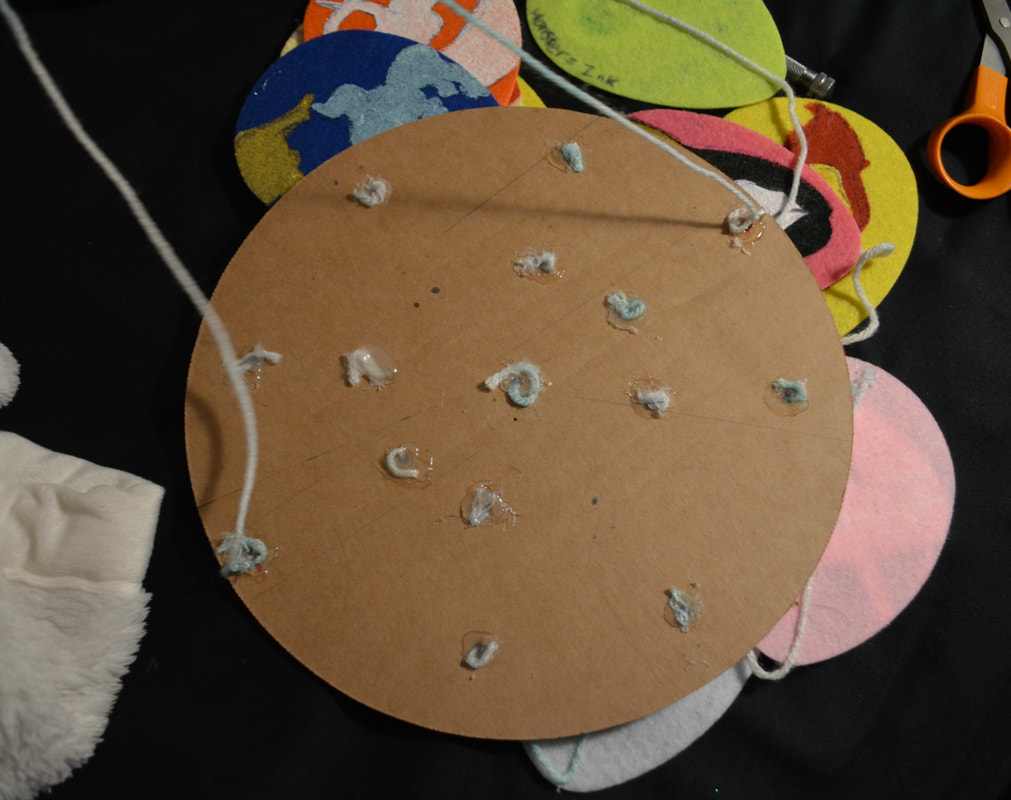 You'll also notice I added extra holes to make a string to hang this mobile from. This was really cute by a window... but we got a huge plop of snow again so that lovely breeze that moved the eggs is now gone. 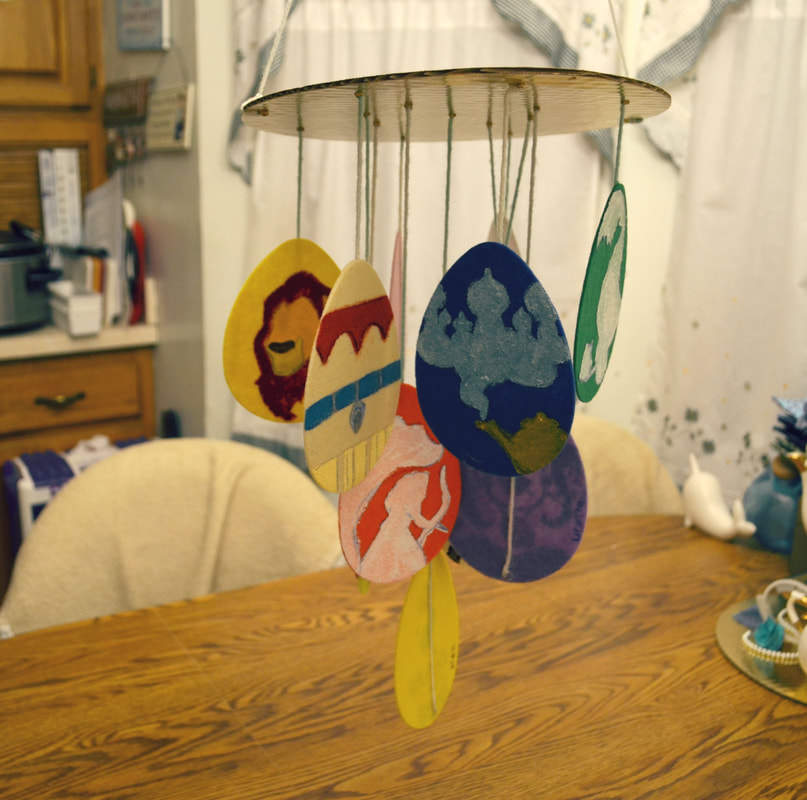 Want a SUPER fast and cheap Easter craft? One your kids will love and can do on their own? Even better one that could be used for indoor and outdoor decorations? Then these are perfect! YOU WILL NEED:
Technically the first part of this project is to measure the item where you plan to hang your garland. Maybe you already know the length, or you're fine with eyeballing it. (No judgement I've done it on many projects.) I really only bring this up because when making garland you need to keep in mind that whatever the length of the item is, you'll need additional length to do any draping. If you don't need this information just skip on down to the picture of the eggs. 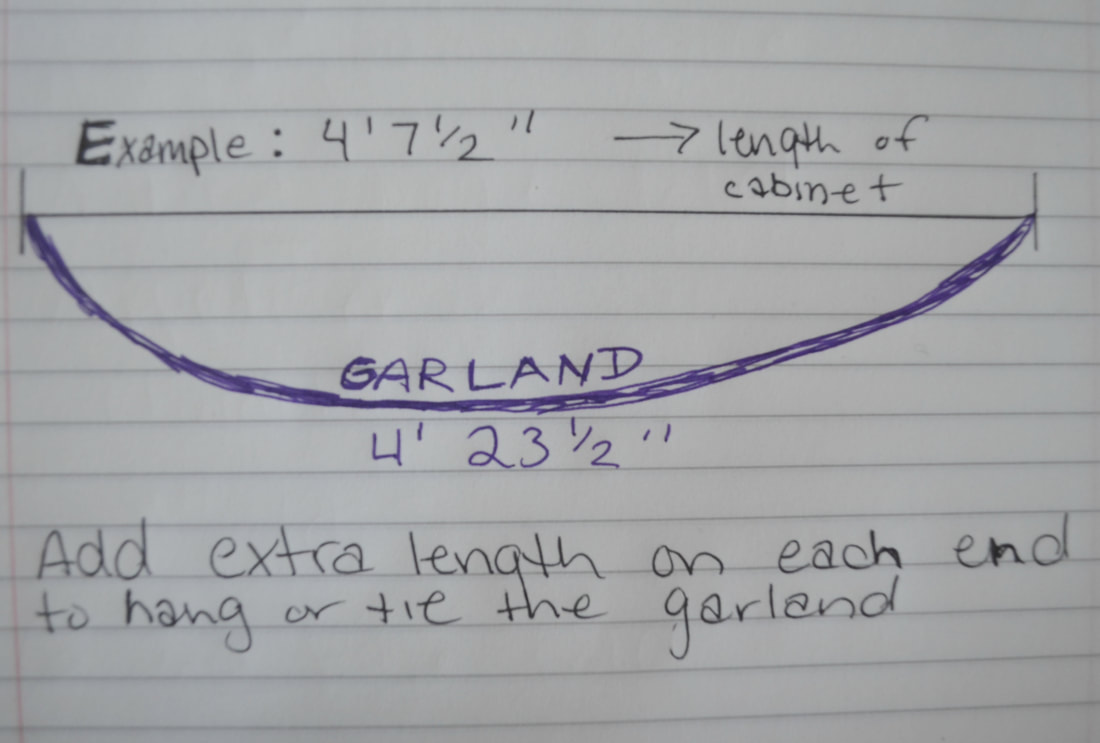 I came up with these measurements by measuring the top of the China Cabinet- that's the 4' 7.5". Then I took that measurement to the kitchen floor, using bits of tape to show the start and end of the measurement. Taking a piece of yarn I laid it out to drape below those pieces of tape. Like I attempted to draw in the above example. Once I was happy with the size of the draping I stretched that piece of yarn out and measured it's actual length. Pro tip: if you tape one end of the yarn to the starting point and stretch it out, you only have to measure how much farther the yarn goes past the end piece of tape and then add that to your original measurement. For me this came out to 4' 23.5" BUT I added an additional ten inches (five for each side) for extra string to tie and hang the garland with. 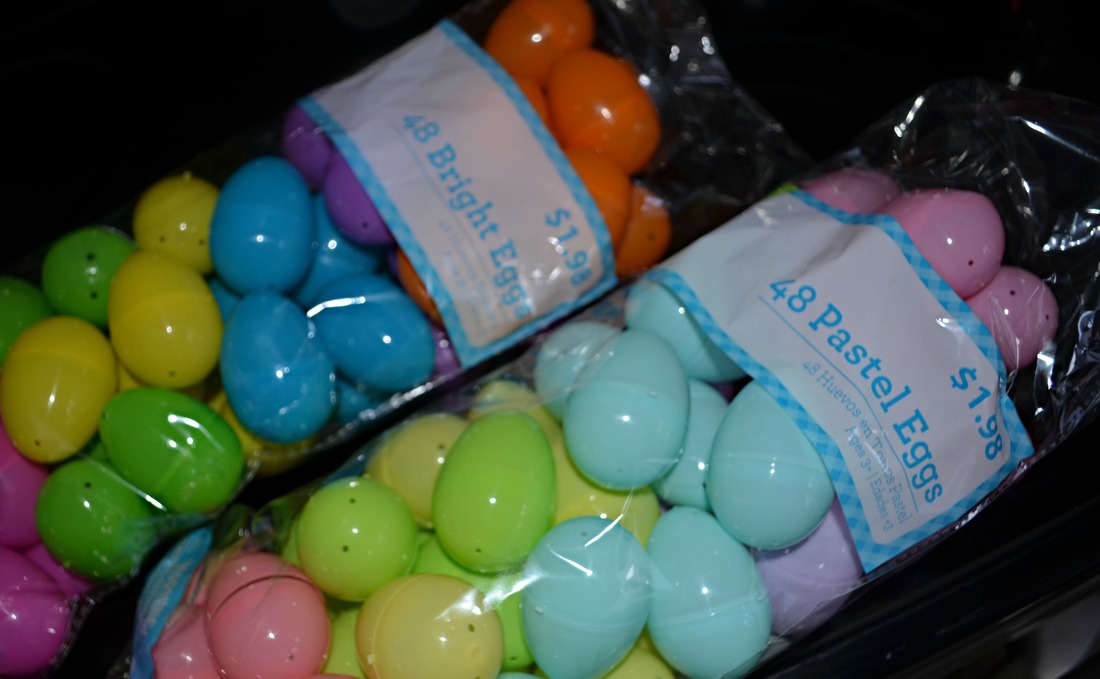 I went to Walmart and bought bags of plastic eggs for $1.98. The beauty of these eggs are that they already have holes drilled in the top and bottom. This is perfect because you're going to need them. Now, take your measured out yarn and thread the needle. 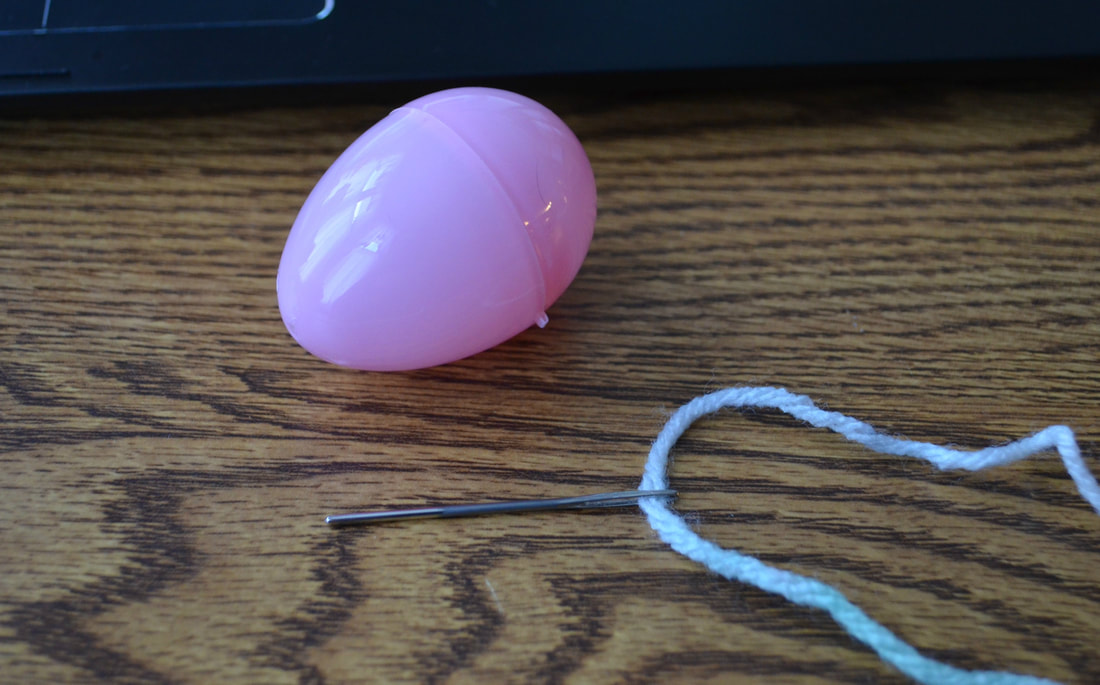 You're going to thread your needle through the base (or top I suppose, it doesn't matter). But you're going to have the egg open either way. I couldn't string straight through from one hole to the other without opening it up. Once you get through half the egg just go ahead and string it through the next hole on the opposite side like so. 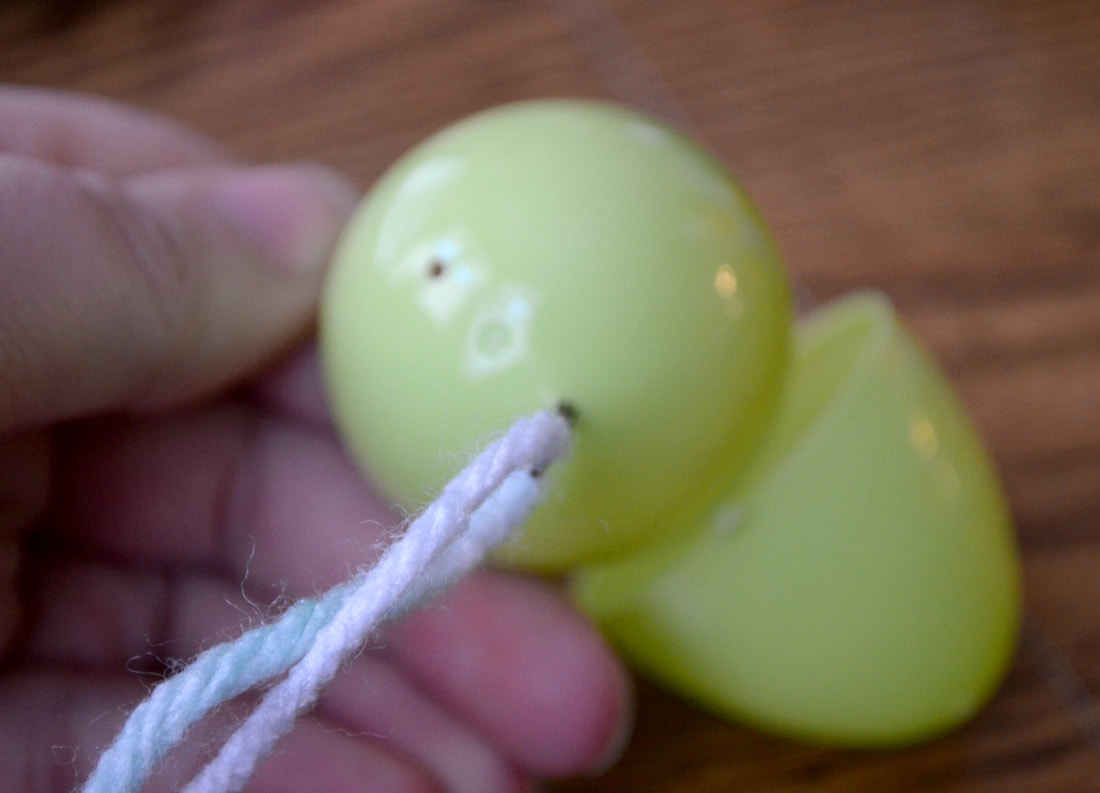  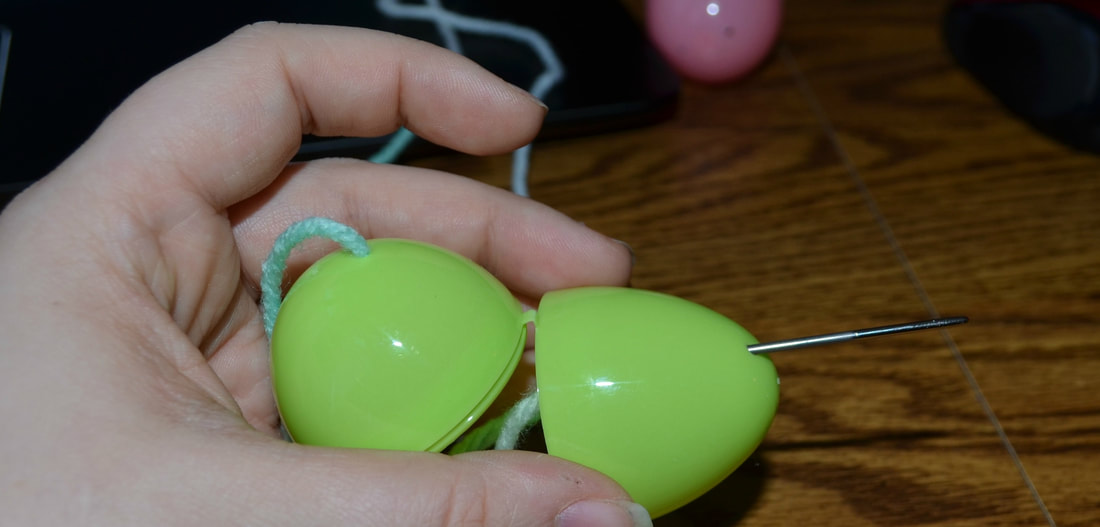 Simply close your egg up and move it down the string. Continue this until you've filled your garland. BUT now that you know how to string your egg, I've got to my first egg and show you what I did. When you are ready to start and end your garland remember to tie a quick knot in the yarn. 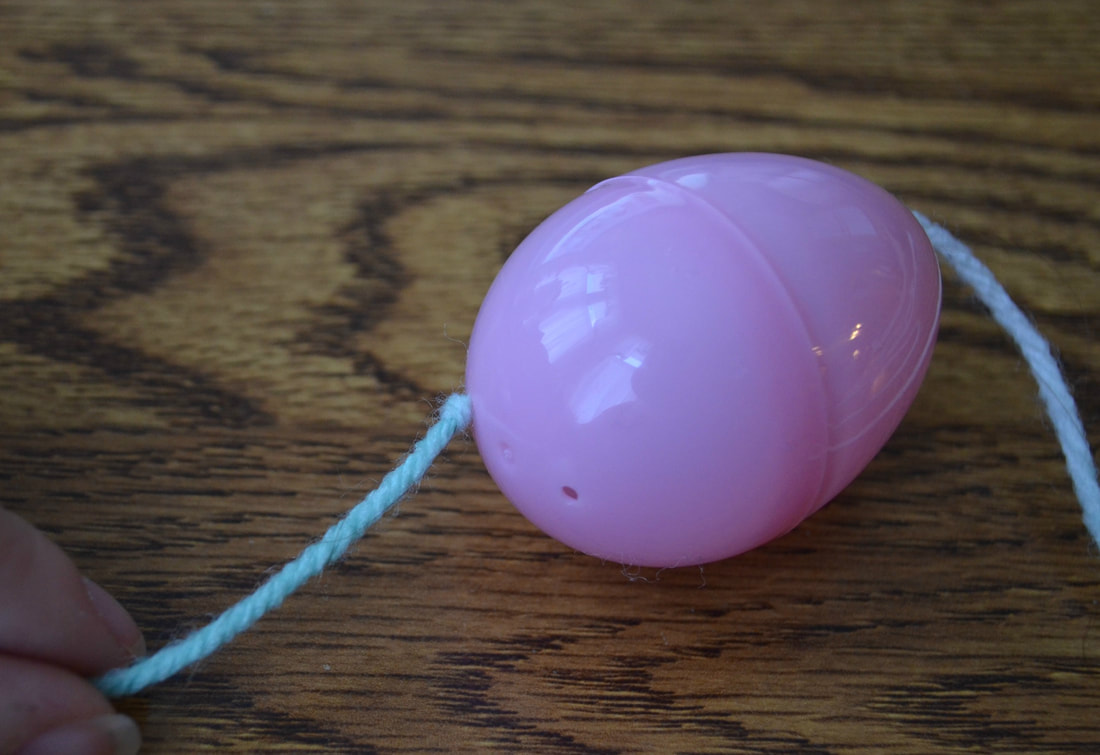 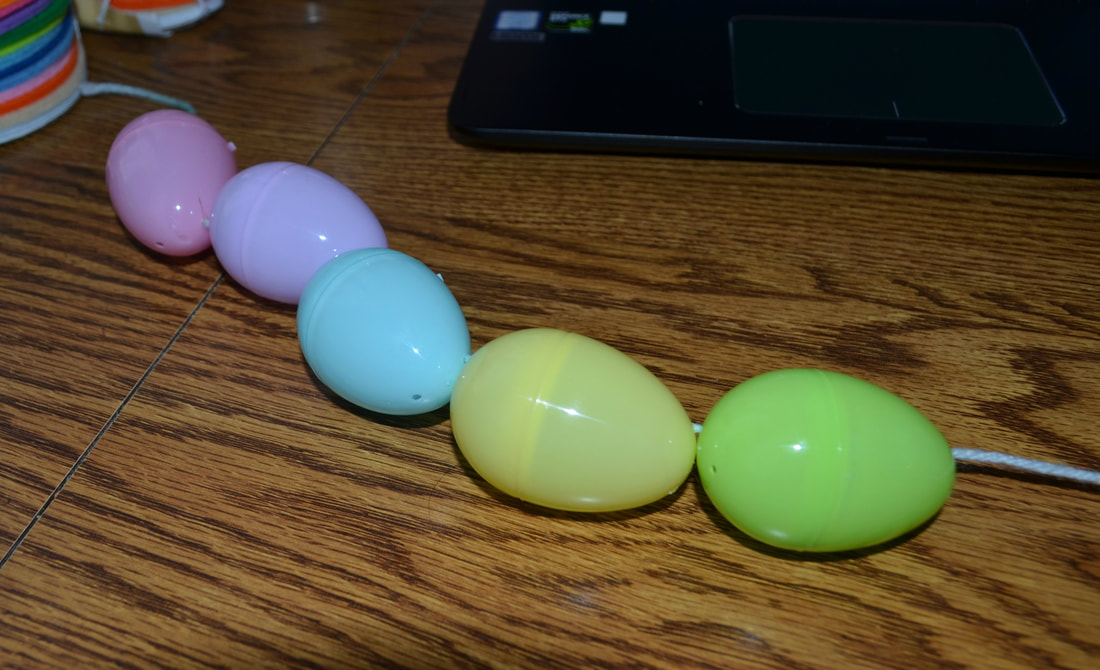 As I said this was so easy your kids can do it by themselves, right? Correct! Those plastic canvas needles have a rounded tip and are darn near impossible to hurt yourself with. And this is a great craft for hand eye coordination. Jenna joined me after I got my second egg on my garland. She picked up her yarn and immediately started stringing them along. She flew through her garland and had a blast. She was so proud of her finished project! BUT when she was stringing them she kept pushing the eggs so tightly together that they would pop open. What happens then is your eggs lay awkwardly compressed and so you think you can string more eggs on there than you actually can. I'm glad she did that because I never would have thought about telling ya'll not to push your eggs together. 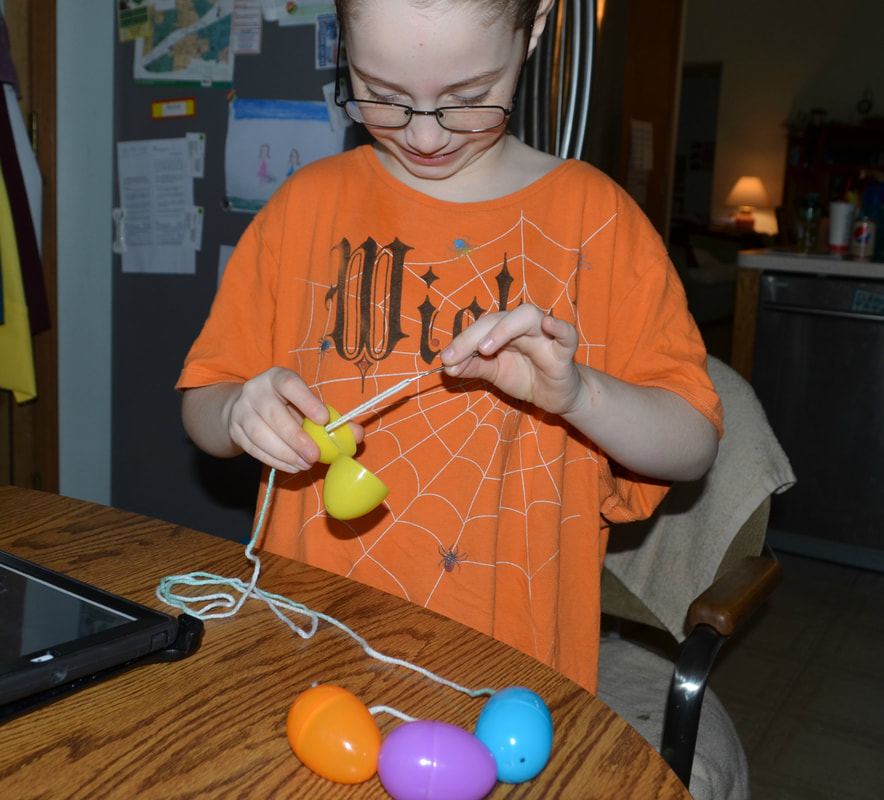 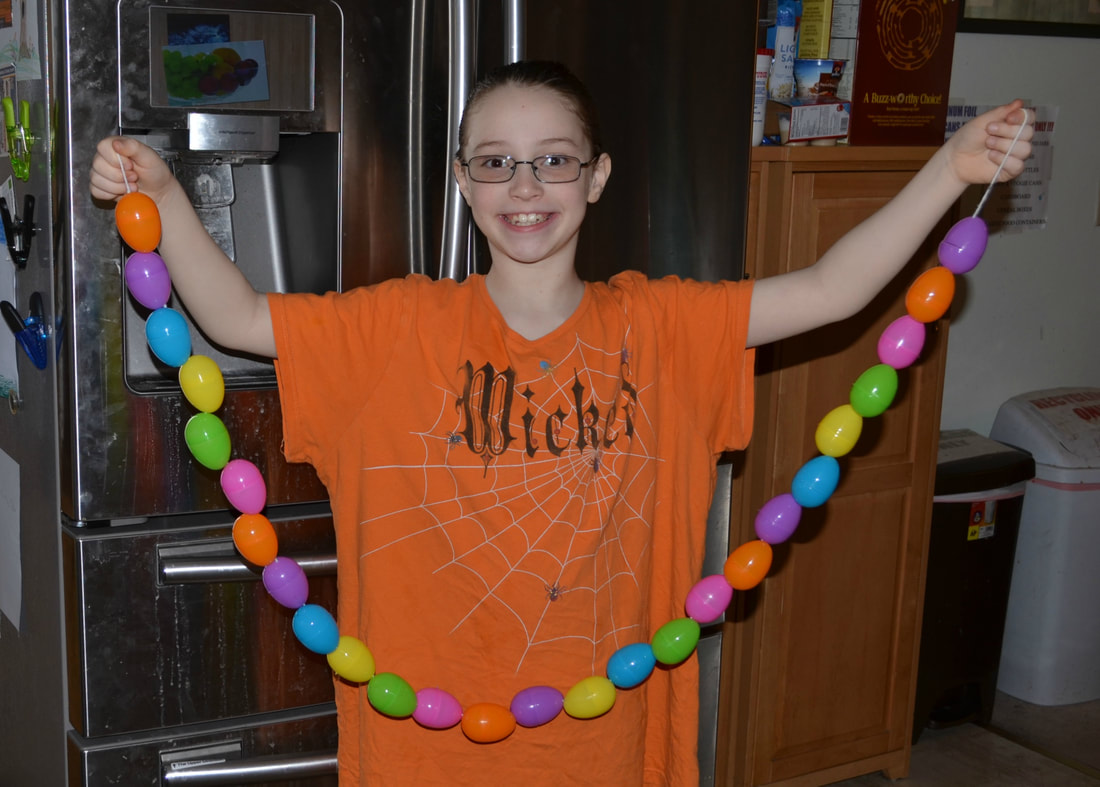 Once you're finished with your strings of garland just hang them up! I originally got this idea from seeing people hanging long strings of eggs in their trees. I wanted this to be an outdoor project, as we've been working on more outdoor decorations for our front yard. BUT our robins have already returned and they're very particular and skittish about items in our yard. We only have one tree in the front yard, and it's very small, and they favor nesting in it. I know we have a bit before I really need to worry about them nesting, but I didn't want to risk pushing them away. So instead we just hung them in the house. 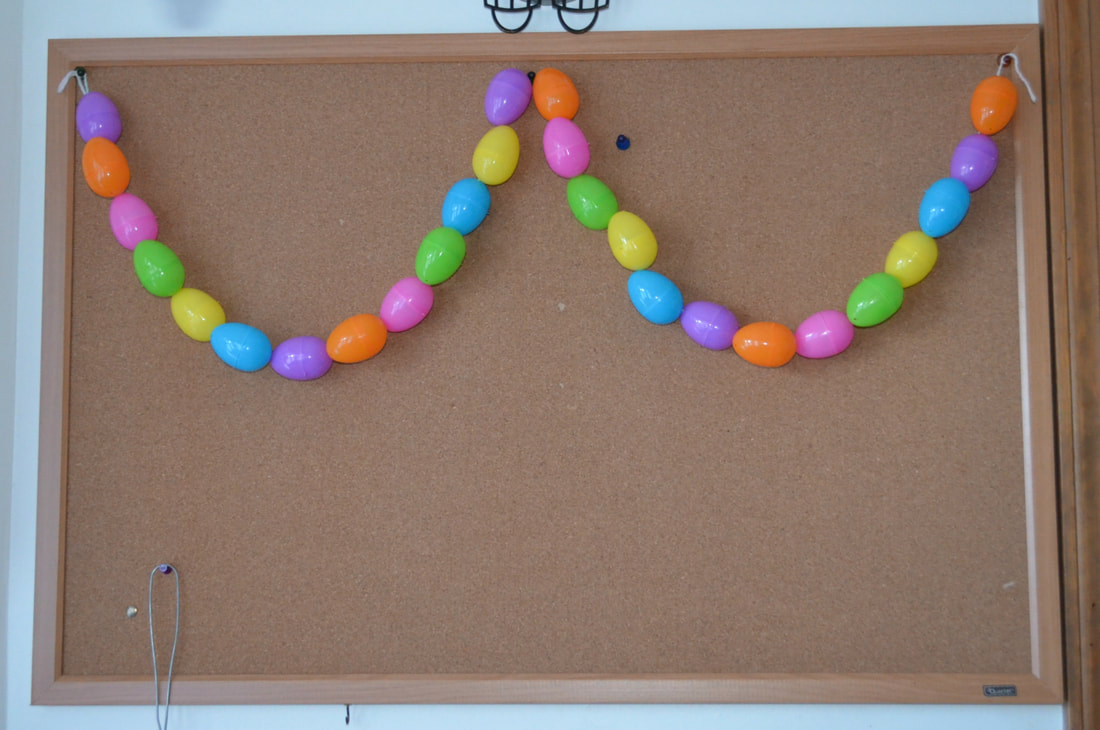 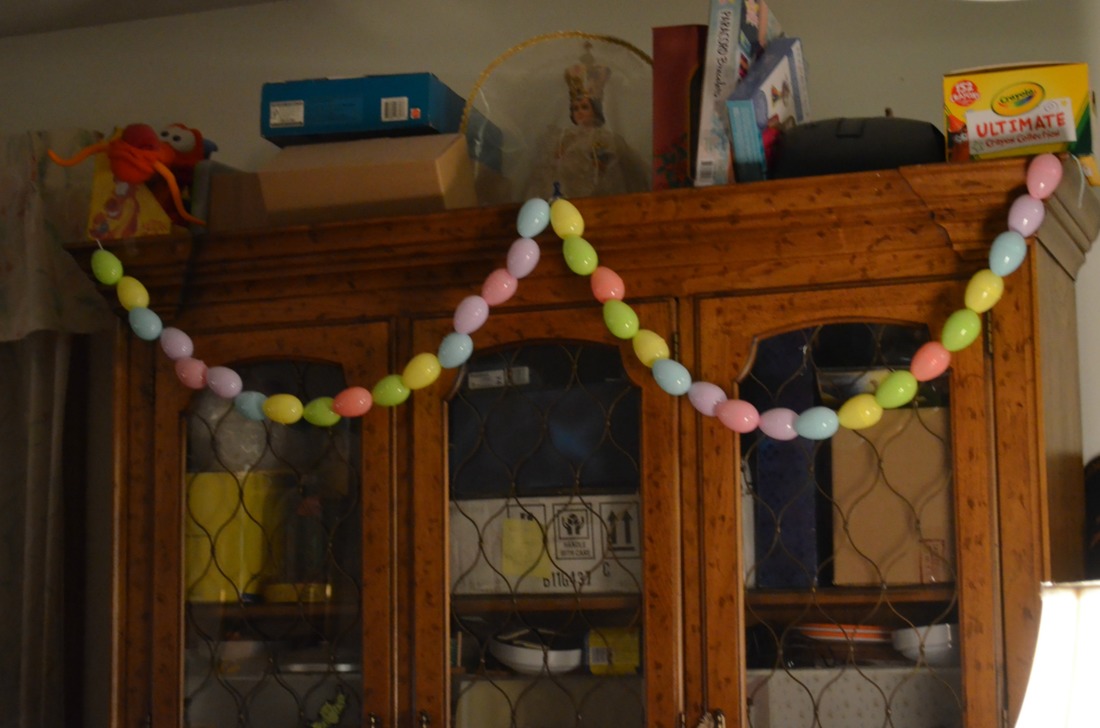 I hope ya'll enjoyed this and your kiddos enjoy making these as well. I already have thoughts in my head about using other shaped eggs, changing their direction when stringing them, or maybe even adding bows or pompoms in-between so many eggs. There are a lot of things you can do with a really simply idea and I hope you guys explore your options! And this project took maybe 30 minutes once we had our string measured out. So it really is a fast project you don't have to worry about getting them to sit through it. |
AuthorWrite something about yourself. No need to be fancy, just an overview. ArchivesCategories |
 RSS Feed
