|
I wasn't originally going to put this on the pet page. BUT besides giving these stairs a serious new look, I also made them safer for my pets. So I figured in case any other puppy parents have similar issues, this may help them. YOU WILL NEED:
My husband and I have an adorable little Yorkie-Pom who turned six this past June. He's the cute puppy in the pool in the photo above! He has shallow knee caps and a bad habit of believing he can defy gravity. (First two years of his life our living room was his personal trapeze stadium.) But recently his knees have started to cause him grief and he can't always leap up to our bed. So we bought him some simple dog stairs off of Amazon. They had positive reviews and only cost $29. (I'll include a button for those if you're interested.) And they were tall enough that they reached our bed. 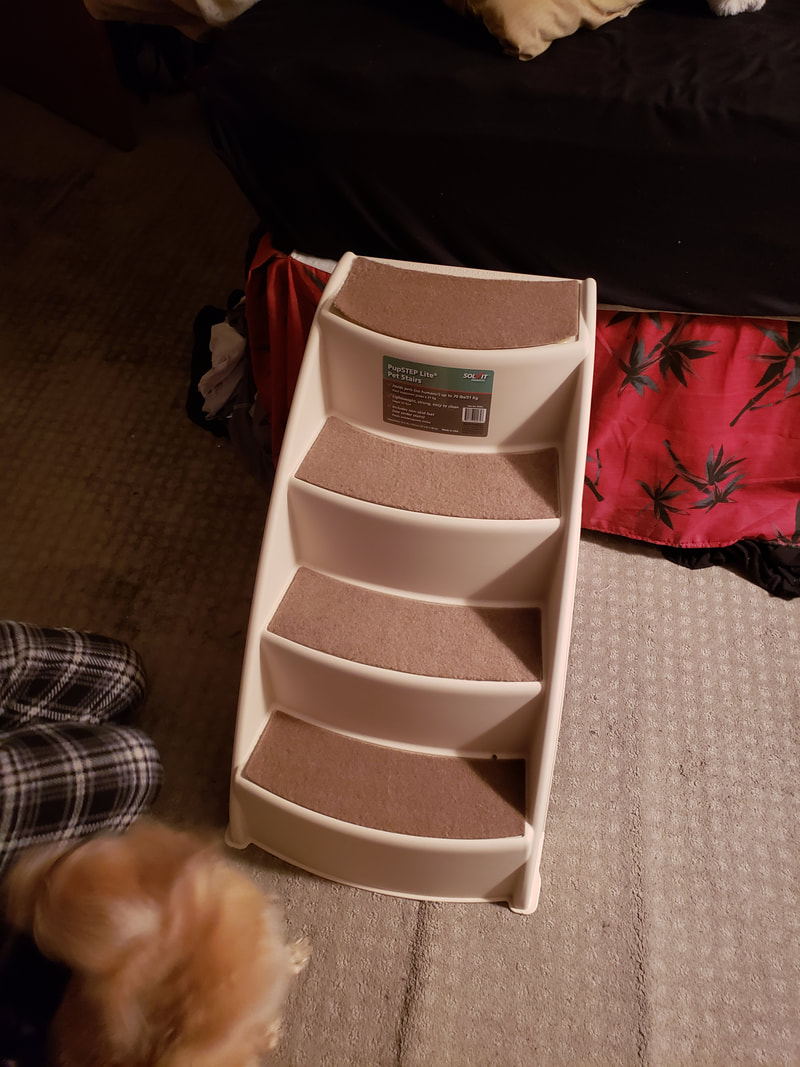 Now, they're perfectly fine stairs, except for that fact that they are very light weight. They shook a little bit and wobbled when he'd go to step off them from the top or the bottom. AND since he still tries to leap off the steps the shaking made him even more nervous and he wouldn't go near them. I had already planned on painting them so I figured, sure I'll also add some stabilizers to weigh them down. BUT THEN we discovered he also didn't like the carpeting on the steps. We thought it was our imagination but he seriously would place his paw on the carpet and then step back suddenly. After placing a blanket over them he'd go up and down them like a champ. So we also decided to re carpet the stairs. To start with, rip the carpet off the steps. It's cheap carpet with even cheaper glue and easy to remove. For any excess glue left over simply take a scraper tool to them. 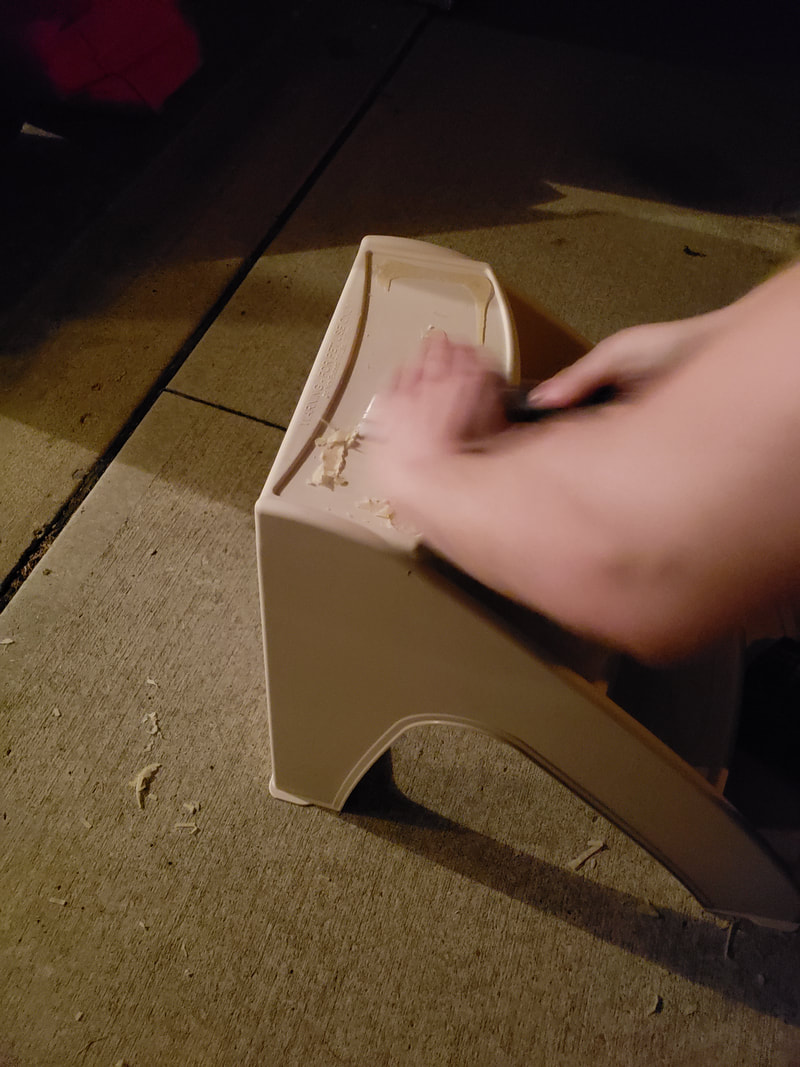 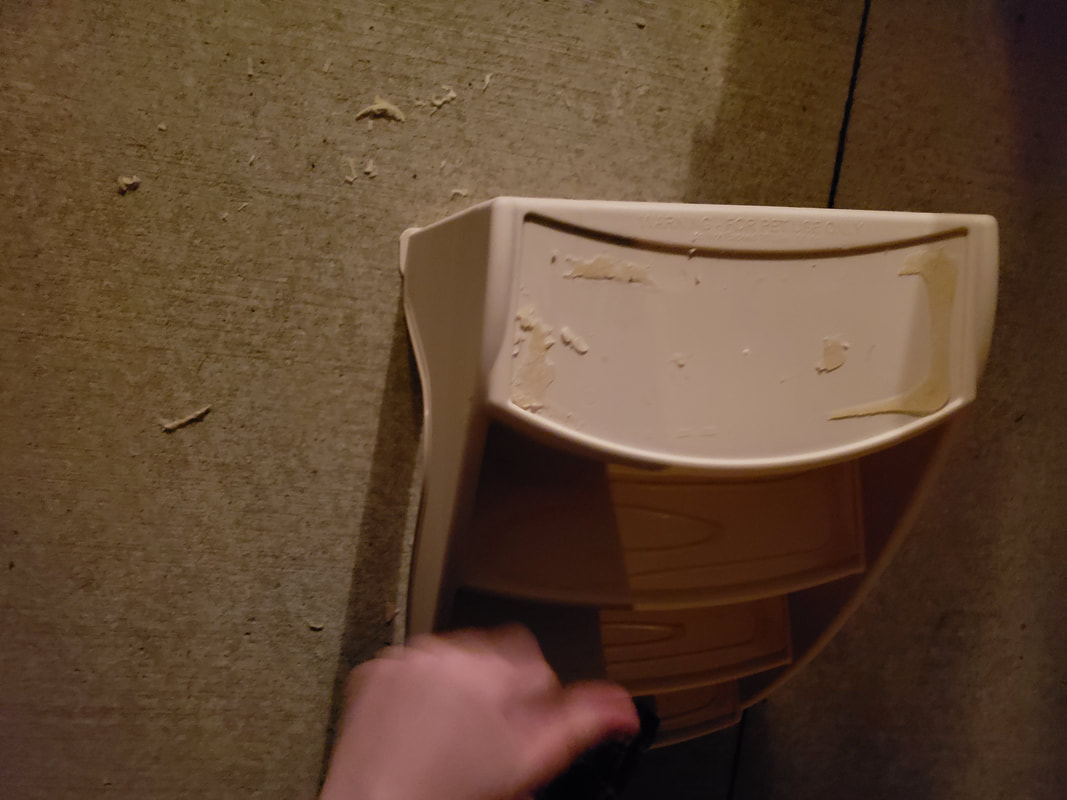 Next, we needed to weigh the steps down. We actually decided that since the plastic was so thin. we were best off making a wooden skeletal structure. So off to Lowes we went and picked up some 2x4's for $5 a piece. 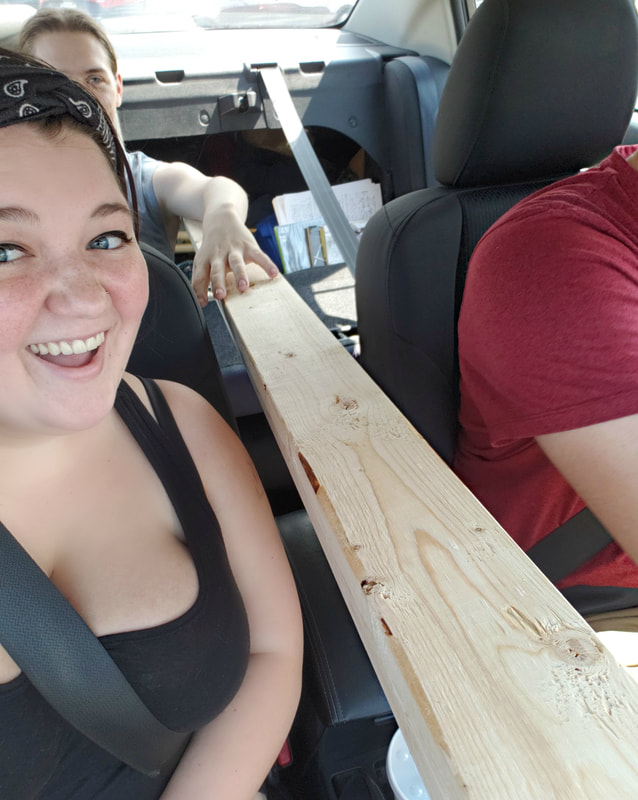  Once we got our planks home we measured them down to figure out the lengths needed to layer the inside of our stairs. Take your stairs and flip them upside down to attach the wooden structures. 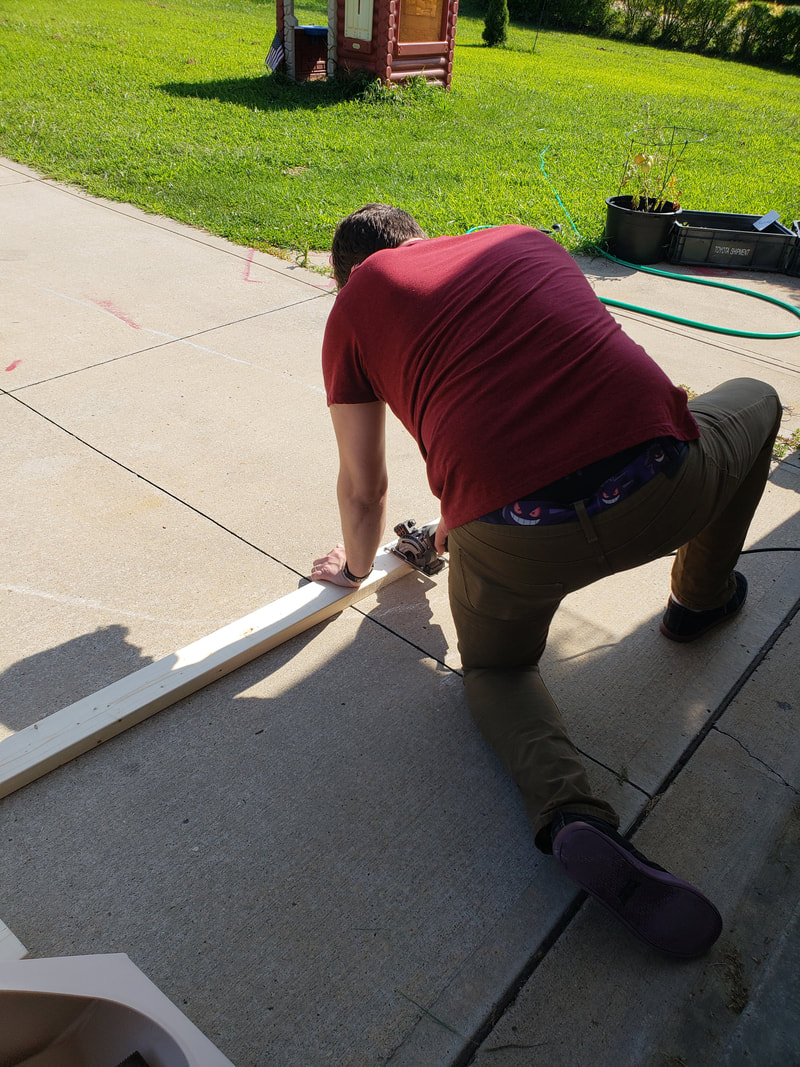 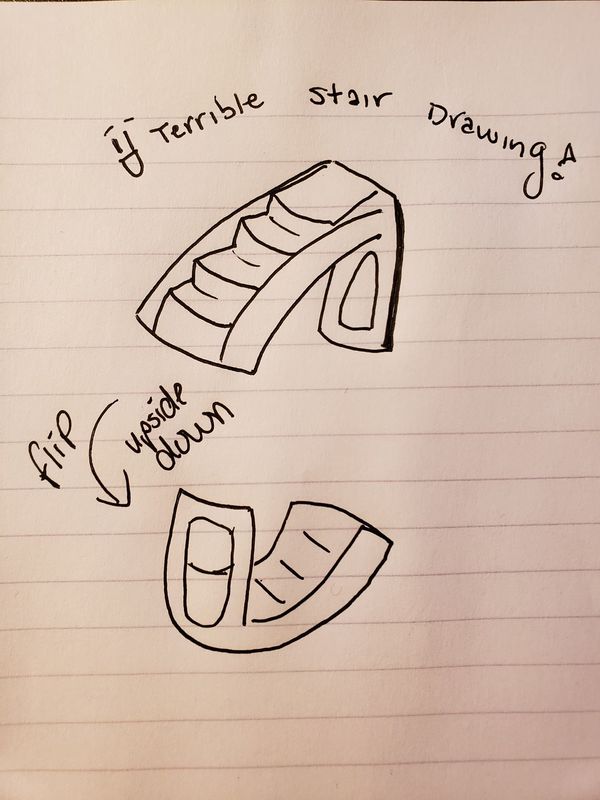 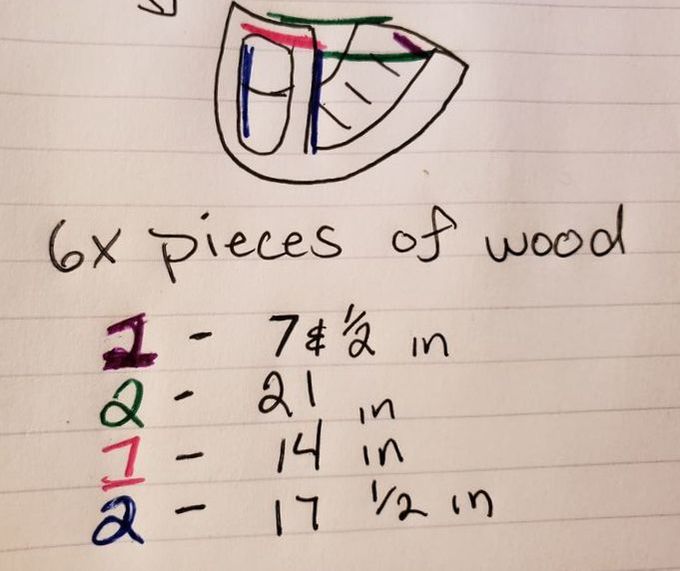 We placed two wooden planks down the back legs, two planks across the front and back of the bottom of the stairs, and then two long ones going from the back to the front. Using screws and a drill we attached them to the inside. 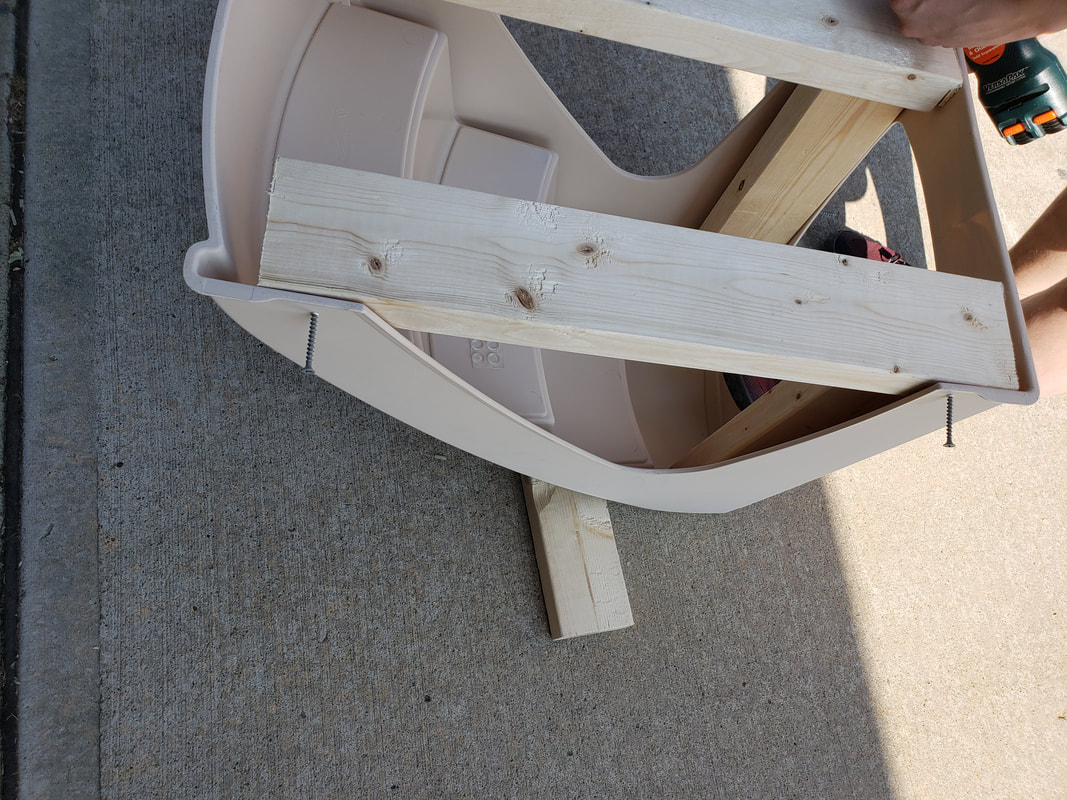 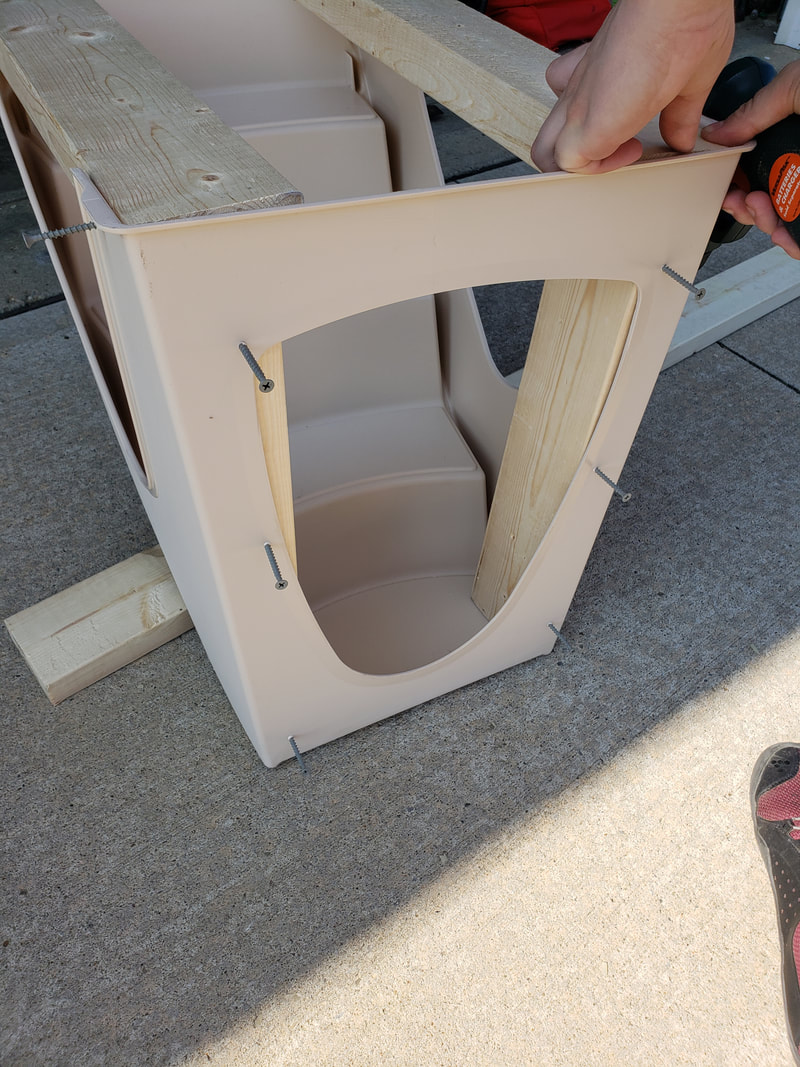 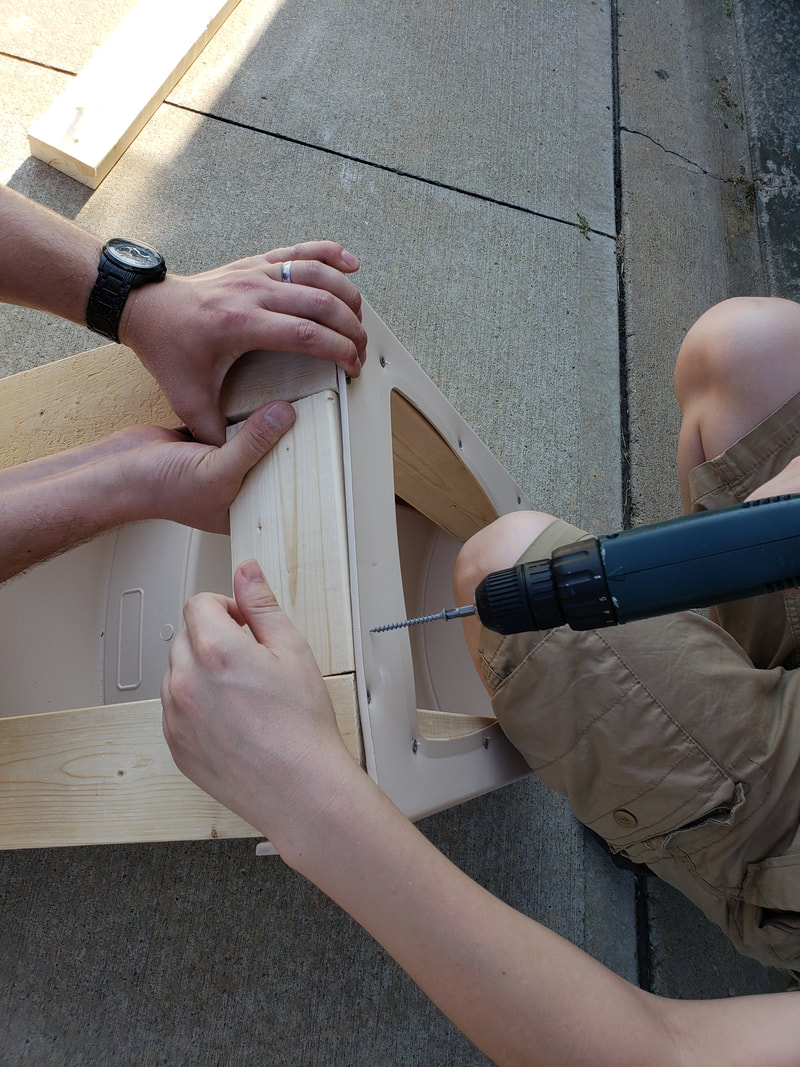 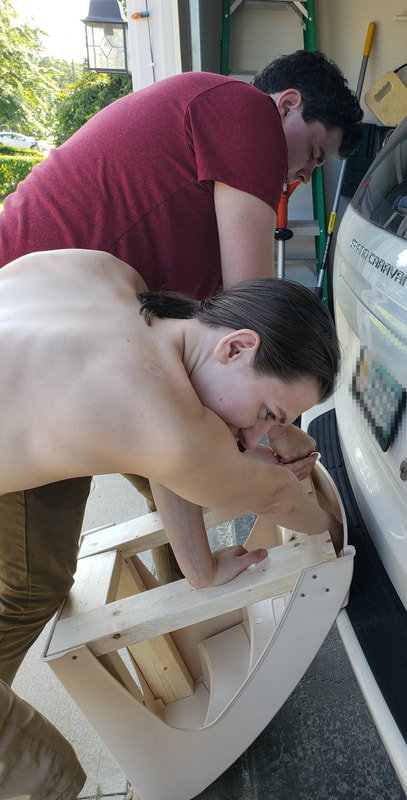 When that was finished I coated the stairs in spray paint. I chose the Krylon Colormaster Gloss Enamel, Black. 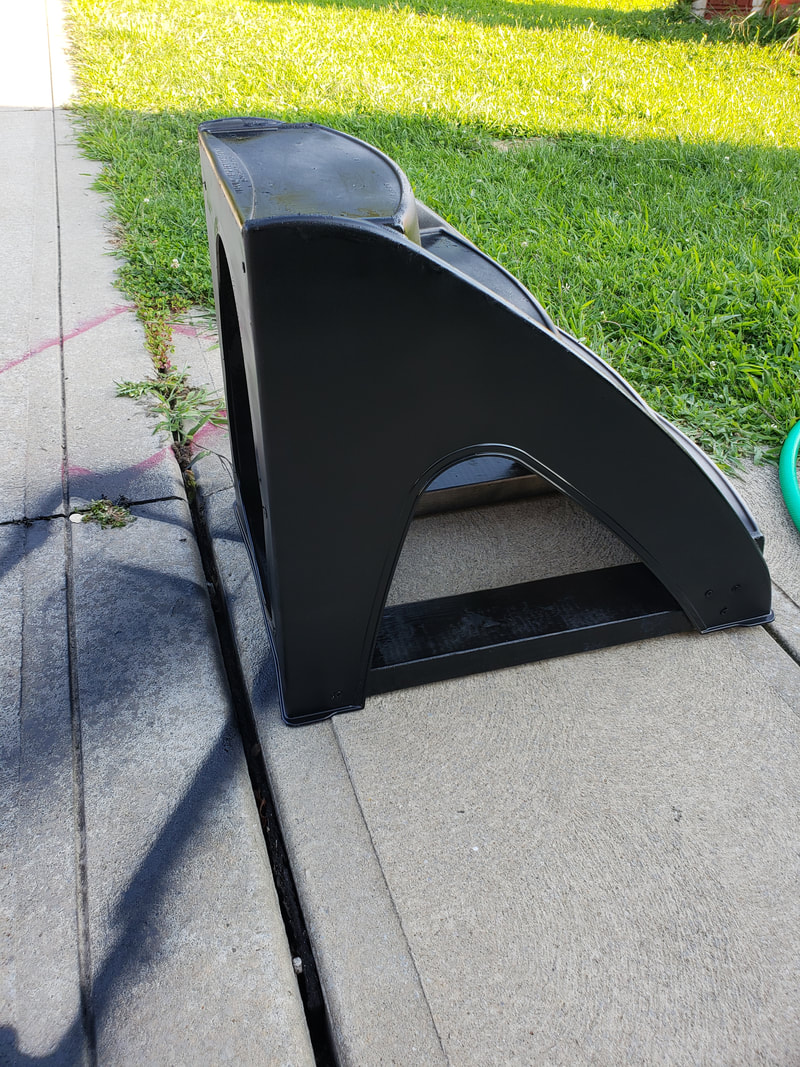 I gave the stairs a few days to air dry in the garage before applying the fabric to the stairwell. We used Loctite Super Glue and staples. We laid the fabric over the stairs until we were pleased with where the pattern would sit. Then using our fabric scissors we cut it down to make it easier to work with. 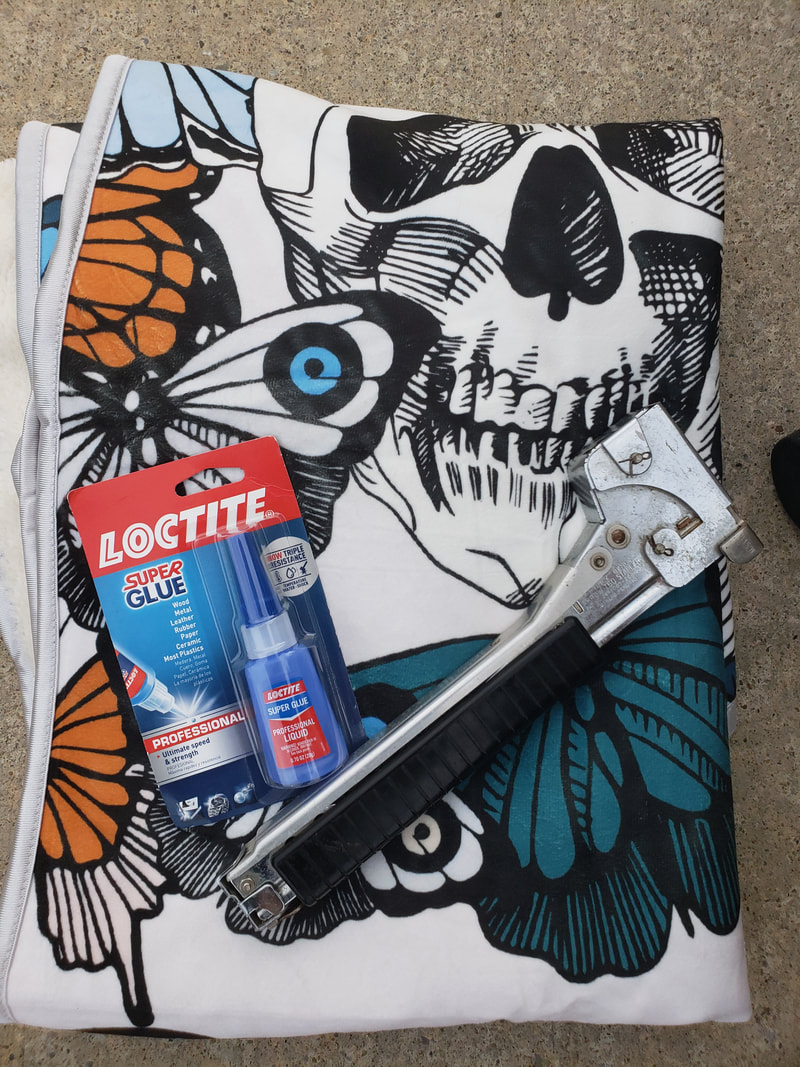 We used loctite on the first step to help hold it into place. Only takes 10 seconds for it to start holding. But do watch your hands for glue bleeding through the fabric. Then we used the stapler to give us an additional hold. Continuing this down the stairs. Using our X-ACTO Knife we cut slits in the fabric for the inner stair walls. If you don't want to fabric the WHOLE front of the stairwell just make sure to make clean cuts. 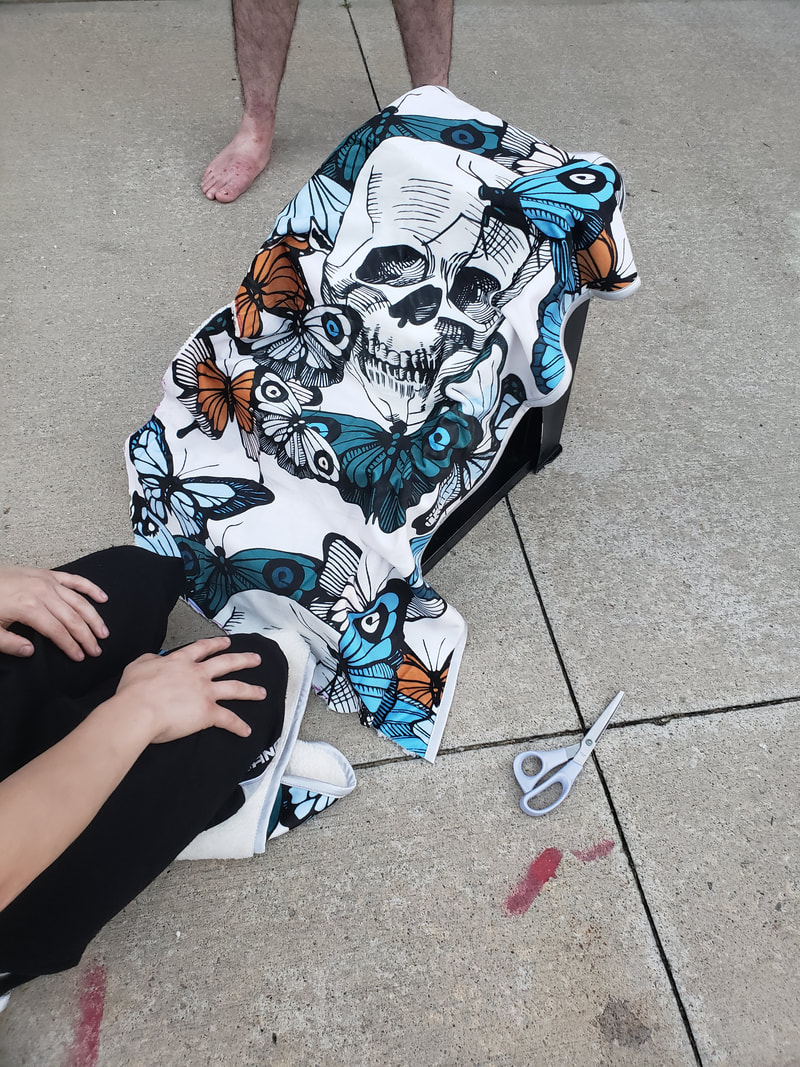 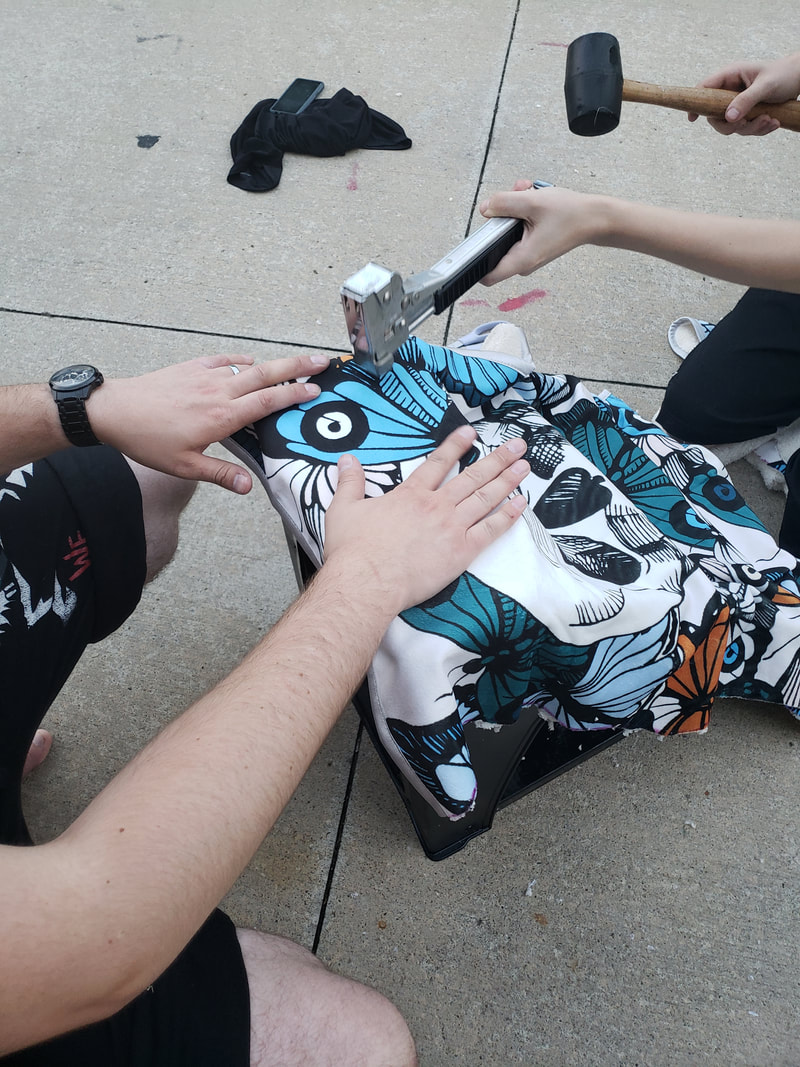 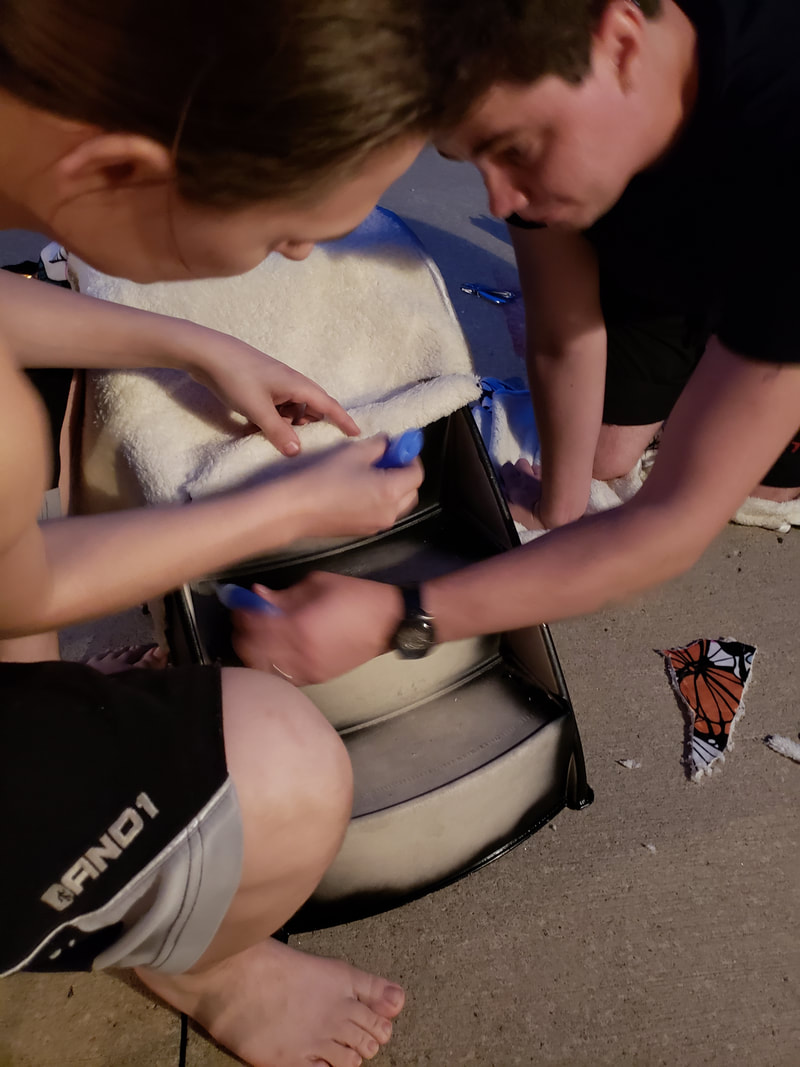 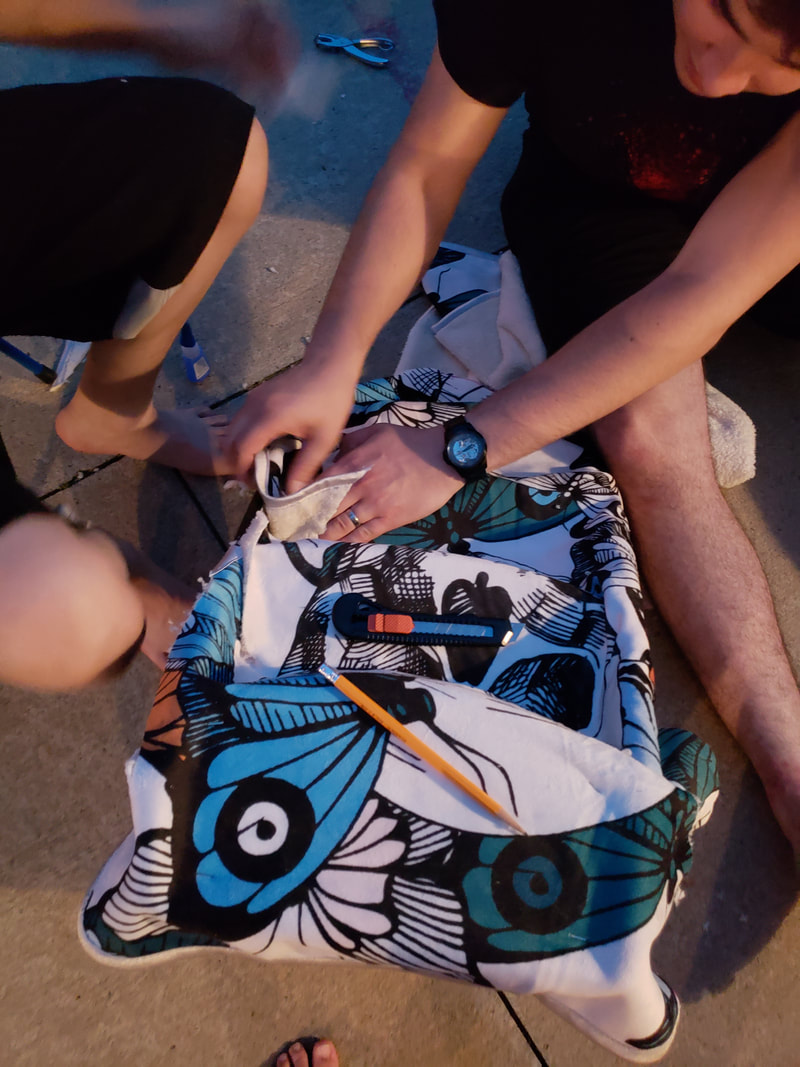 To make the sides of the stairwell fit tightly you'll need to take the fabric and fold them, then cut a triangle out of that fold. 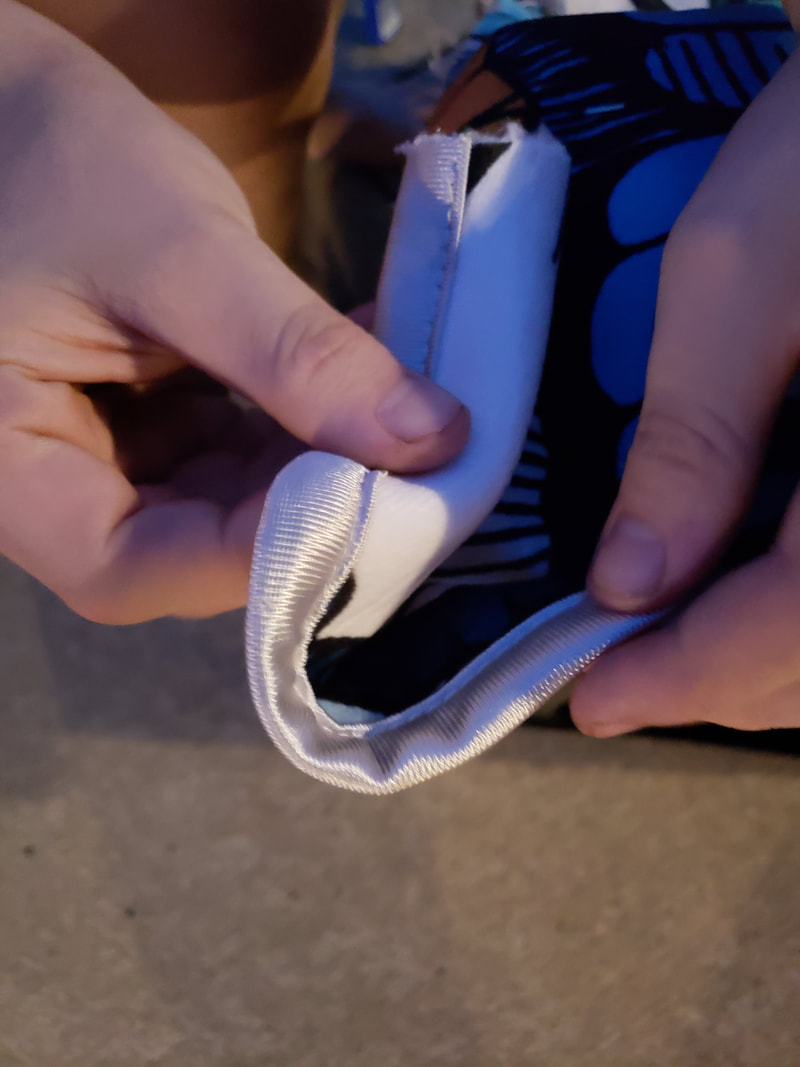 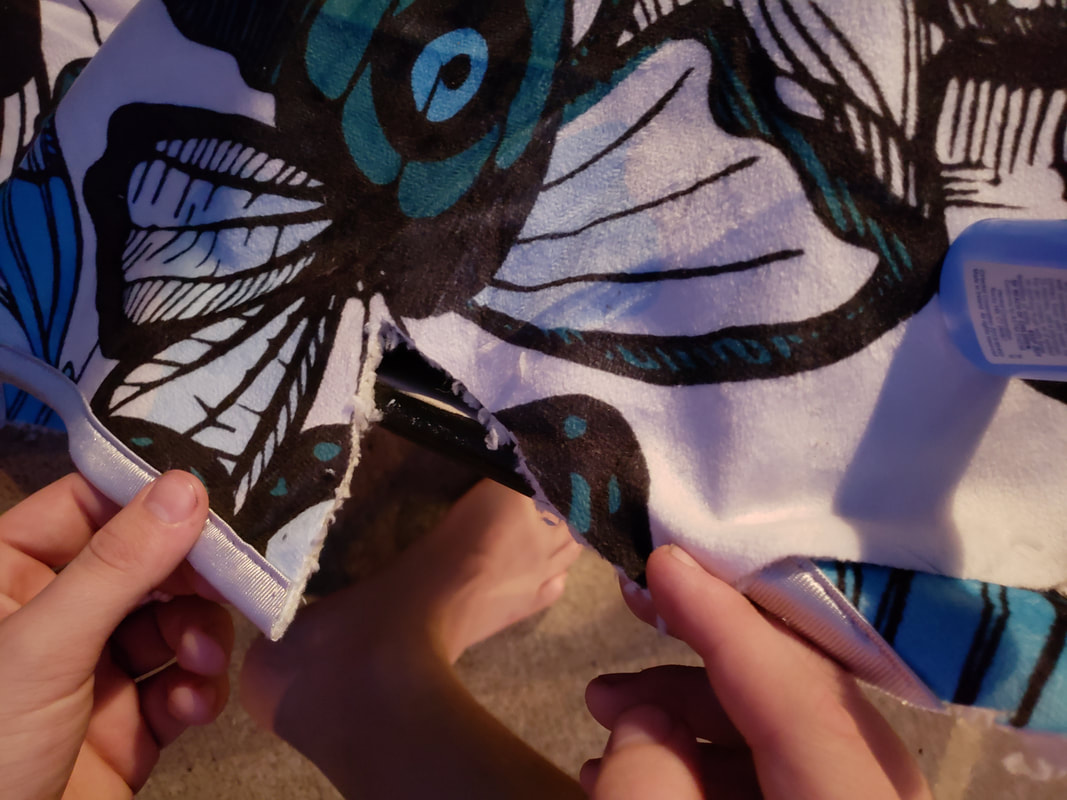 When you do this you'll get nice straight lines. 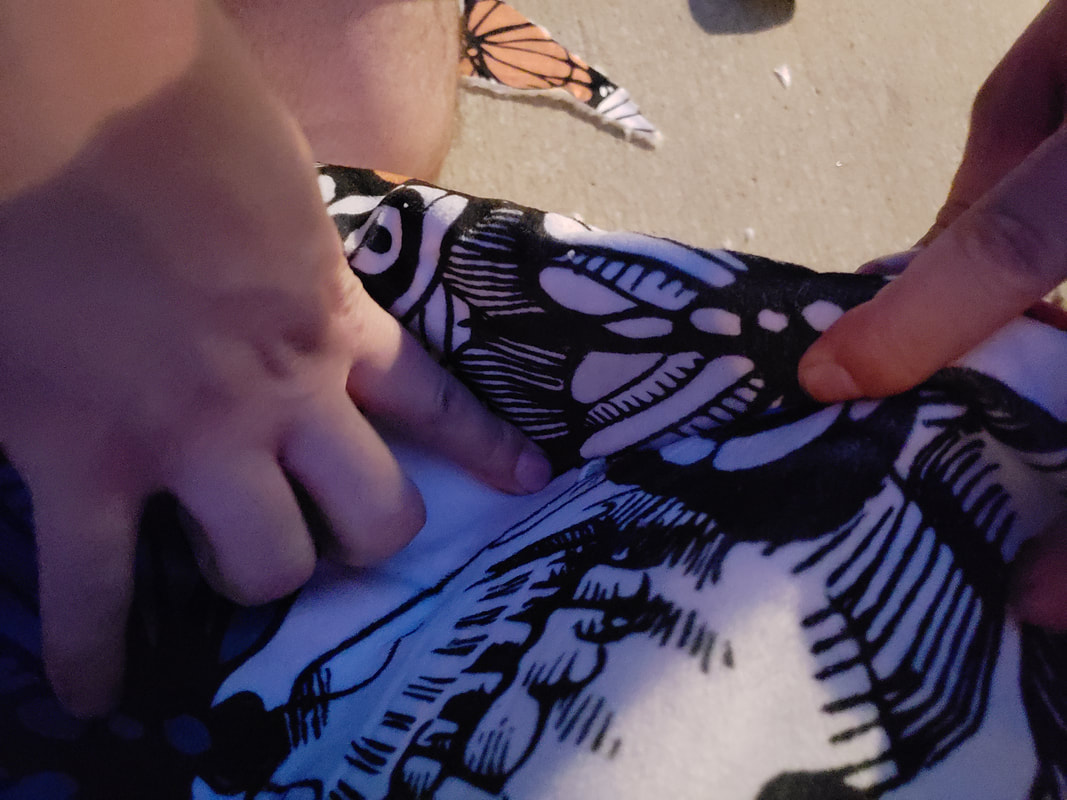 When we were done we used our X-ACTO Knives to cut the excess off the sides of the stairs. And then the next day I took my hot glue gun and attached the fabric in smooth folds so that the stairwell is neat and tidy. Then using some black paint I touched up any scratches in the spray paint that may have occurred while we were applying the fabric. 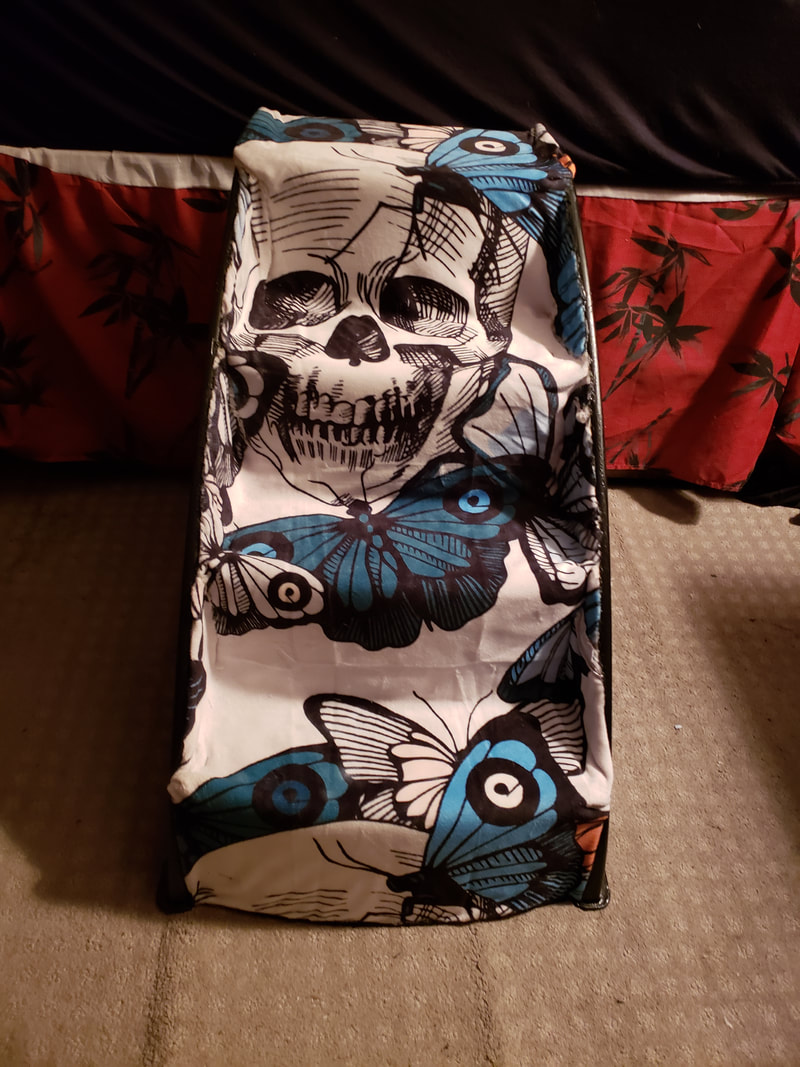 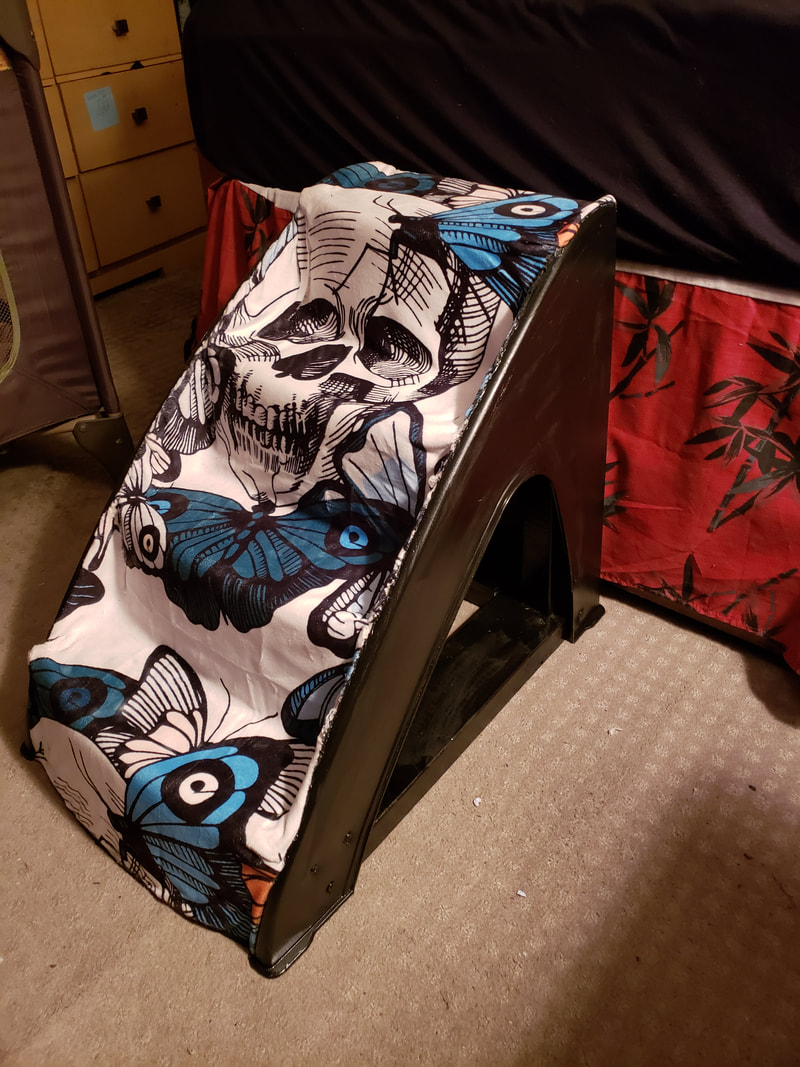 And there you go, not only does this make a fabulous room accent, but it's safer for your pets too.
0 Comments
Every year on my oldest dog's birthday we do a birthday photo shoot. He is such a well behaved boy AND he knows that he's guaranteed some treats for putting up with his mommy's photography. This year our photo theme was camping! I sewed him a bunch of camping props, but really wanted to push it a step further. YOU WILL NEED:
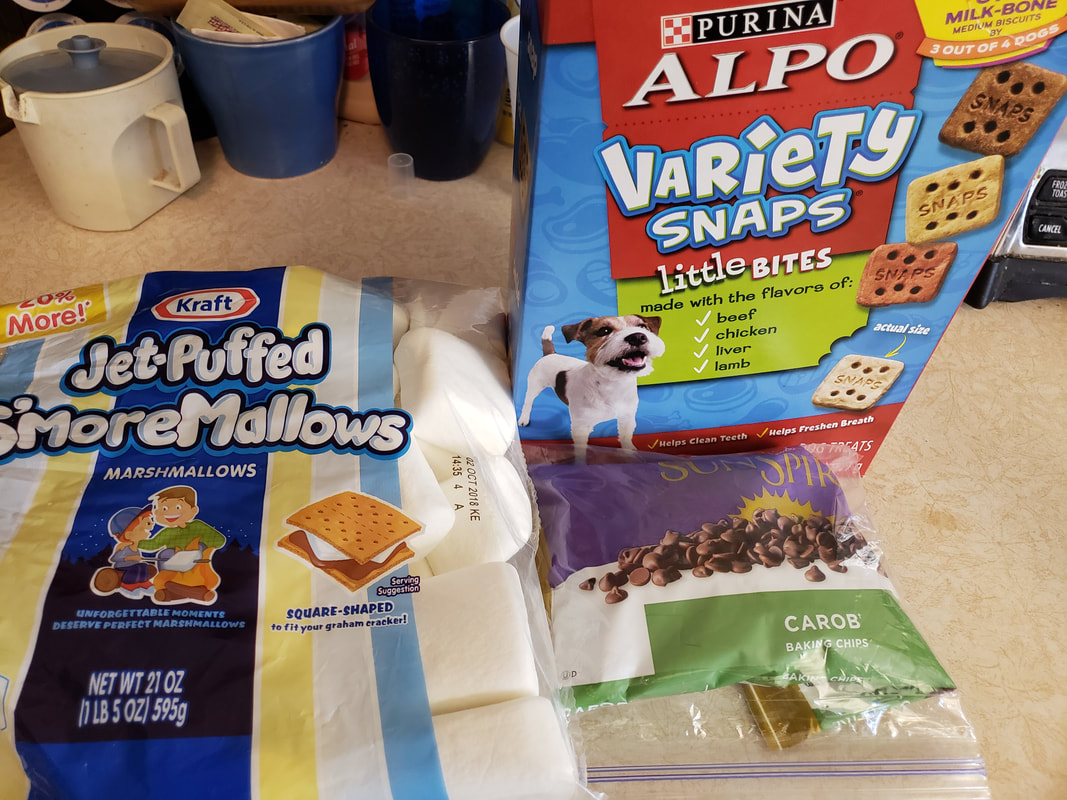 The beautiful thing about this is that it's sooo simple. Dogs can have marshmallows, though this isn't something I would do very often. (My dogs never get people food unless it's veggies so I really do stress rarely giving them people sweets.) I made one for each dog in the house, and each one got one as a treat. And Carob chips are a safe chocolate substitute that can be given to your pups. Simply melt your marshmallow in the microwave, till it's gooey. OR you could just use marshmallow fluff. That idea didn't cross my mind until I was already in the melting process. Once your marshmallows are melted down, twist your treat into the mix and remove. 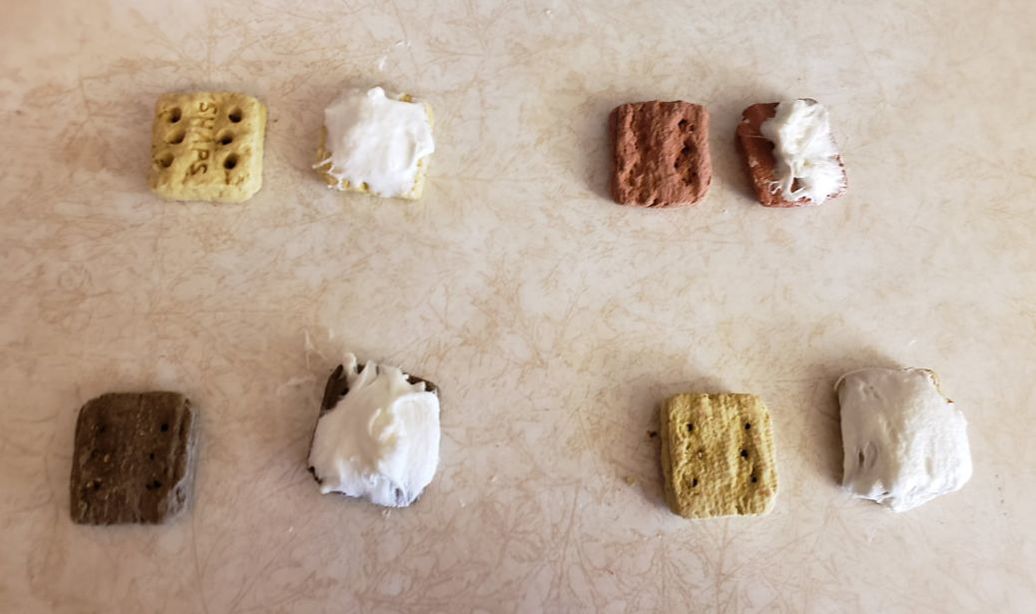 Now, melt your carob chips. I recommend melting a few at a time. And just like with chocolate you're going to want to melt for a few seconds at a time and then mix and repeat until it is the proper consistency. Then repeat the dip and twist with the carob mix. 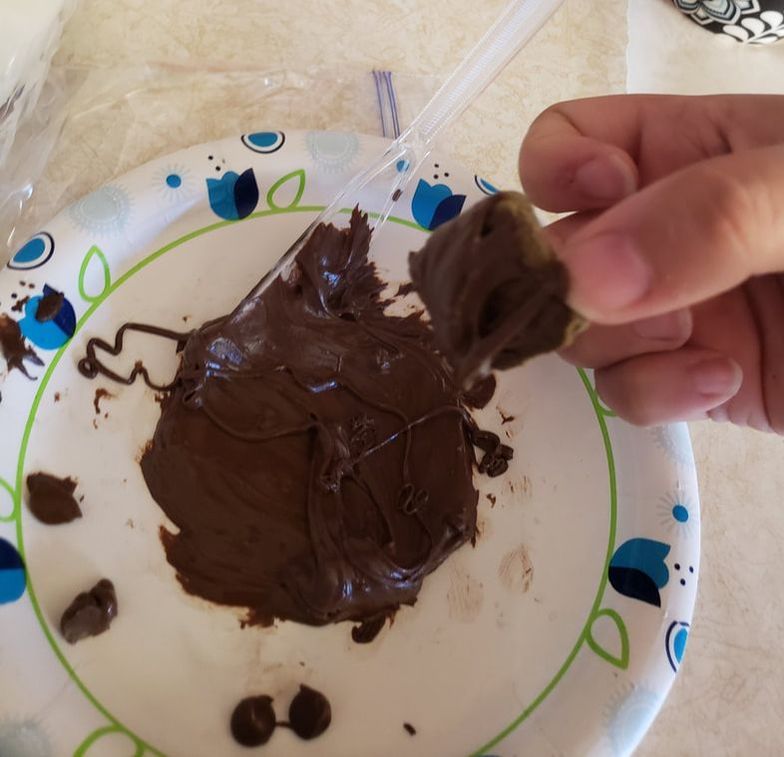 Then, like you would with any other S'more, simply place the two ends of the treat together to make your puppy S'mores complete. 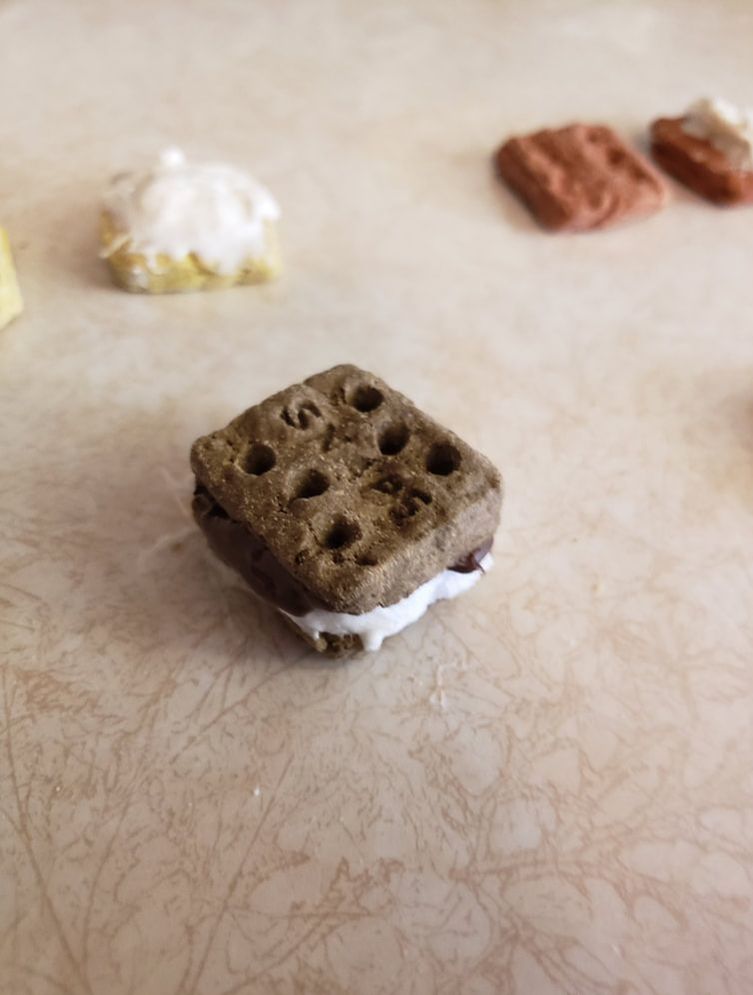 And finally, give your babies a special surprise. My dogs generally get organic and healthy treats and really only for certain things. It's too easy to overfeed a dog or miss-feed them. So again, make these for a special occasion, not an everyday thing. 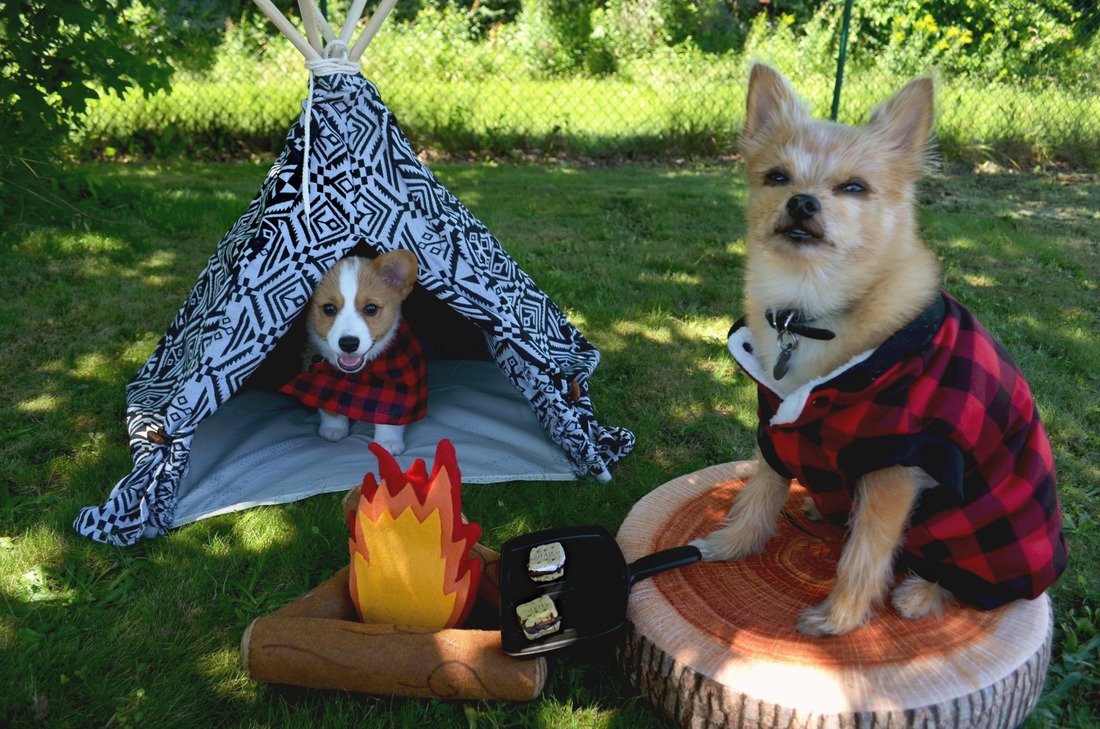 I know, this is a strange pet to keep. I however, have a long history of keeping 'bugs' for pets. So when Lorcan (little wild one) came into my life I didn't hesitate to keep him. Back story here: my roommate works in a factory and they get these random crates shipped in for projects, and in one of these crates there were DOZENS of snail shells. Being that I collect shells my roommate brought one home for me. He left this shell in his pocket for 24 before giving it to me. AND I should also mention that they do not know where these crates came from or how long they had been in their factory! Anyways, he gives me this shell, and I tell him I think it's still alive. I set it in a potted plant and within 20 minutes this "dead" shell had moved from the soil to hanging from a plant leaf. I quickly identified him as a Grove Snail and found that while some are in the US they are native to the UK. With that information we made the decision not to release him into the wild and to keep him as a pet (which is common in the UK). Lorcan has been a member of our family for almost a year now. I've kept him alive, AND HE'S GROWN, so I decided a bigger, better, home was in order. Snails can live for 3 to 15 years so I don't know how long we'll have Lorcan for, but I would definitely own snails again. They're a super fun pet with minimal care. And I'd be happy to give you more information if anyone's interested. But for now, I'm going to show you how to set up a snail home. Kids especially love to keep bugs as pets so if you have any little ones you do nature science projects with, they will love to watch their 'slimy' friends in these little homes. Though, for good reason, I stress that parents be active in the handling of such small creatures. YOU WILL NEED:
Let's start with Lorcan's current home. Since he wasn't planned and I didn't even know if he was going to survive/if I would do an adequate job taking care of him, I got a quick cheap home for him. A $5 Betta tank I got at walmart. It's not huge, but he's only one snail so it gave him a decent amount of space. 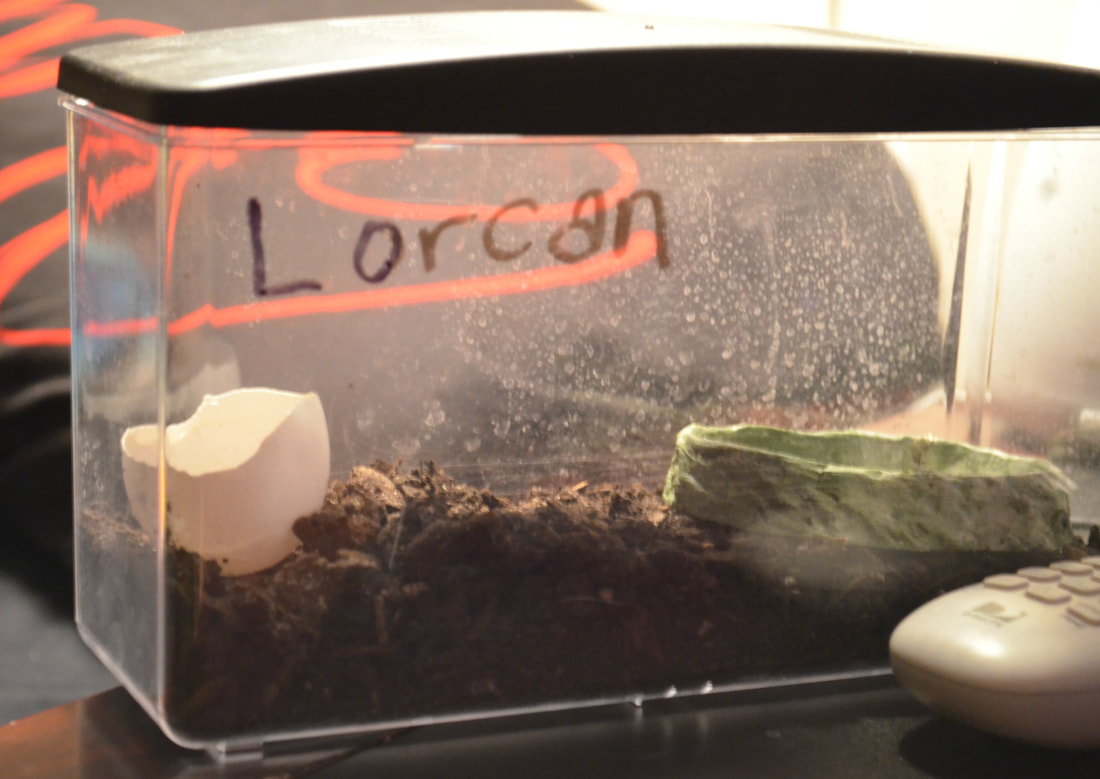 As an upgrade I bought him a MEDIUM sized Kritter Keeper, these boxes are amazing because they can be used for any number of small animals. There was actually a mix up the first time and they sent me an XL Kritter Keeper, it was so big my Yorkie-Pom could fit in it, lol! https://www.amazon.com/gp/product/B0002APZOE/ref=oh_aui_detailpage_o00_s00?ie=UTF8&psc=1 Once you get your container I recommend wiping it down, same with any decorations you may have bought. You never know what chemicals could be lingering on these items and they could be harmful to your pets. Then start filling the bottom with NON-PESTICIDE Soil. I really emphasize this because to most gardening centers your pet is considered a pest. If you fill it's container with pesticide soil, you're literally killing him. Quick note on snails, they burrow in the dirt. So if you put a LOT of soil in there, be prepared to search for your snail when you can't find him anywhere else. Also snails lay their eggs in dirt so you need to clean their soil regularly if you don't want hundreds of baby snails popping up. I'll also mention for those familiar with the birds and the bees that MOST snails are hermaphrodites so they don't need a partner to lay eggs. In the 9 months (I wrote this back in February) we've had Lorcan he's never laid eggs, so who knows when or if that will ever happen. I also made sure to put enough soil in his new container that I could put in some live plants. This is good for him for a healthy ecosystem, he can climb on them and he can eat them- though so far no eating has occurred. But make sure you look into what plants are toxic to your snail! Spider Plants are safe both to live around and to eat. At the time that I got him I only had one spider plant and it wasn't blooming, so I didn't want to risk him eating it. However my spider plant is booming with new plants and so if Lorcan does eat the plants in his home, I can always plant new ones. It's the circle of life and I feel good about that. And my plants are planted in the non-pesticide soil.  This is the soil I currently use.  You don't need to plant them super deep, just enough that they can take hold. Spider Plants are also ideal because they need a minimal amount of water. You don't want to OVER water your soil as this is bad for your snail. While you are likely to find him climbing to the top of his container (snails really like to climb), I also mentioned he will burrow. Snails, slugs, worms, and other creatures tend to come out of the dirt after it's rained, this is, to over simplify it, so that they don't drown. Which brings me to their water bowl. They will need one of these but you have to be aware that you can only fill it so much. They can drown in their water bowls! I put the minimal amount in there and just add more everyday as it is likely to evaporate. 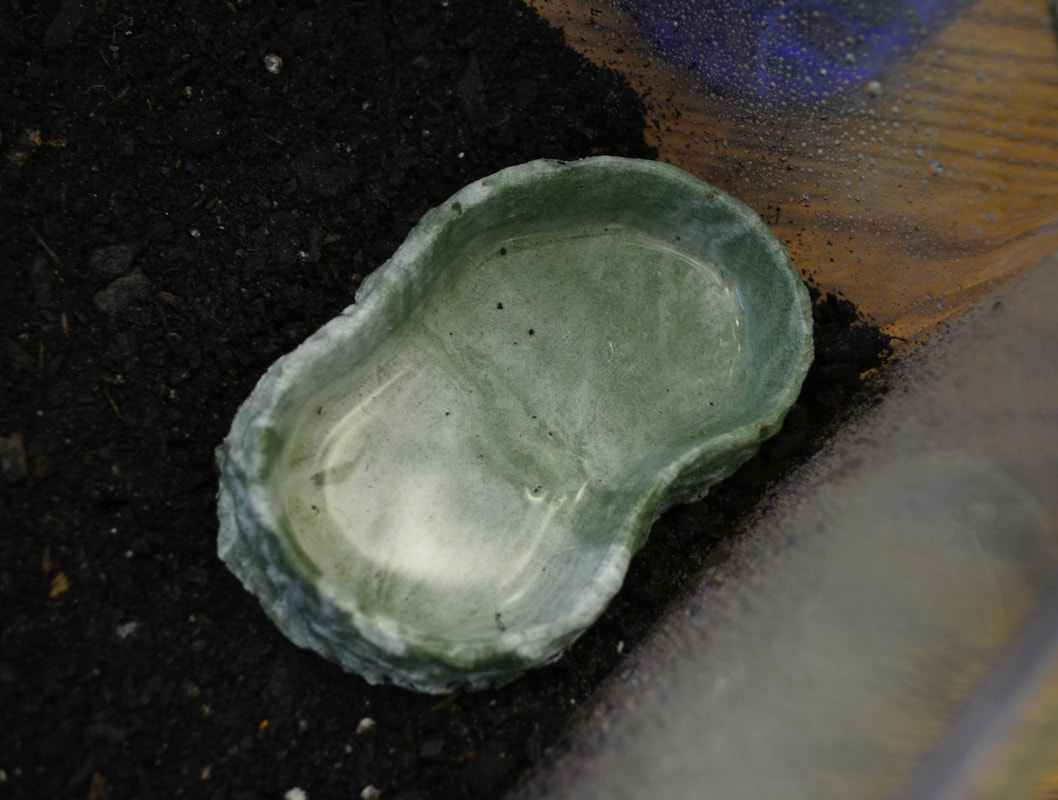 Finally you can put things in there for your snail to climb on. They should be smooth surfaces so that they aren't hurting themselves. And as snails like damp dark places, a climbing log may be just the thing for them. 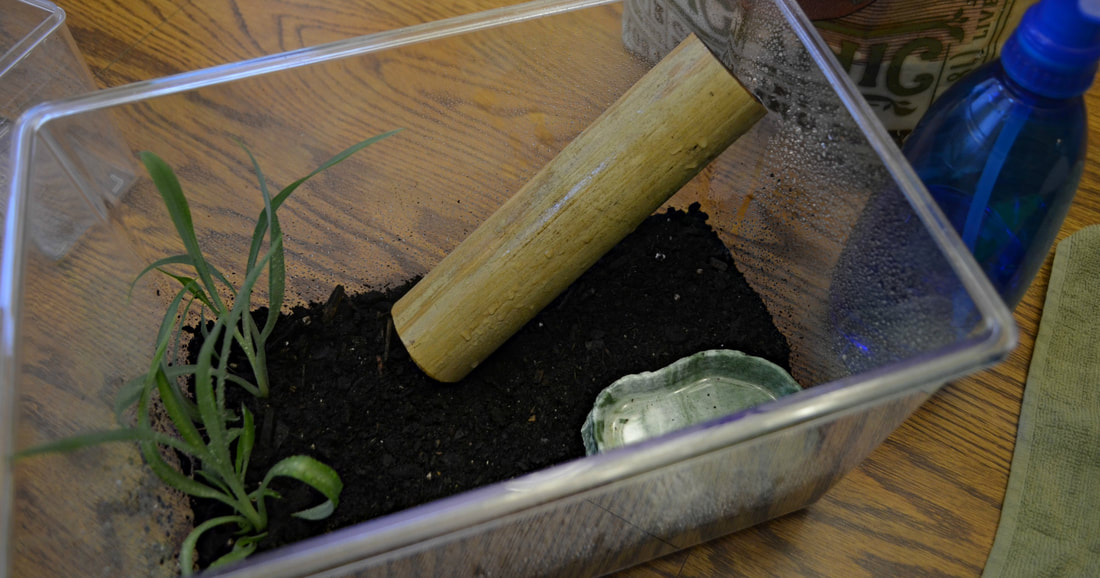 A lot of snail owners suggest putting a cuttlebone in there for the calcium. Mine seems to avoid it at all costs. But he gets lots of calcium through the egg shells I give him, so I'm not too worried about that. Just be ware that you should make sure your snail is getting the calcium it needs to keep it's shell strong. In case anyone out there didn't know this, their shells are attached to them the same way turtle shells are a part of them. If their shell is crushed or ripped from their body, they will die. THIS is why I emphasize parents being present with your kids and their pet snails. Until they are older and can properly hold them and be aware of the real life and death consequences of mishandling their shells. I will include a link to the UK snail owner site where I have learned most of my information from since getting Lorcan. You should also have a spray bottle for misting their container down. Just simple water, but the moisture is important. I also plan on getting moss for sections of his soil, it's supposed to help it retain it's moisture and be good for your snails environment. But for now, here's some photos of my snail enjoying his new home. 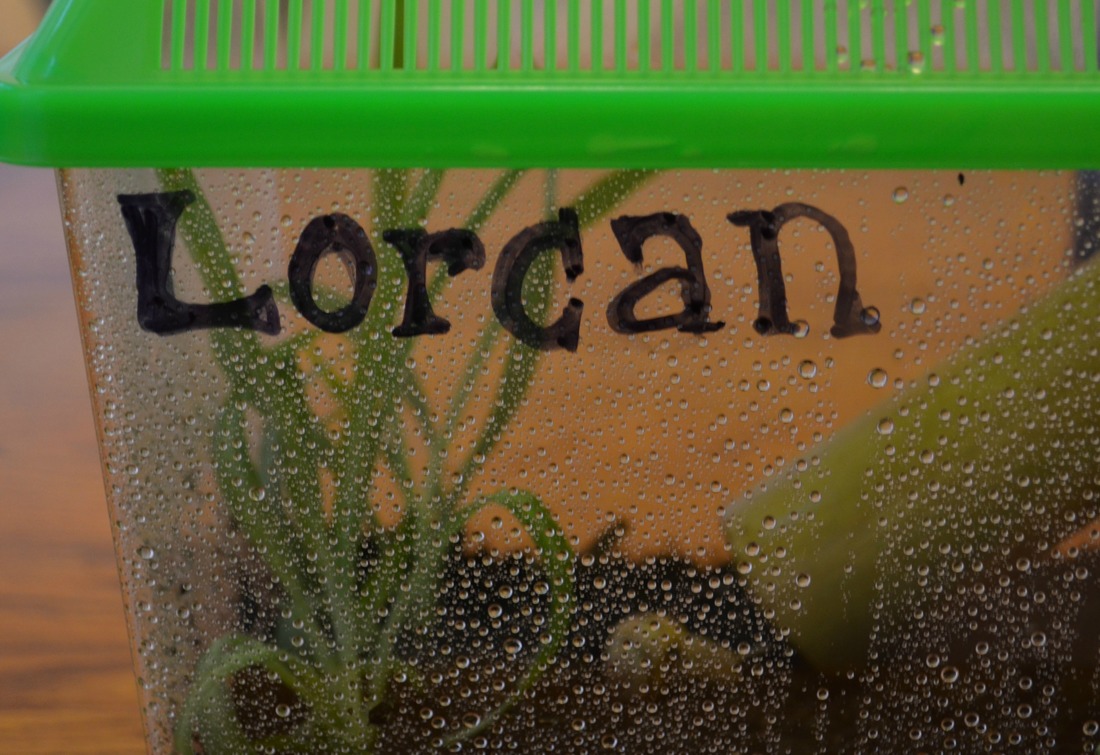 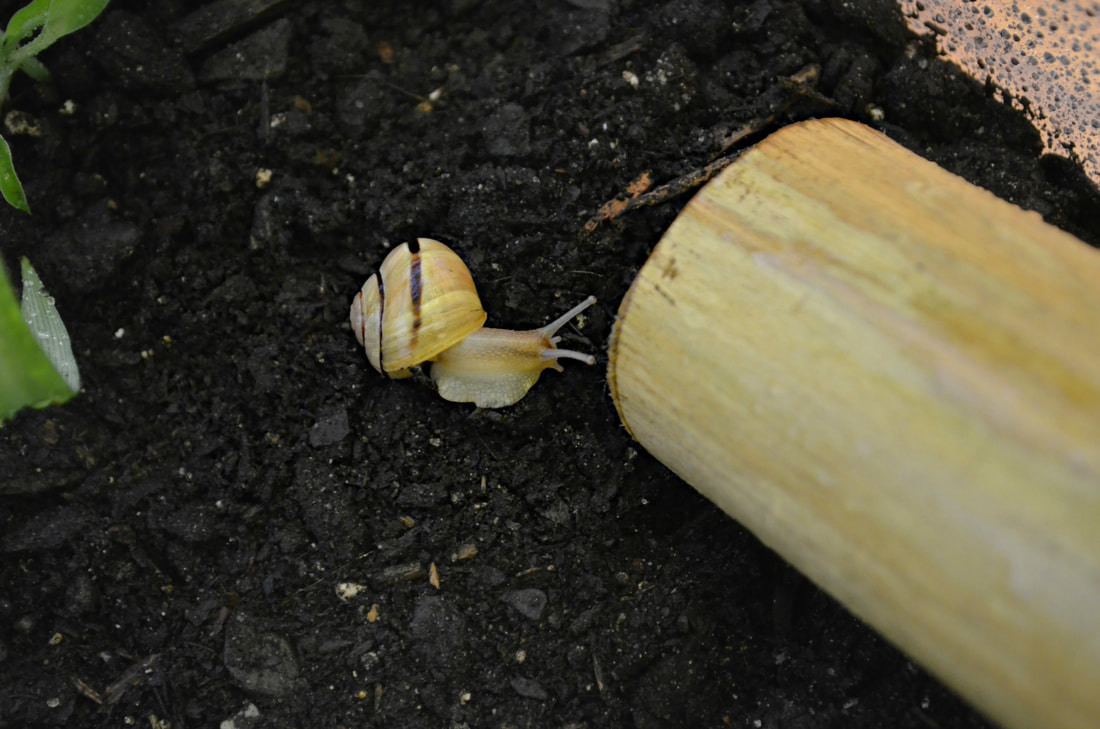 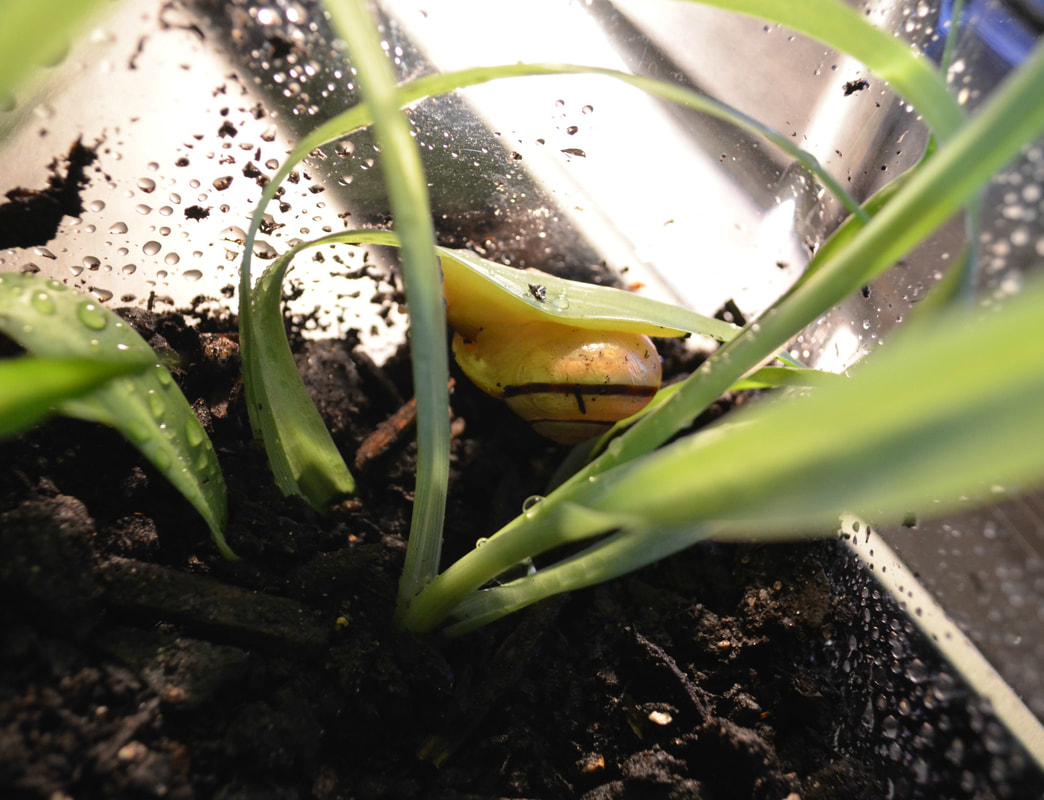 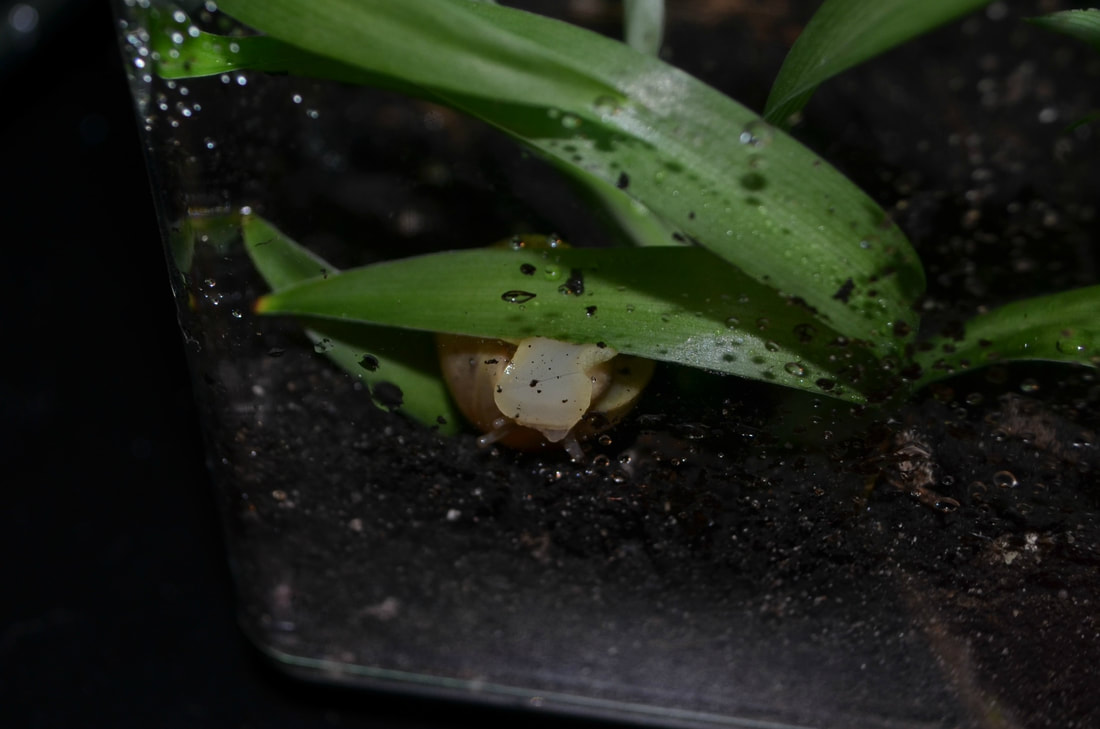  http://www.petsnails.co.uk/
|
By the way the cutie pictured above is Albion my Yorkie-Pom.
Pets!Alright, we all know that we LOVE our fur babies. And over the years I have had the pleasure to be a fur mommy, and a mommy to turtles, reptiles, and other animals. (And this isn't likely to slow down as my husband and I adore animals.) I've wanted to make a page dedicated to pet projects but at the time that this craft blog really got started we lost our turtle very suddenly and I was too heart broken to make any animal related posts. I think I'm ready to write about my animal babies again and I can't wait to share them with ya'll! ArchivesCategories |
 RSS Feed
