|
A few people know that I actually studied photography during college. I've always had a passion for photography and while I no longer want to pursue it for a career, it is very much a part of my daily life. Especially with this blog site! When it comes to photographing small items a Light-box would be very helpful. Now, you can get light-boxes for relatively cheap but the better quality ones tend to be $100 or more. I would love to get myself even a $40 one to see how it improves things! BUT I'm a newly wed chasing a writing dream and budgeting as best I can. Things like that are not in my current budget. You know what is? Nothing. SERIOUSLY, I made this for absolutely nothing. I had all the pieces already around my house! I'll try and place a value on certain items though, so you know what this could cost you. You will need:
To start with you'll need a cardboard box you're fine with sacrificing. Why didn't I have to spend any money on this? It's right after Christmas! I know this is going up late BUT easter's around the corner so keep an eye out for boxes! But, yea, I just went through the recycling and picked the box I thought would best meet my needs. 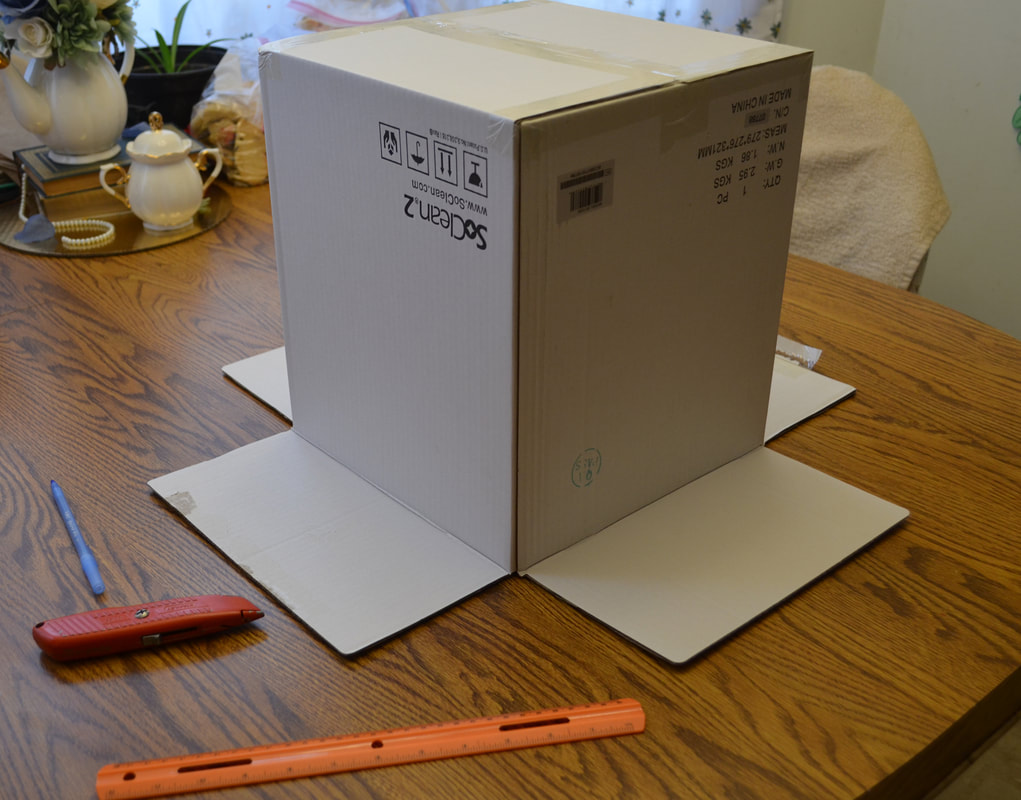 Now, you're going to decide how thick you want your borders. Remember that cardboard is relatively fragile and when you cut out the centers of the box sides, they are going to lose some of their strength and bend. I made mine relatively thin to give the most amount of space to the white tissue paper. The only spot where mine really started to bend was the top (I'll get to that).  It's hard to see but there's my drawn lines on the box. ^ This particular side only has three lines drawn. This is going to be the entrance where your items will be set to get photographed. So you're going to cut straight down and make this an open side.  You're going to start cutting out your sides. My husband actually came out and took over the cutting for me, which was adorably sweet of him.  When all your sides are cut out, hopefully all your sides will be flat. However, if you have some that bend, this is how I fixed it.   I look a bamboo skewer, something I had from a previous project, and hot glued it on the inside of the cardboard box where the frame is bending. This will work for any part of your frame that you feel is too thin or is bending. NOW, if you got that taken care of, or got lucky and didn't have any parts of it bend to begin with, your next step is to take your bare frame and get ready to glue tissue paper to the sides.   I found it easier to hot glue the outer boarder of the frame and then place it on the tissue paper. I then cut the excess off and folded and glued any remaining to the box. If you have an easier way to go about this then please do it that way! I only did a single layer of tissue paper on the outside. The nice thing is that I can add extra layers to this as I please. For now it's working for me, but I do think I might add another layer on the INSIDE of the box. I've seen various ones where people lined the entire inside without white and others where they only lined the outside of the box frame. In the supply list I told you you're going to need a sheet of white cardstock. Now, I actually used white poster board, and cut a rectangle piece that would fit the inside of the box. You want it to curve up and back out of the box as seen in the photo below.  Now, have I noticed a difference in photos? Yes and no. There are some items that I think I overall preferred without the light box but I was able to use it for chocolate melts and other items I have in upcoming posts. But below are two side my side photos where you can clearly see the difference between light-box versus no light-box.
This cost me nothing as I said, but if you were needing to purchase any of the items this is what I could come up with. The cardboard box would cost you: about $5 (https://www.staples.com/12-l-x-12-w-x-12-h-shipping-boxes-32-ect-brown-5-bundle/product_210898) The tissue paper would cost: $1 if you got to a dollar tree. (https://www.dollartree.com/Classic-White-Tissue-Paper/p11216/index.pro) The poster board is 80 cents at Michaels. (http://www.michaels.com/white-poster-board-by-creatology/10040622.html#q=poster+board&start=6) And if you want to use the Bamboo Skewer you can also get those at Michaels for $2.19 (http://www.michaels.com/bamboo-skewers-100ct/D019038S.html#q=bamboo+skewers&start=1) I'm posting these prices while assuming that you have a hot glue gun and a way to cut cardboard. I don't think I need to price check those for you.. BUT Michaels will also have those, lol. Anyways, I hope this was useful for someone out there and I look forward to seeing how you guys use your light boxes!
0 Comments
Leave a Reply. |
Crafty Things?This is a page dedicated to DIY's and miscellaneous projects. Archives
April 2018
Categories |


 RSS Feed
