|
The wedding is over and now you have to decide what to keep, what to sell, what to give away, etc. And the bar sign may be one of the easiest things you can part with. I mean it's just a silly sign. We paid $6 for ours so I wasn't really thinking about what to sell it for... But then as I was putting things away I realized that we could frame our bar sign and create something beautiful! YOU WILL NEED:
 First thing you do is measure your sign and add additional space on each side of it. In our case our bar sign is 17x23 and we bought a 24x30 size frame. We knew we were having a bunch of 4x6 photos printed so we knew this would be enough extra space. 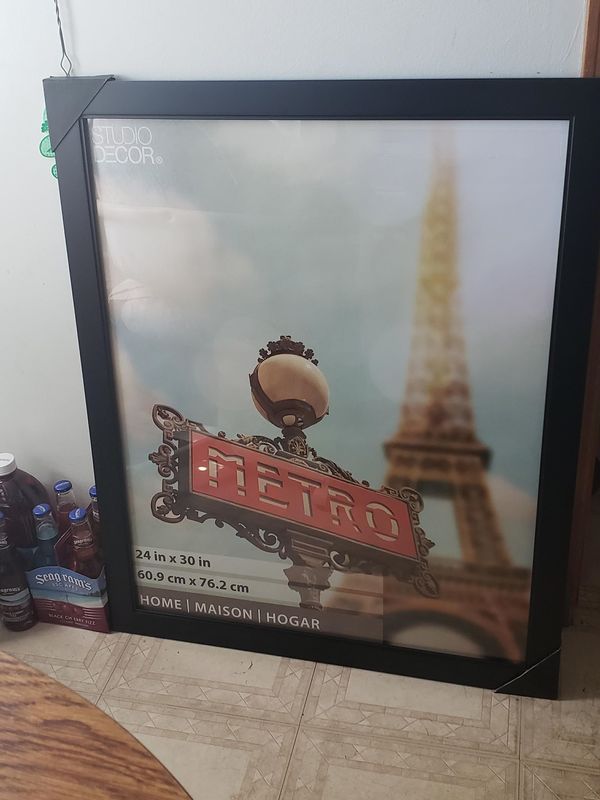 In case anyone didn't know, I actually worked at Michaels for 4 years, so I can let you in a little 'secret'. More often than not we ended up with these giant frames broken off the truck. The glass is very fragile so please be careful and keep it flat while you're working with the backboard. Now taking the backing off the frame, set your sign in the center of it. Then, taking a pencil mark where the corners sit.  Next I used Velcro to keep the sign in place. A sign like this would not be held down by basic glue or tape, but velcro will help keep it flat and in place. 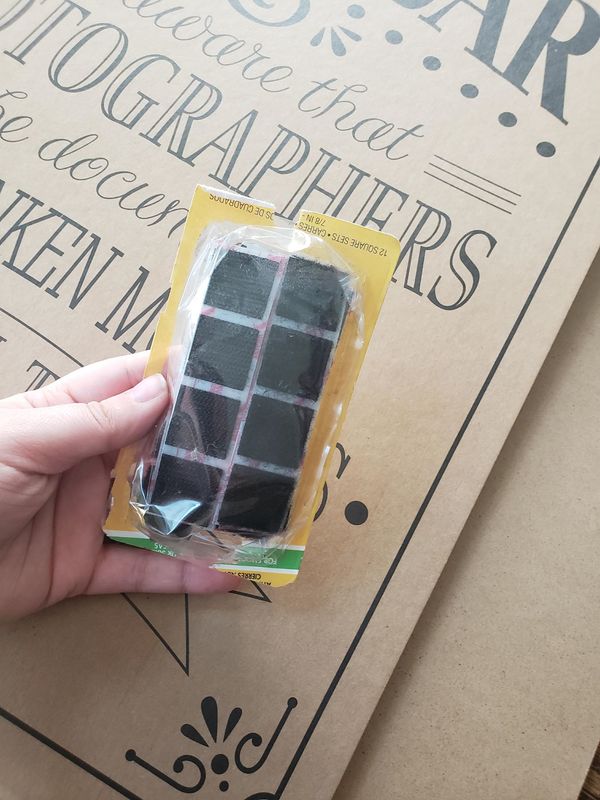 Once my sign was set I took my 4x6 photos and laid them out. Some of them I knew right away I was going to cut out the person in the photo, while others were just going to need trimmed down to fit the frame. 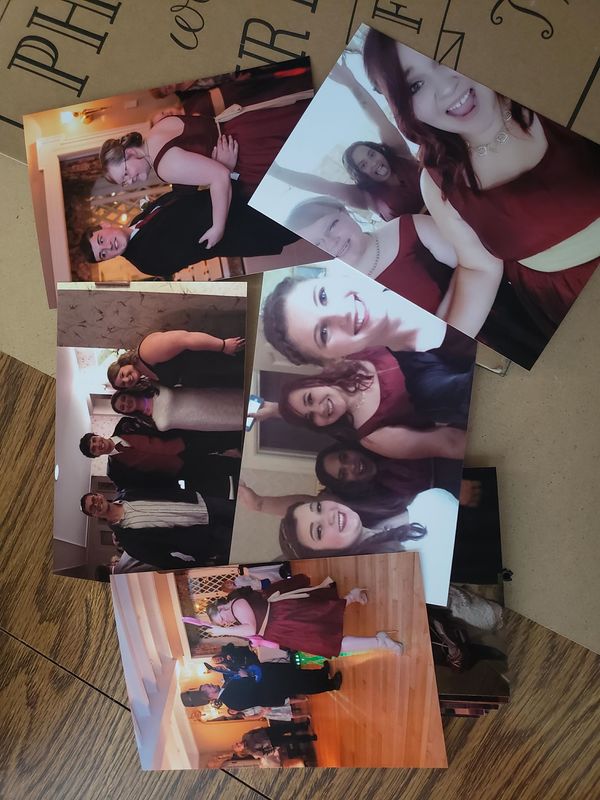 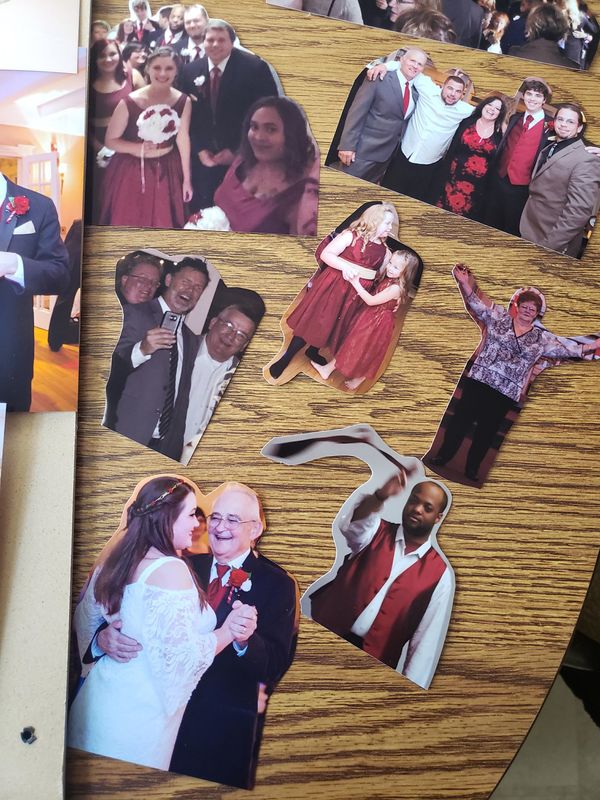 I laid out the photos, trimmed as I needed to, and fit them around the sign. 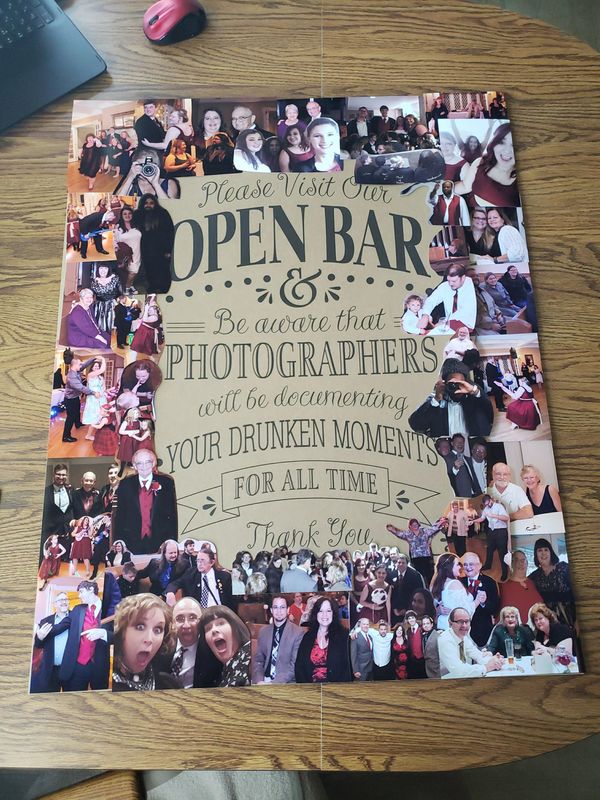 Once you're happy with this, use your glue dots to put them in place. These thick glue dots are nice because they add dimension to your photos. Also the whole thing is a sticky foam. So if you pop out all the circles just cut up the rest of the foam! 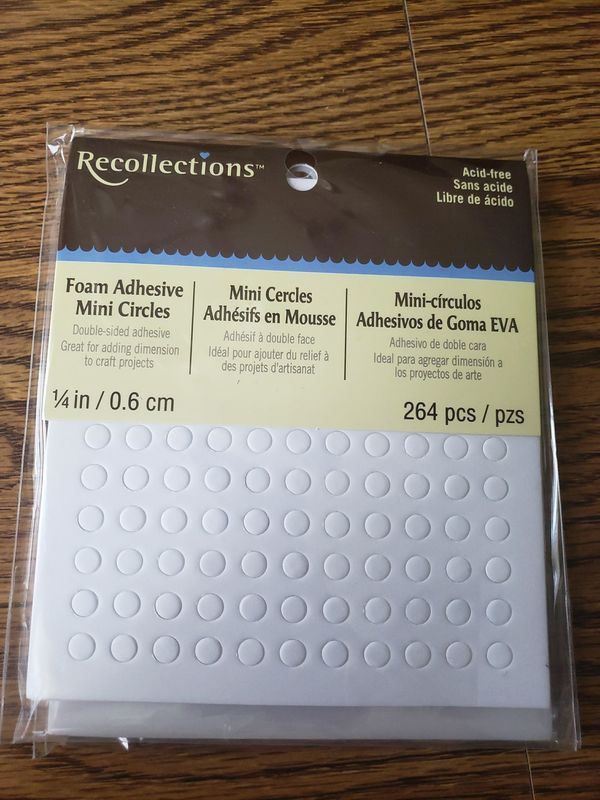 In the end I am so proud of how this turned out. I have never seen someone else do this, though I'm sure some other genius bride already has. And girl you're killing it! Such a great way to honor your guests and have them be just as much a part of your special memories as the photos of you and your husband are. Obviously some of the photos are from the church ceremony (no one was drinking there) and some of them are the kiddos partying (no one under 21 was drinking), but it's cute idea none-the-less. 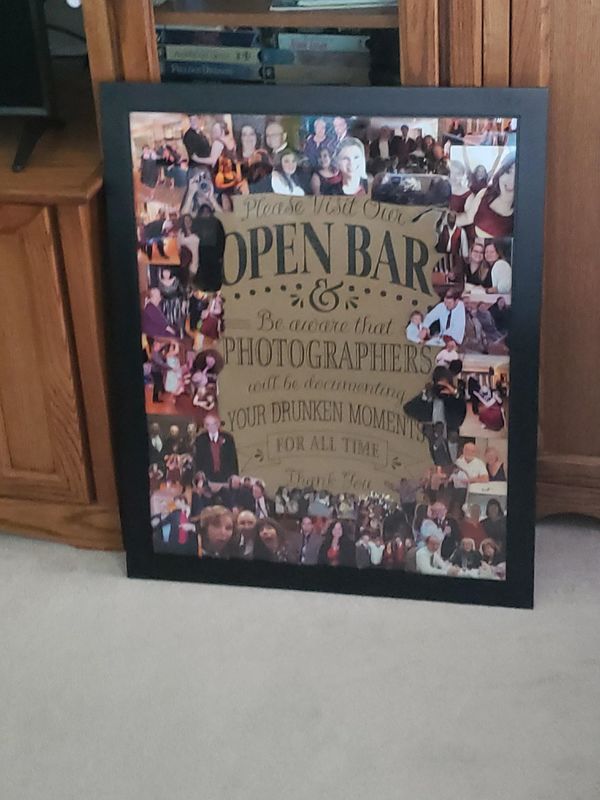
0 Comments
For our honeymoon we drove down to Florida. We did a bunch of sight seeing on the way down and did two days at Disney, a day at sea world, an air-boat ride, and a whole bunch of other cool stuff. But we saved the last two days in Florida for relaxing at the beaches. The second beach we went to was Clearwater Beach. Which was one of the nicest beaches I think I will ever see in my life. The sand is INSANELY soft, and there are shells EVERYWHERE. It was crazy. (It's also a sea turtle egg laying beach!) So from Daytona Beach and Clearwater we took photos, collected shells, and a little bit of sand in small bottles. This is my first project for preserving sand from our Honeymoon. And I actually made this for my mother-in-law for Mother's Day gift. During our first or second year of dating the in-laws went on Vacation and brought back a ton of shells. They used those shells to make me a special candle because they knew I liked to write by candlelight. It was so sweet and thoughtful! So now we're doing something for her using our beach memories. YOU WILL NEED:
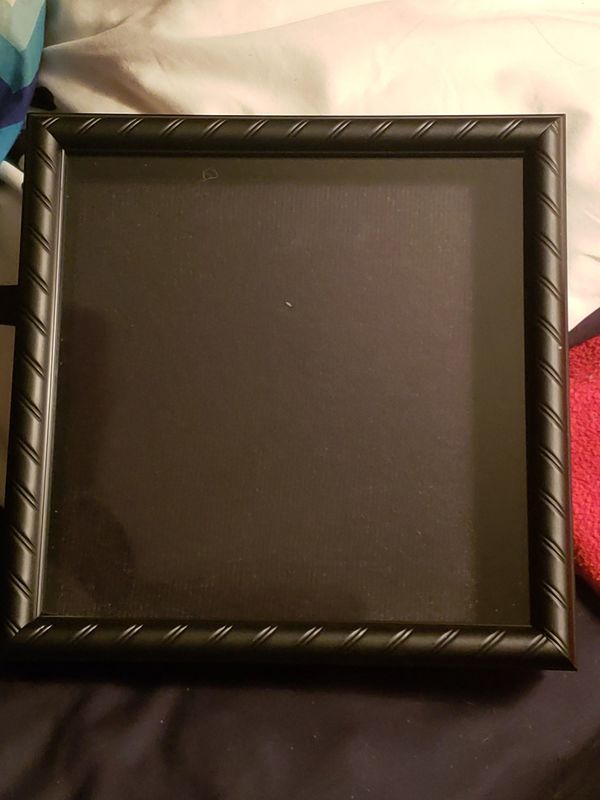 We got an 8x8 shadow box from Michaels for $6 (normally 12, remember sales and coupons are ALWAYS a thing at Michaels). I selected a bunch of shells (that would fit in the shadow box) from our day at Clearwater. 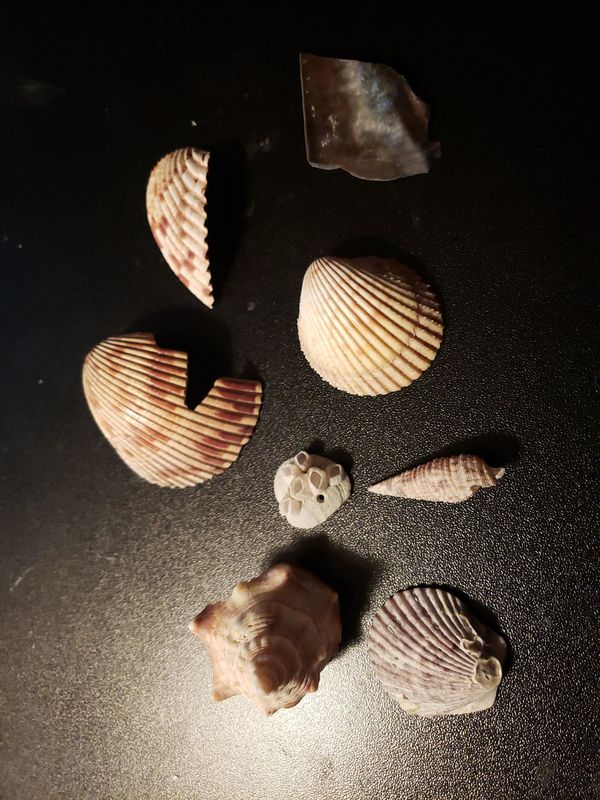 Taking the back off the shadow box you can set the shells in the bottom to decide how you want them lined up. Once you're happy with them hot glue them into place. 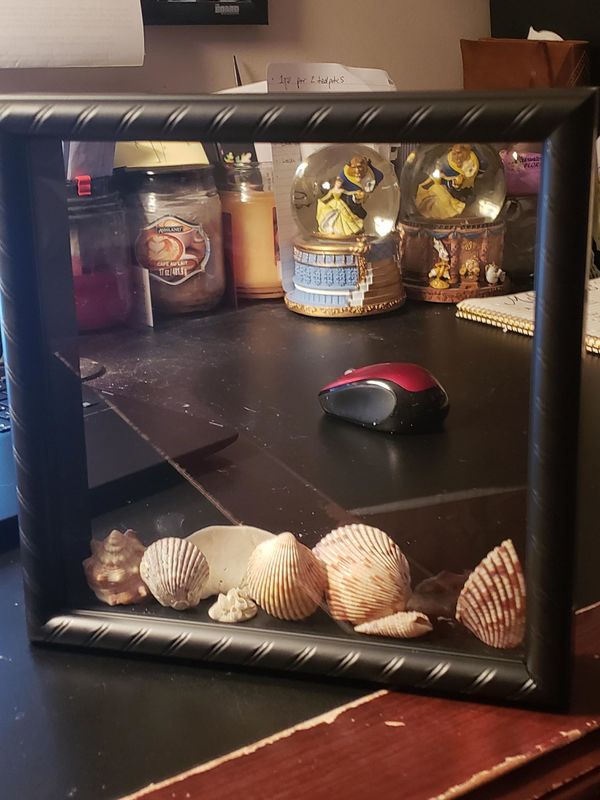 I used some sticky tack and hot glue to prop the one shell up. 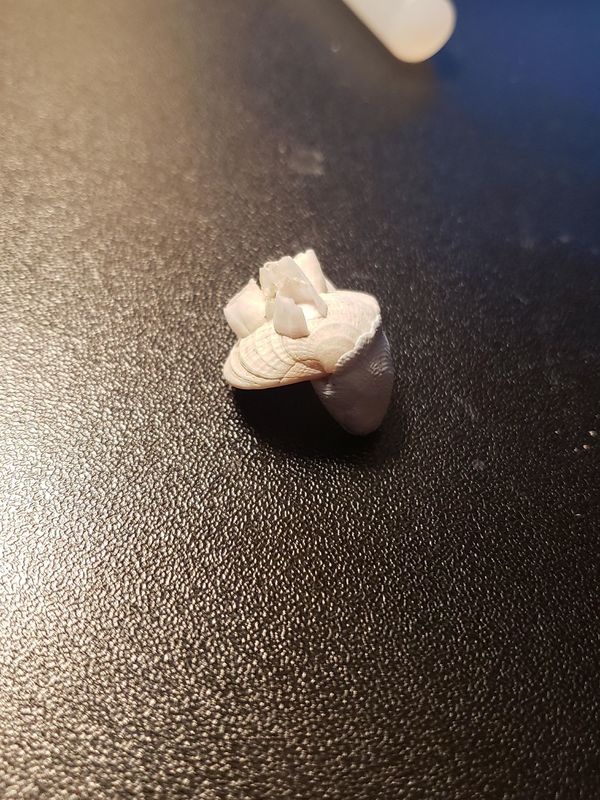 Once everything is glued down and not moving, set your frame glass down, and pour some sand into the frame. Place the back on the frame and turn it to see if you need more or less sand. **SAND MAY LEAK OUT OF YOUR FRAME SO BE SURE YOU'RE DOING THIS WHERE IT CAN EASILY BE CLEANED UP.** 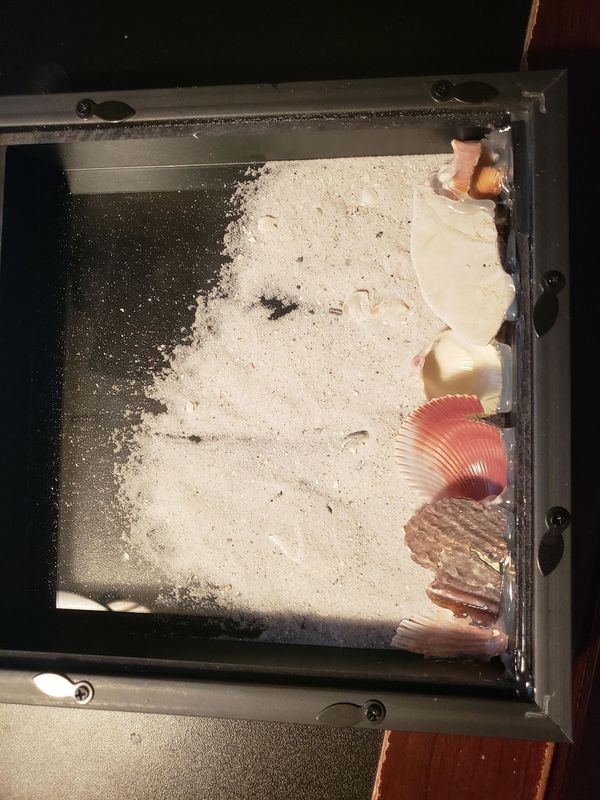 When you're content with the amount of sand you have, take your hot glue gun and glue AROUND the inner edge of the frame where your photo would lay. Also glue any slits in the wood where the sand would pour out. 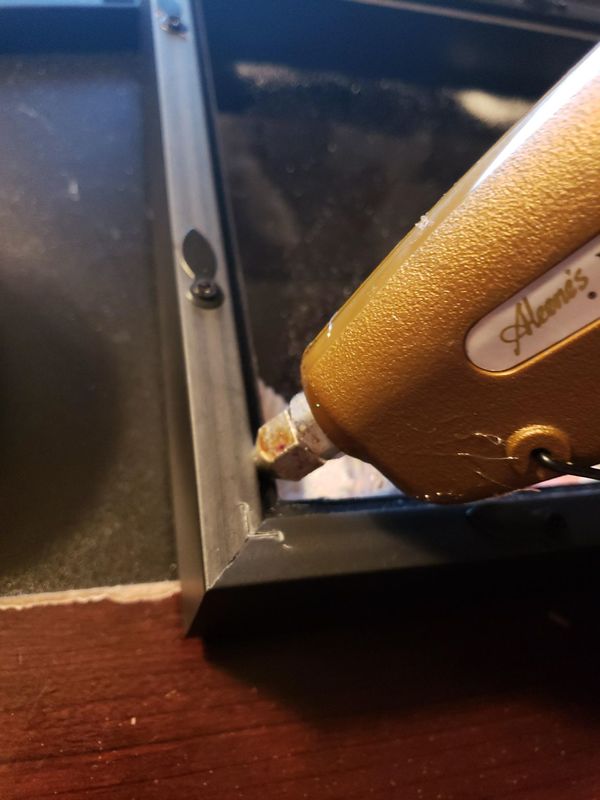 Place your photo in the frame over top of the hot glue. THEN glue around the edge of the photo on the back of the frame. You really want to make sure that sand isn't finding its way out. 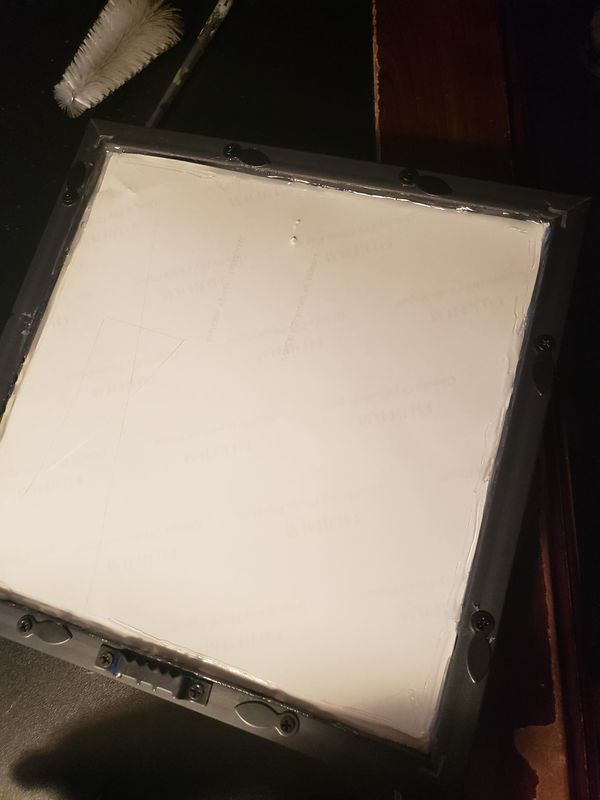 Put the back of the frame in place and you're good to go. I also hot glued the back to the frame. Three layers of hot glue should keep sand from leaking out but you know, sand's a tricky beast, lol. And I peeled the stickers off the back of the frame and dated/added the location of that day. 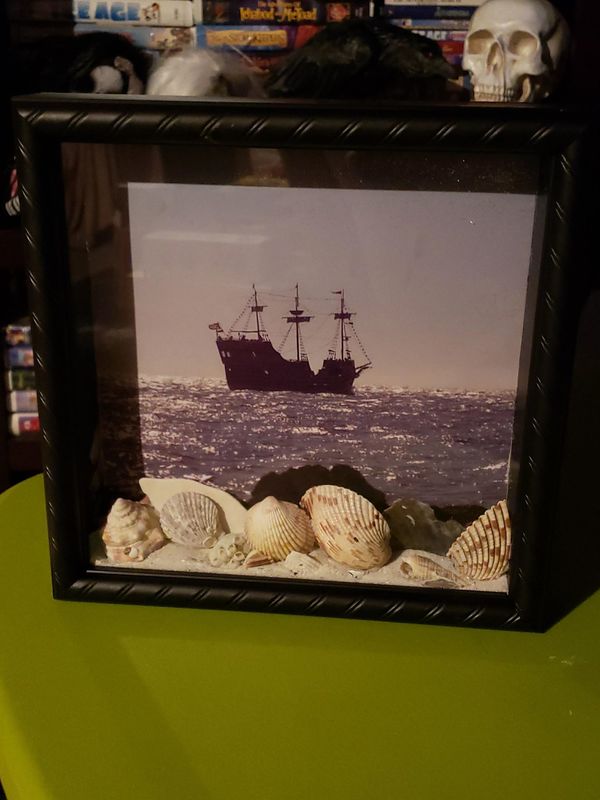 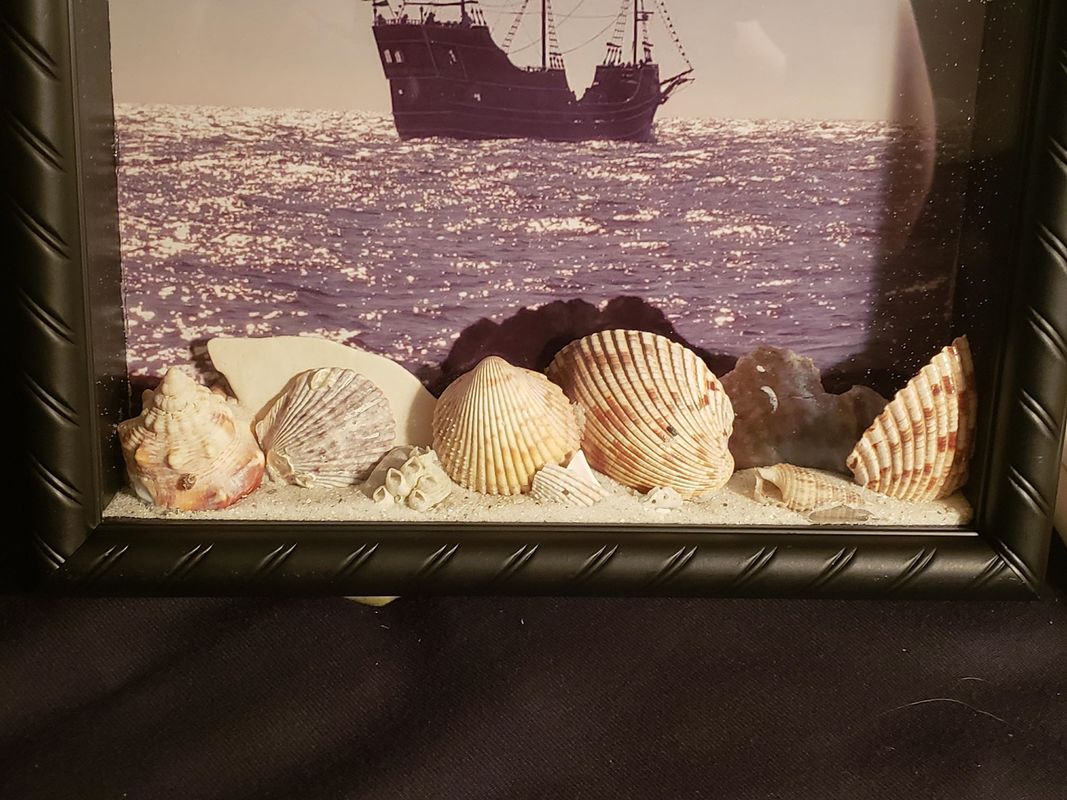 Once you've picked your dress and you're feeling like a princess, you're probably going to need some alterations done. Even if they're small, it's almost guaranteed. Be sure to ask your seamstress to save you scraps of your dress, especially any with lace. Your can then make these beautiful keepsake necklaces. You Will Need:
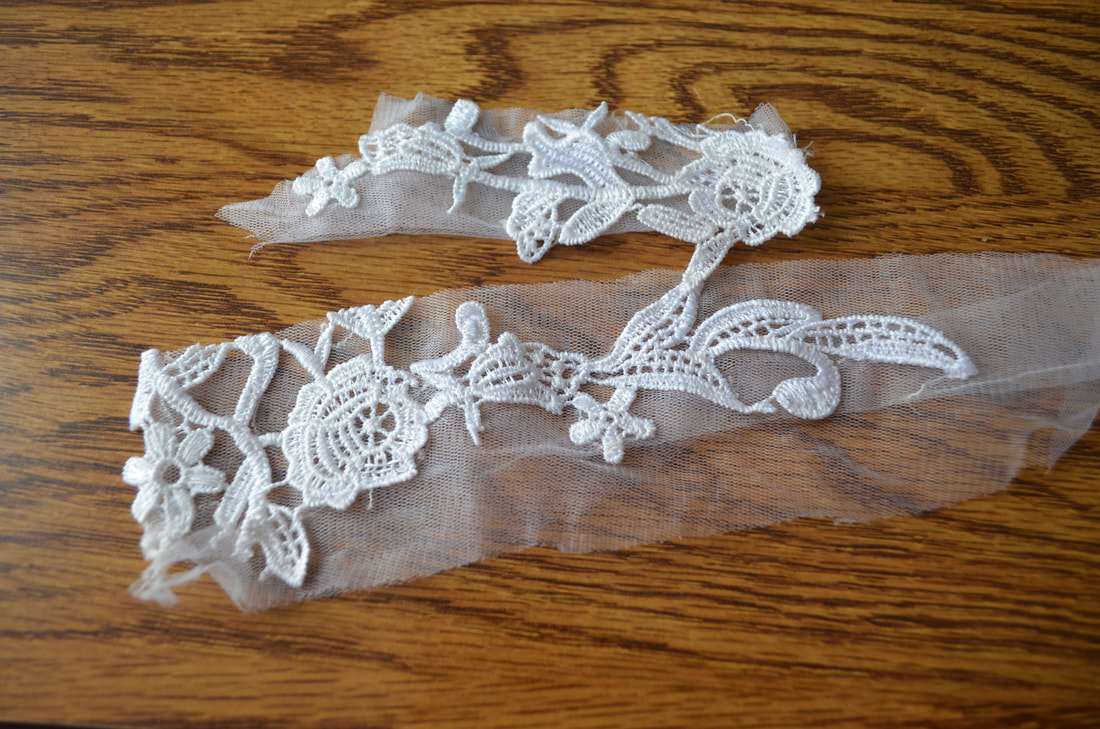 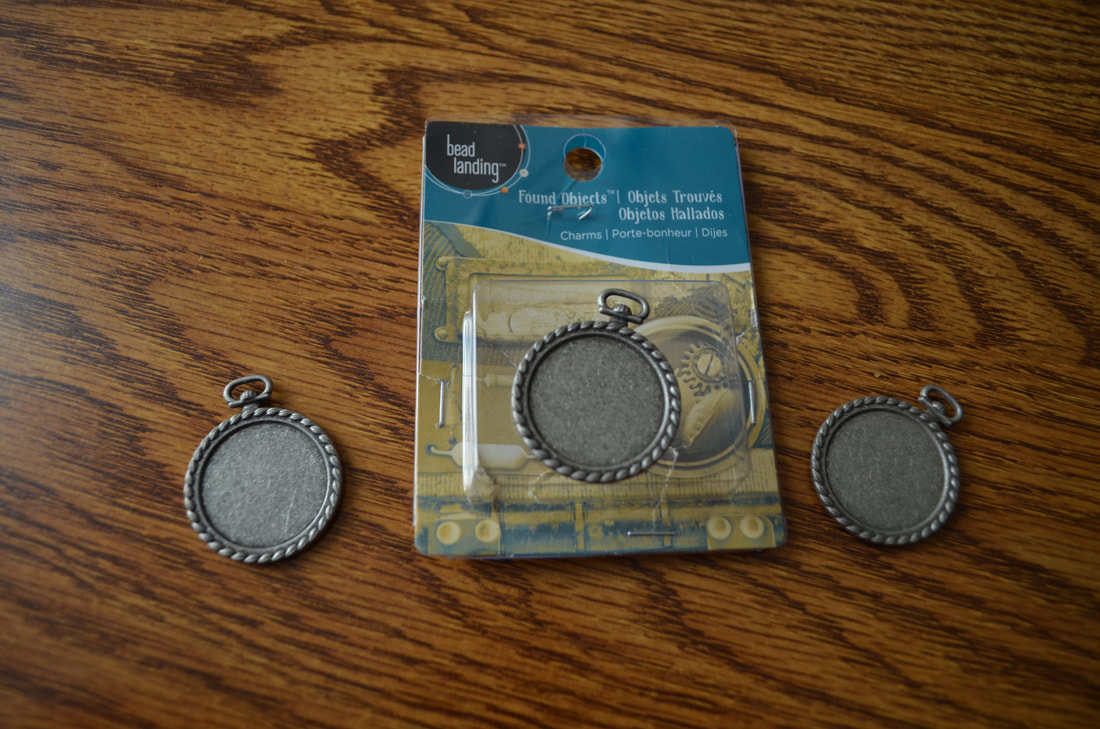 I did this two different ways. The first one was placing the fabric over the charm to see what part of the lace looked good. 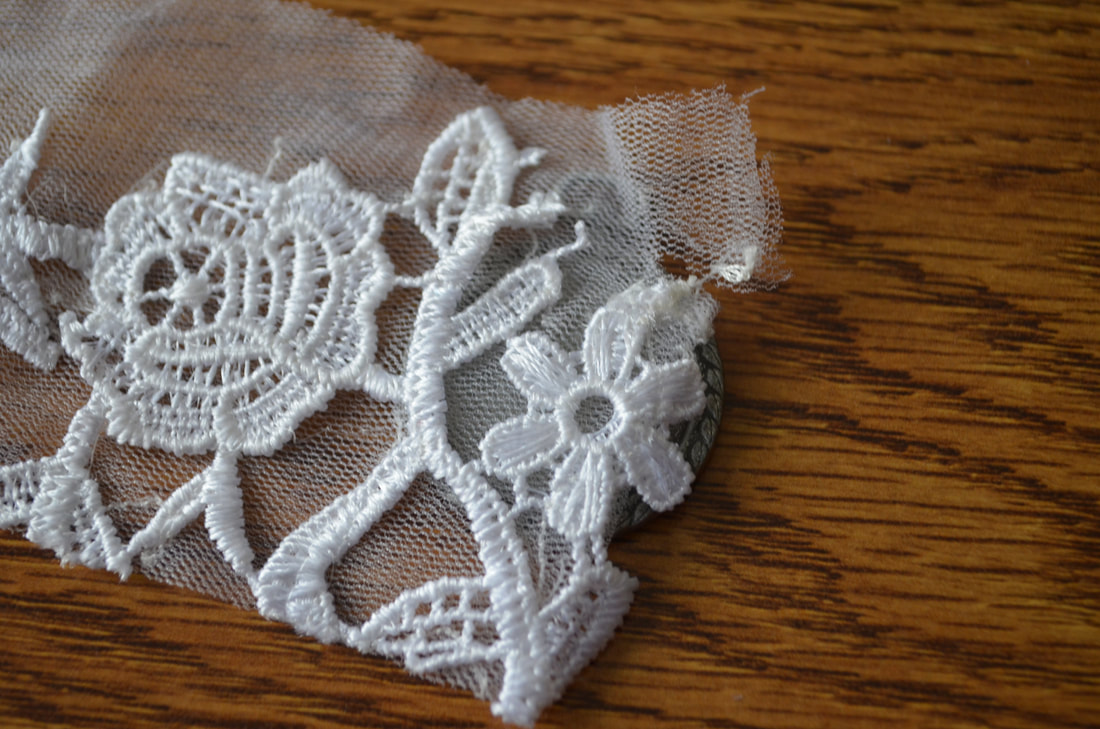 I cut it mostly to the shape of the charm, then applied the glue to the charm. Lightly tapping the fabric to the glue and then cutting it to the frame. 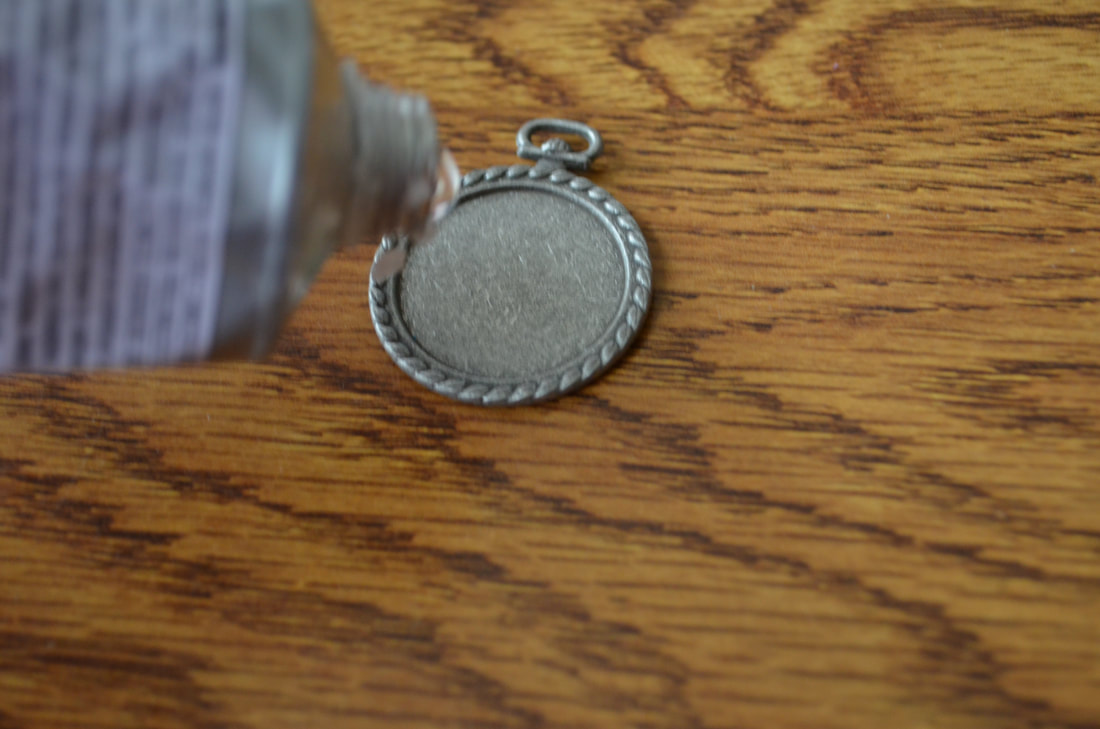 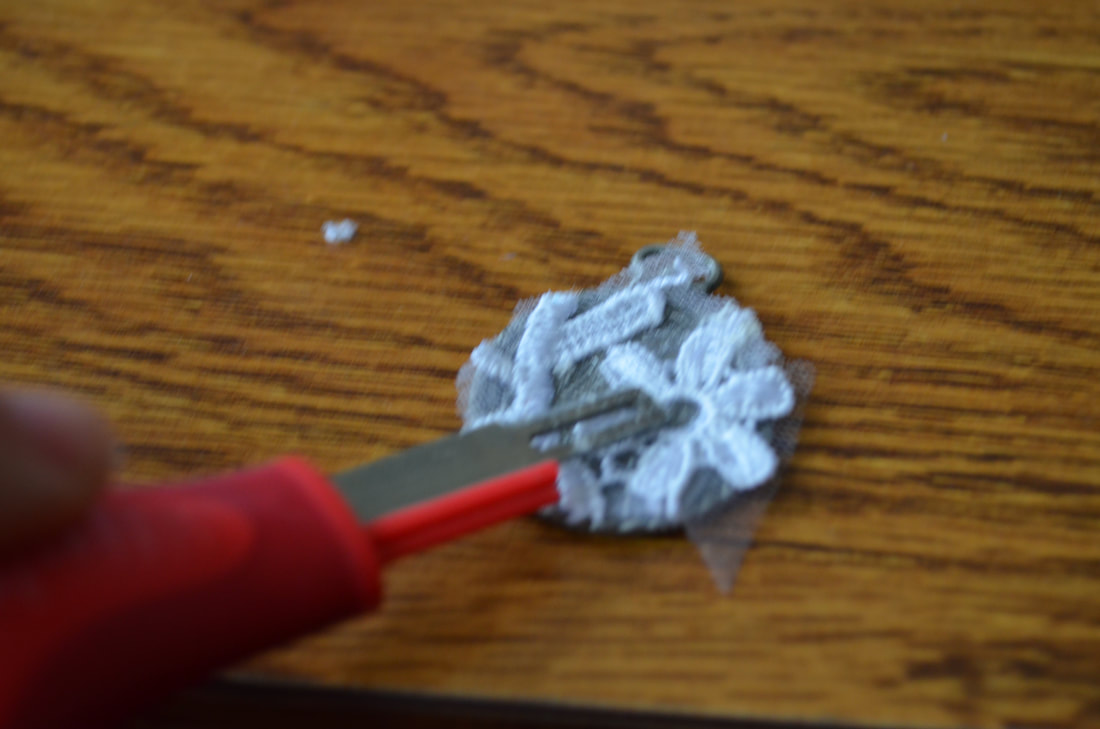 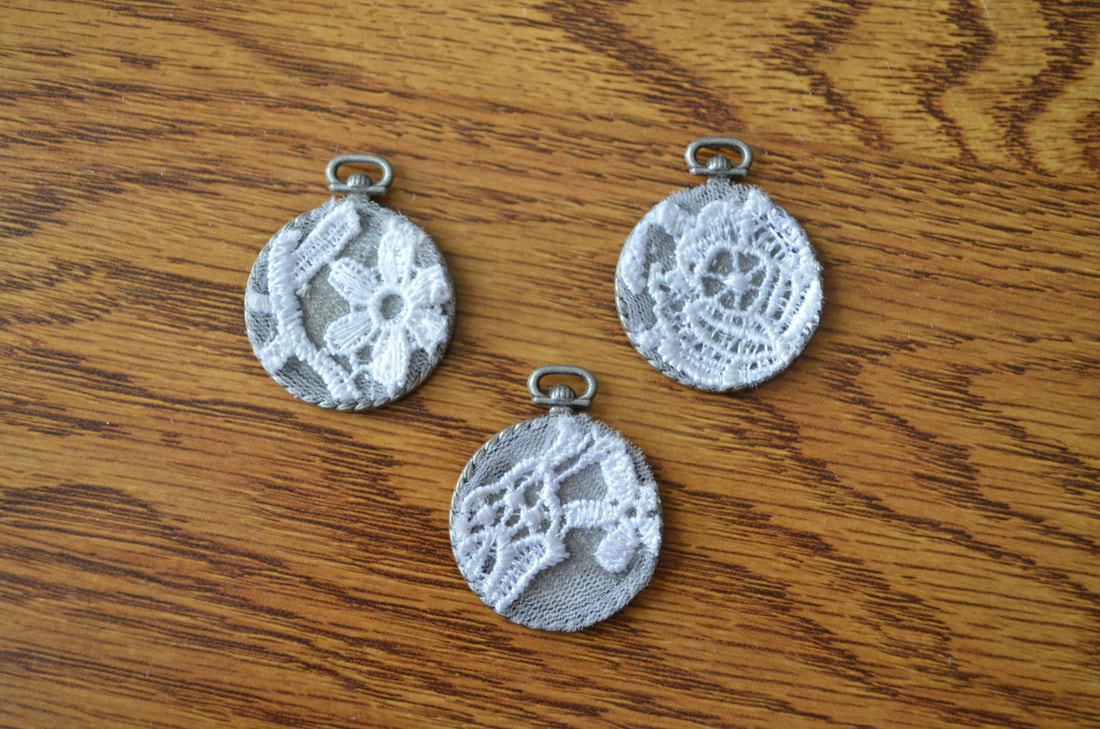 Now, these are cute. But I fear that the white lace will end up getting discolored or stained. So I found these cabochon beads. 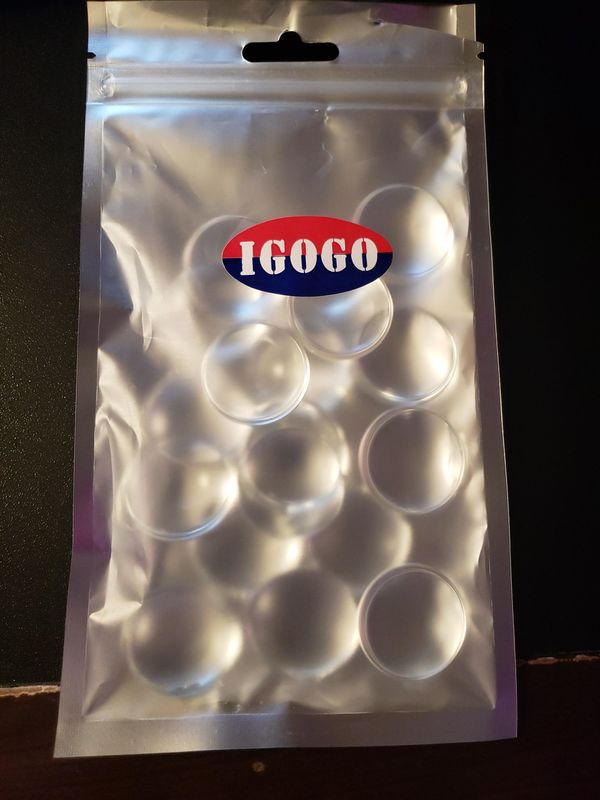 BUT these beads are the correct measurement for the center of those charms. So I took the fabric, glued it to the flat side of the bead, and then glued that to the charm. 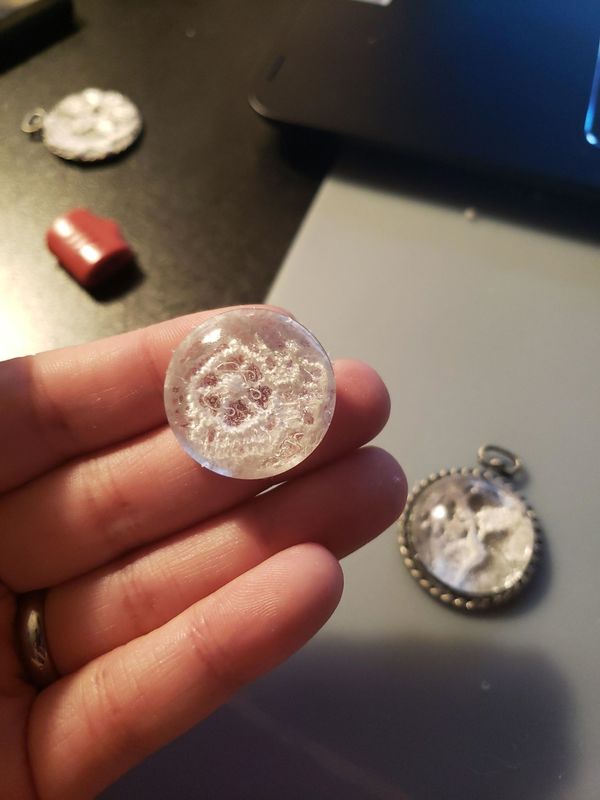 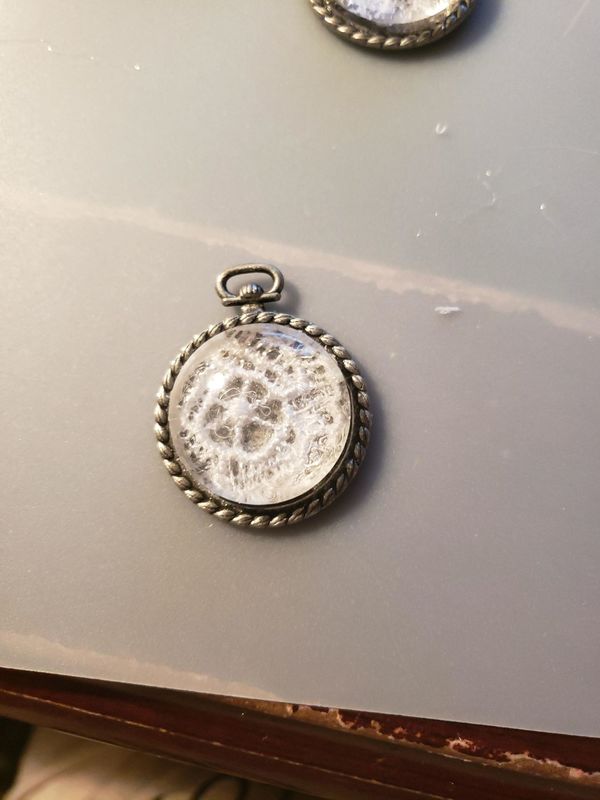 I made two of them with the glass beads over top of them. But I really like the third one as a full charm cover. I'm currently looking for a 2 inch cabochon glass to cover the entire top. I also know there are flat glass tiles that may also work for this. Or you could just leave them as is. No matter what you do these are adorable and such a sweet thing to have. My little sister has already been promised one, she was in our wedding and I hope one day I may be in hers. But if not, I want her to have a part of my wedding dress as her something old. If Joshua and I are lucky enough to have a daughter I would like her to have one. Or perhaps a daughter-in-law would be interested in one. Idk but I think it would be a lovely keepsake to pass down. I hope this gave someone an awesome idea. And remember this could be done with any fabric just as a cute craft, it doesn't have to be some special occasion preservation. 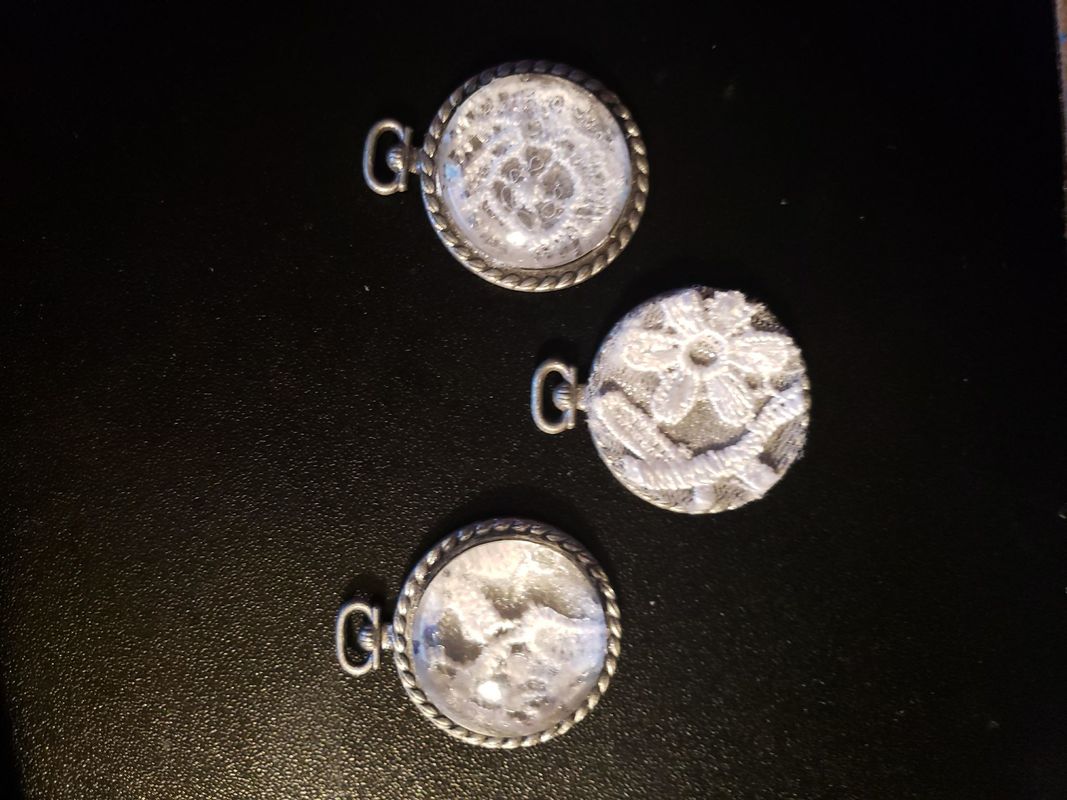 So the wedding is over, the items are packed up into boxes, what are you going to do with everything? I started going through and figuring out which centerpieces we were keeping and which we were giving away. But then we also had our bar sign, copies of our invites, petals from our flower girls, etc. All these little things that we needed to decide how to put them away. And so I present you this idea. YOU WILL NEED:
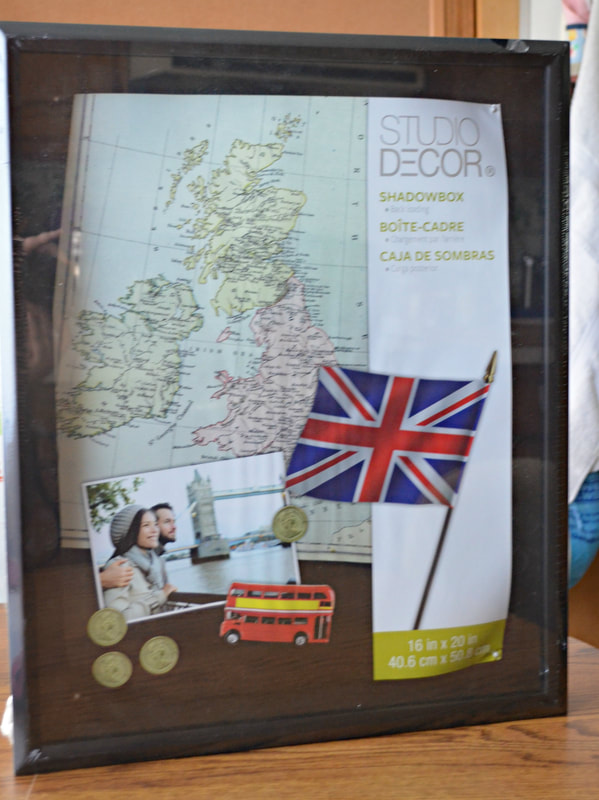 I chose a 16x20 shadow box for this project but I used a 30x40 to frame my wedding dress. If you've never used a shadow box they have these fabric backs that allow you to pin items to the board. Perfect for rearranging items, but also holds your items in place. I bought two packs of pins, one with white ball tops, and one that are tiny silver pins. The ones with the white balls are ideal for pinning your wedding dress down because they disappear into the fabric. The tiny silver ones are great for hiding when attaching smaller items like your husband's tie or your garter. 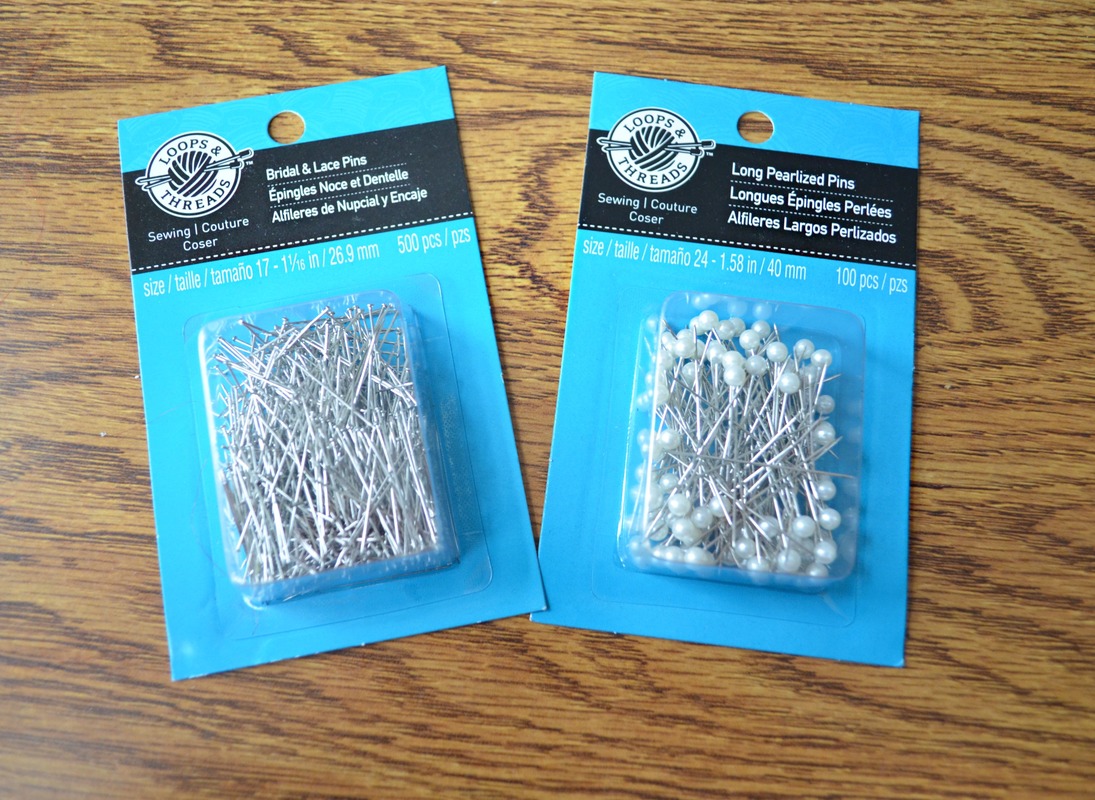 After going through the items and deciding what wouldn't fit, what I really wanted preserved, etc, I decided on these items. My husband's tie with the hidden note, his boutonniere, petals from our flower girls, leaves from our toss bouquets, our invites, and the pamphlet from our wedding. I laid all the items out deciding what I liked where, before I pinned anything down. 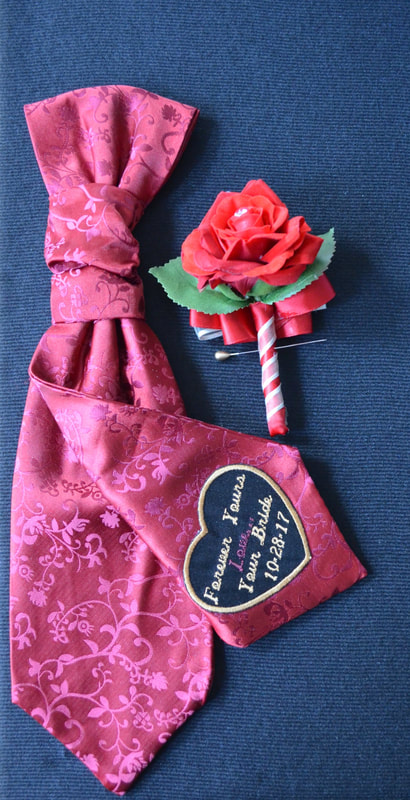 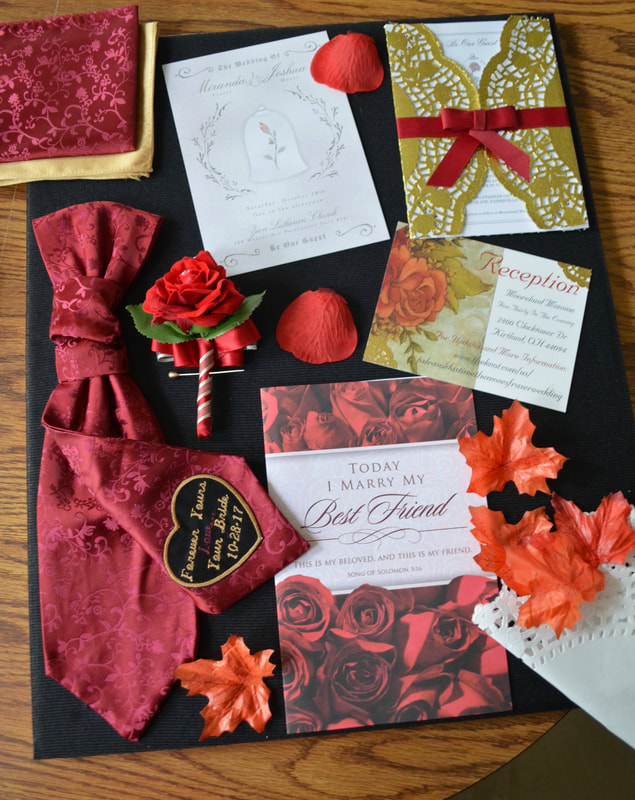 (Special bonus note here: I ordered that iron on patch months before the wedding but I had to wait till we had his tux to iron it on. That way he wouldn't see it till the morning of our wedding. And the store I got it from is TheWeddingDivas on Etsy. This isn't sponsored but I love supporting fellow artists.) Once you're happy where things are placed, use your pins to hold them in place. Now, remember to pin at an angle so the pin goes through the fabric on the back of the frame. 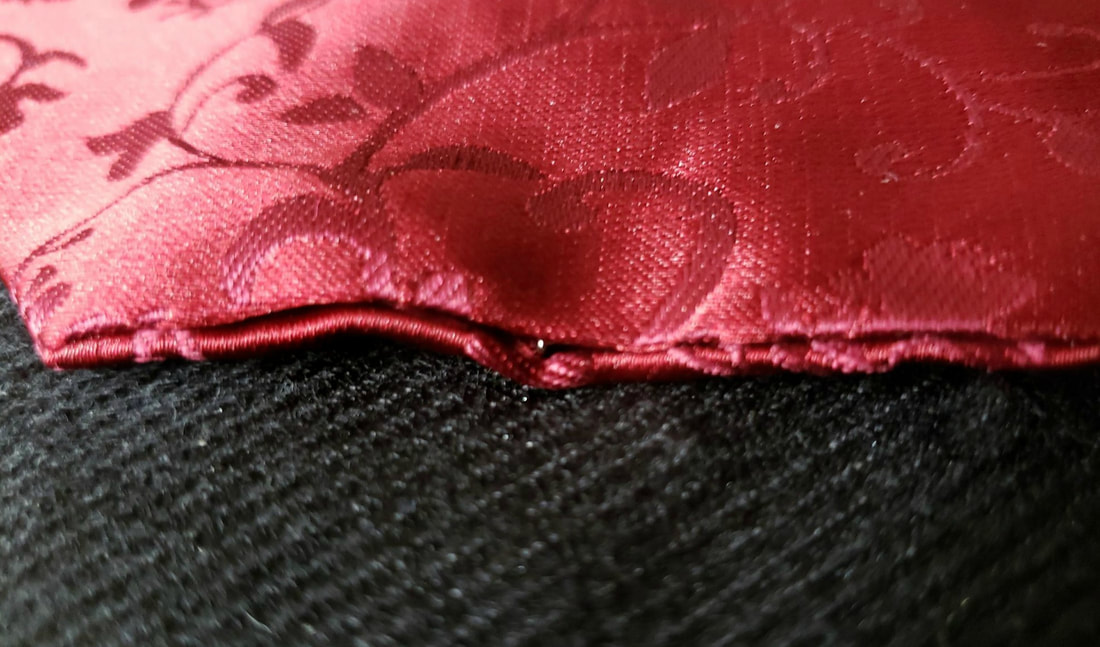 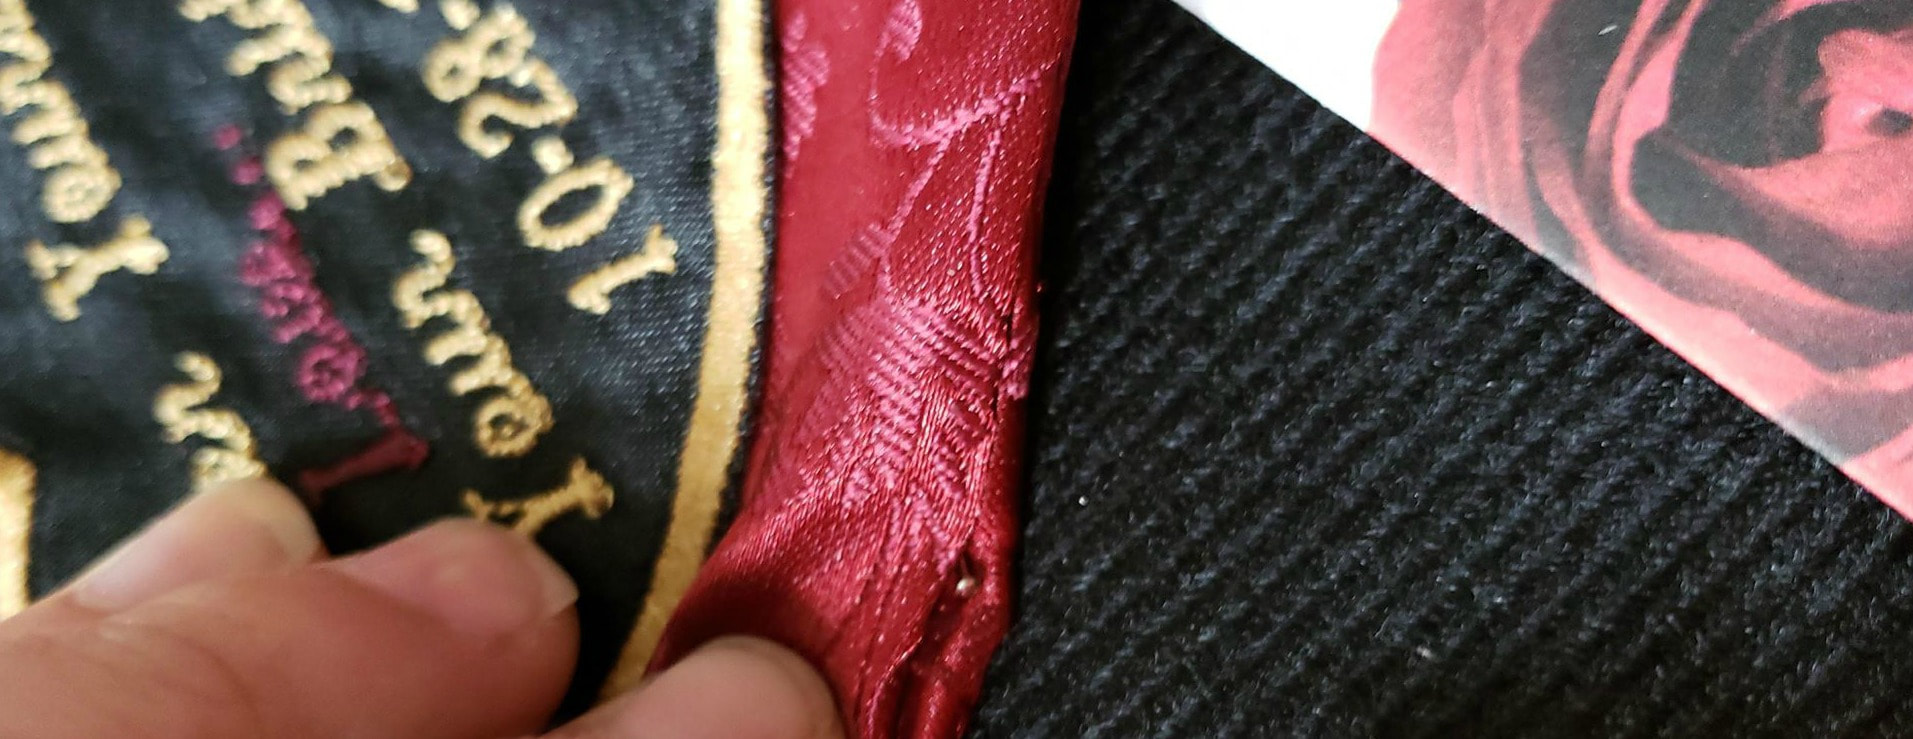 See the little pins? You can't when you're not searching for them. 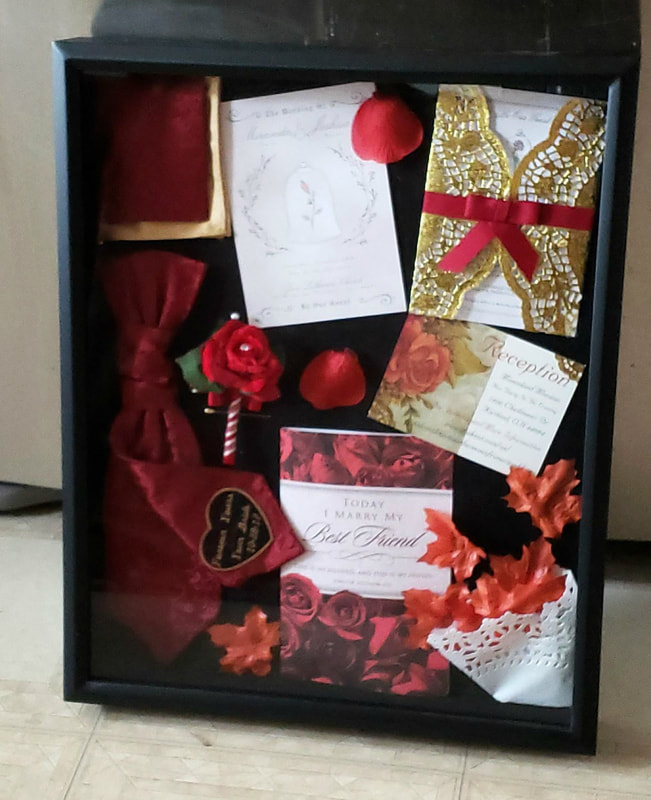 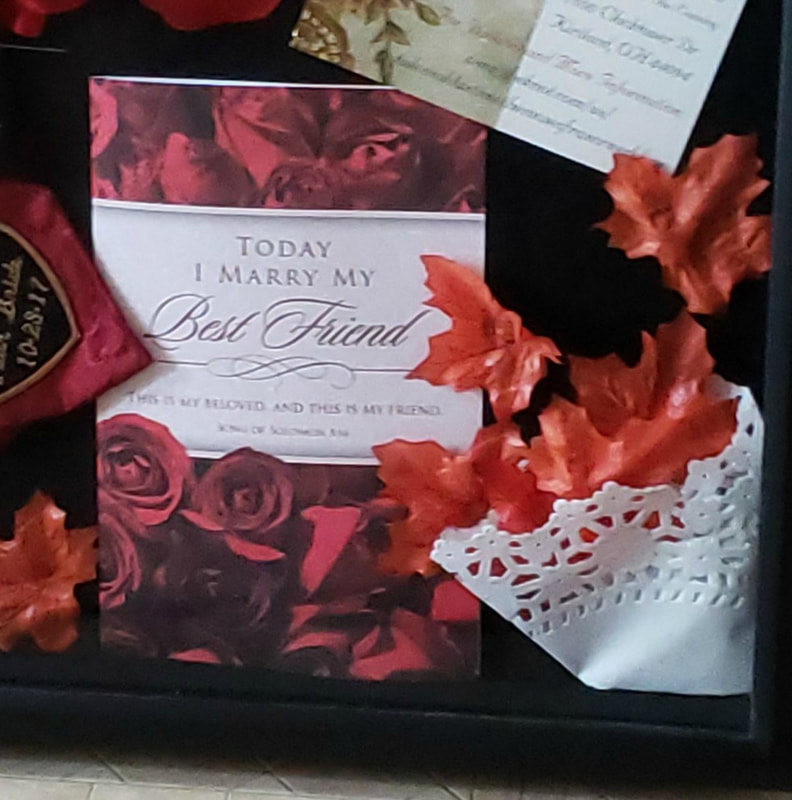 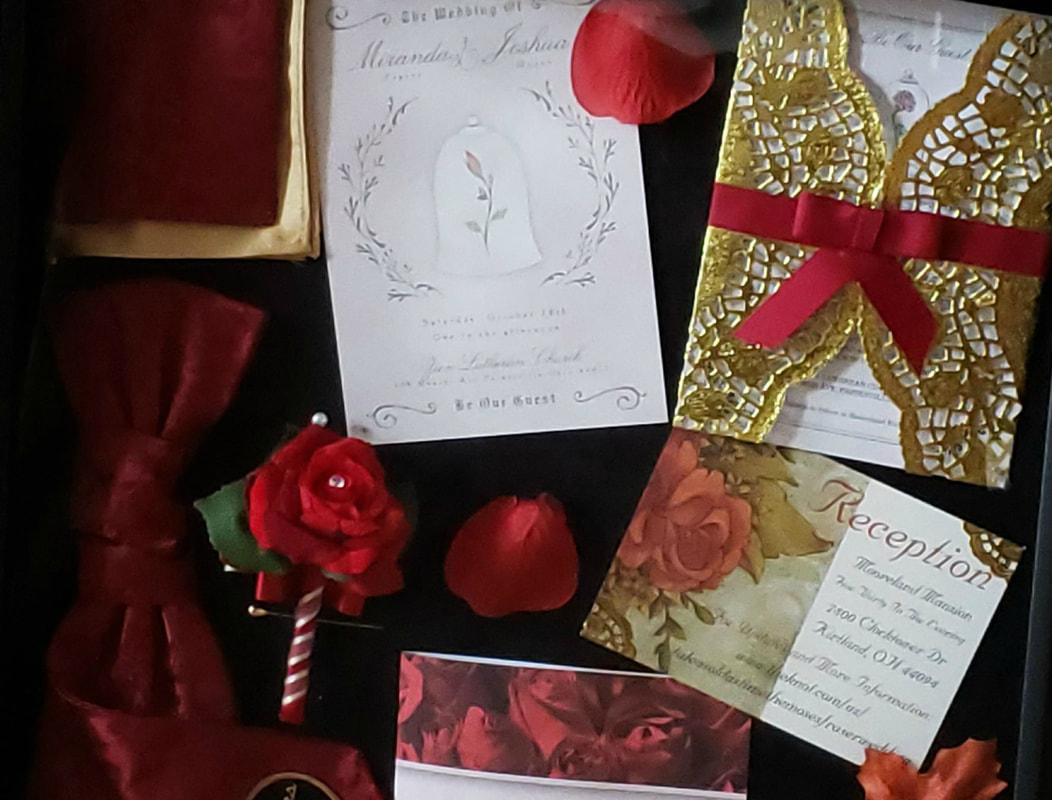 I'm sorry these aren't the best photos. Between the glare and my camera acting up these aren't that great. But it is really pretty in person. And like I said I used those little pins to attach my crown and my garter to my wedding dress box. 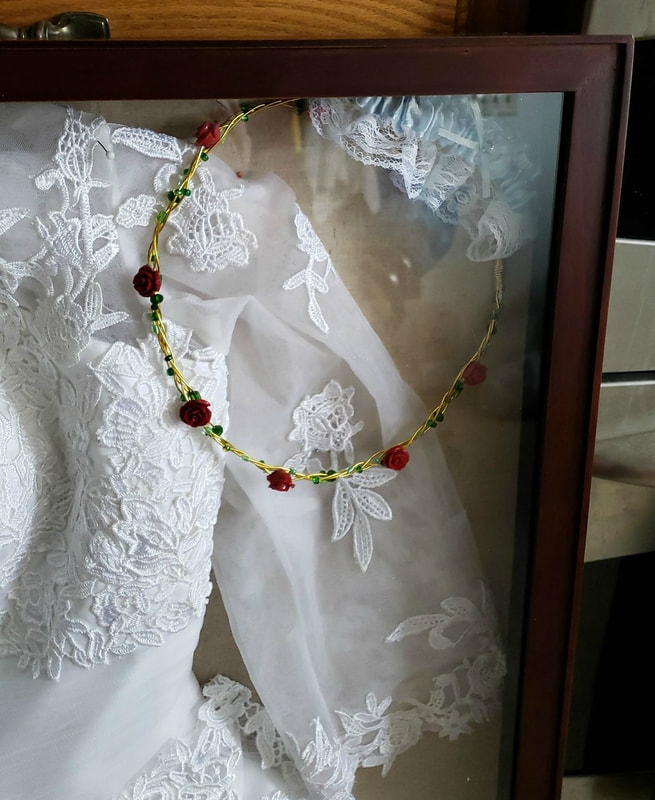 I had to consult my momma on this one because she was the one who did 95% of the work on these. And so I had no step-by-step photos on my camera chips. She however had a few and we were able to work out the steps to show you guys. These too were really simple and my mom wants to point out that enjoyed working on these while she sat and watched her tv shows... but she did burn herself a lot. (I'm better with Hot Glue then she is.) YOU WILL NEED:
Alright, to start you're going to want to get your corsage bands. Pretty much any craft store or website with wedding stuff will sell these. We bought ours at Pat Catans. Now they make different styles, some are pearl band, some are a simple band with a strap, etc. So you'll want to look for whats right for your style wedding. The ones we bought were simple straps with the clips. My mom thought it would be easy to work with, and since I'm not the one who had to wear them I didn't argue. Taking your strap the first thing you're going to want to do is set your greenery down. For appearance sake whatever greenery you want should be set down first, you want it to be like a mini bouquet on the wrist, so leaves are important. We laid two long leaves going long ways. So right to left on the wrist. And then two smaller ones going up and down, so from fingers to arm direction. Once you like the style and placement go ahead and hot glue them down. From there you're going to start attaching your flowers. My wedding flowers were roses so we took two silk roses, cut their stems completely off, and hot glued them butt to butt. 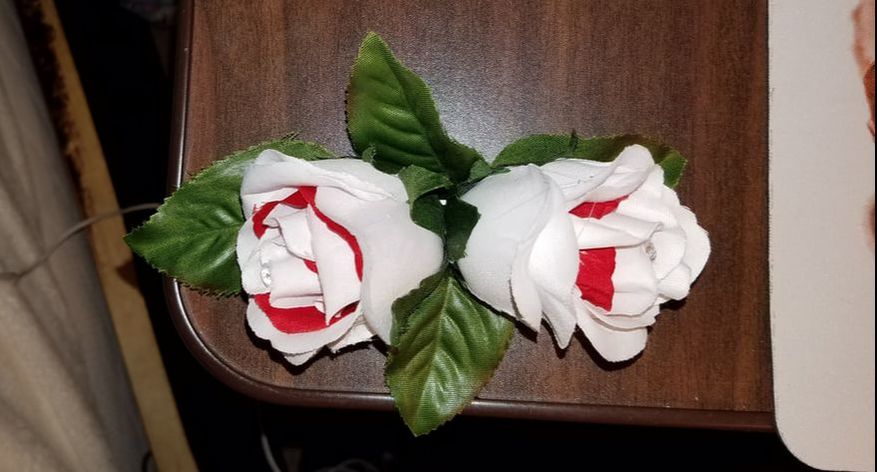 If you're interested in how we made the swirled colors on the roses you can check that out here: Once you have your MAJOR pieces in place, you can start filling in with smaller floral and greenery. And again, once you're content with their placement, hot glue them into place. 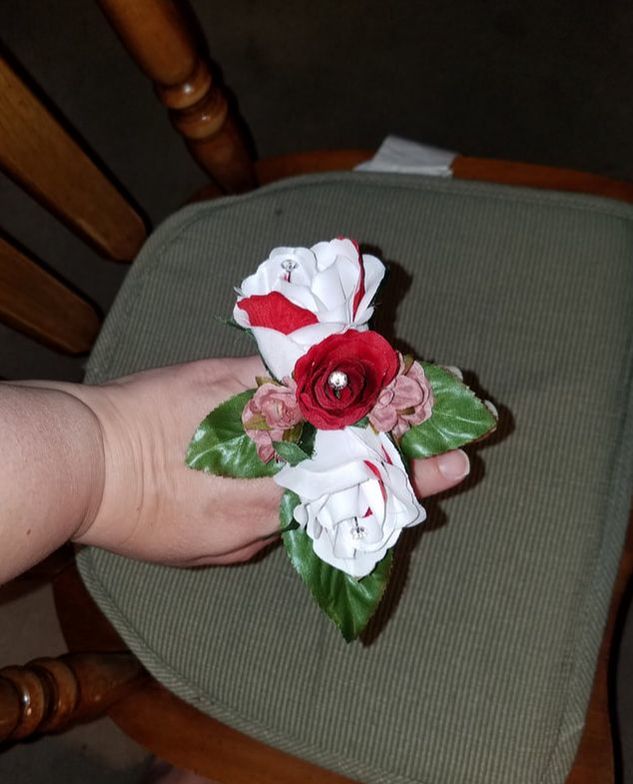 As you can see the flowers have little diamond picks sticking out of them. This is where those add-ons come into place. And gems, pearl picks, ribbons, etc, you'll want to add on now. It's really that simple. My Aunty J took a photo from the wedding of my mom's corsage so you can see the finished product here. 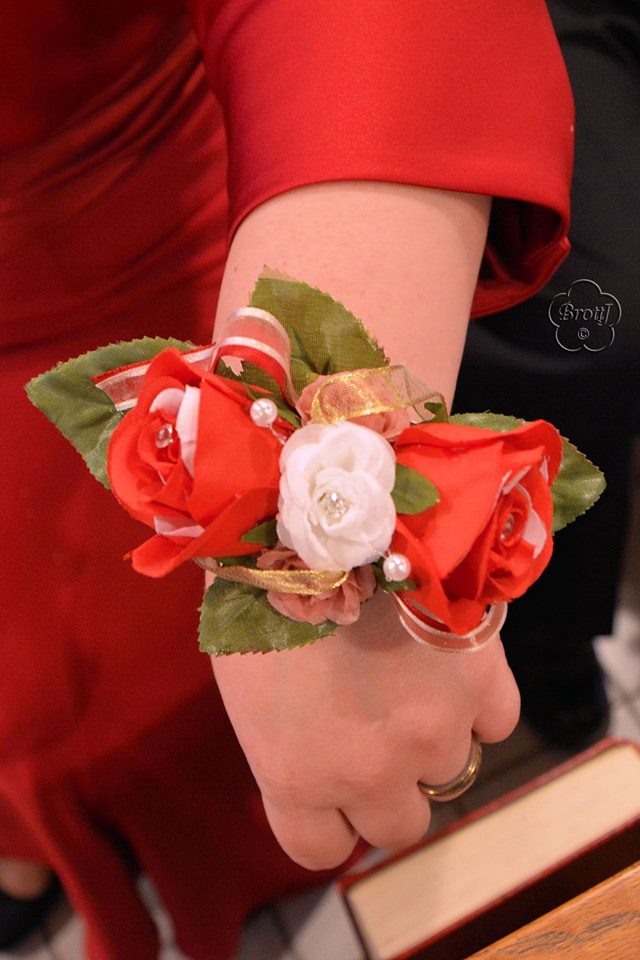 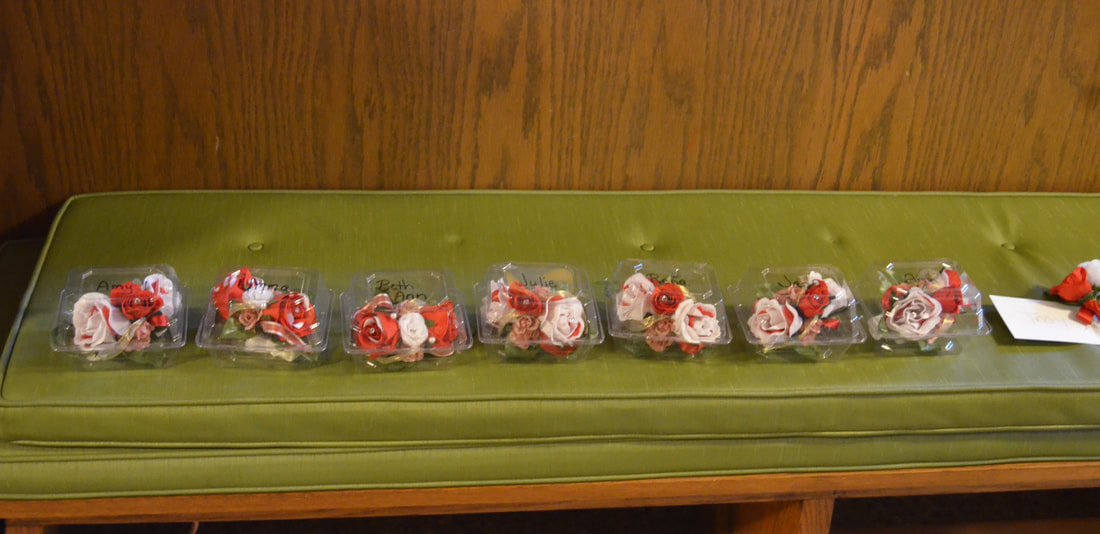 When I mentioned that I was going to be writing about how we made our boutonnieres people started asking me about our bouquets. Now, I hadn't written about those because I COMPLETELY forgot to take step by step photos of how we made them. It was a mess, flowers and floral tape everywhere. (And my beautiful friend Jeanni helping my mother and I figure out what we were supposed to do.) BUT I will do my best to explain the initial floral steps. You're going to need your flowers of choice and a way to attach them when you're happy with their placement. With this in mind, what kind of bouquet do you want? There are a lot of different styles, I'll include a link from easy weddings explaining the most popular ones. https://www.easyweddings.com.au/articles/bridal-bouquets-ten-different-types/ I think mine would be considered either nosegay or round bouquets, BUT because I used Bouquet Holder/Handles that you can buy at a craft-store or online, I'm really uncertain. And because I already had my handles, I would be using Hot Glue to attach the flowers to the Styrofoam. I picked ribbon to wrap the stems with and I will show you how to do that. For my initial bridesmaids I used White and Red Silk Roses and pearl picks (these may be called something else but search in the wedding section and they should be easily found). You're going to use wire cutters to trim your flowers down to your ideal height and then begin placing them in the Styrofoam. This is where it's all up to you. No tutorial is going to tell you what's going to look best to you. What I will say is that, unless you're making a Biedermeier style bouquet, you don't want your flowers to be symmetric. When my mom was first trying to help me with these she literally placed the red roses in such a way that they formed a perfect square. It looked like a dice, lol. So we obviously rearranged those. 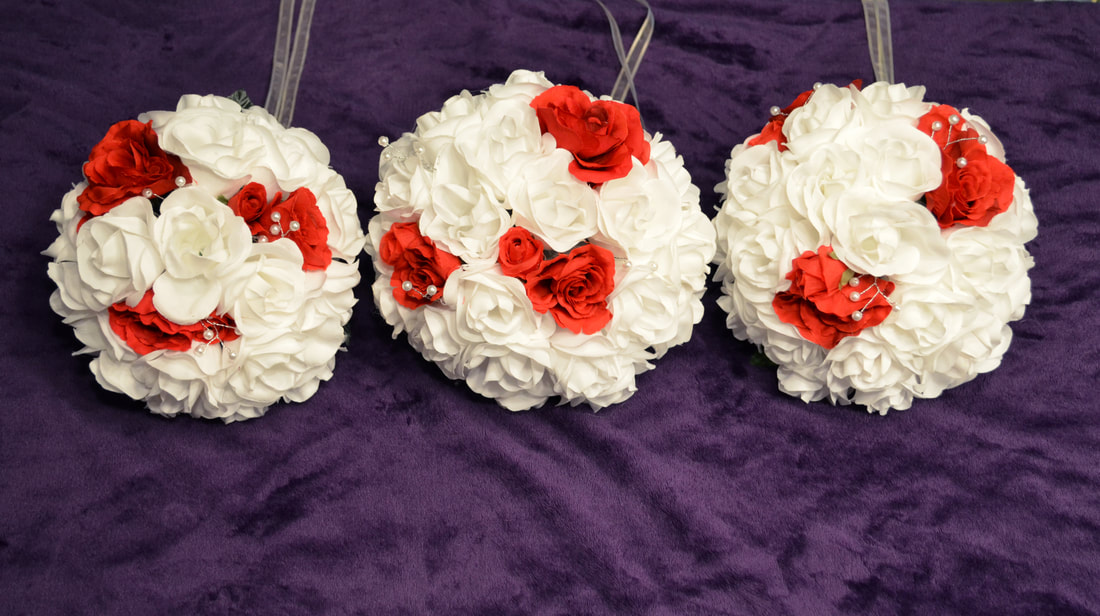 For my Maid of Honors we did basically the same thing, except we gave them mini cascading fronts. I knew mine was going to be a large cascading bouquet so it only seemed fitting. To make the cascade we left the stems longer than rest of the bouquet. We placed them in the front of the holder's Styrofoam. We also used some greenery to fill in around them. 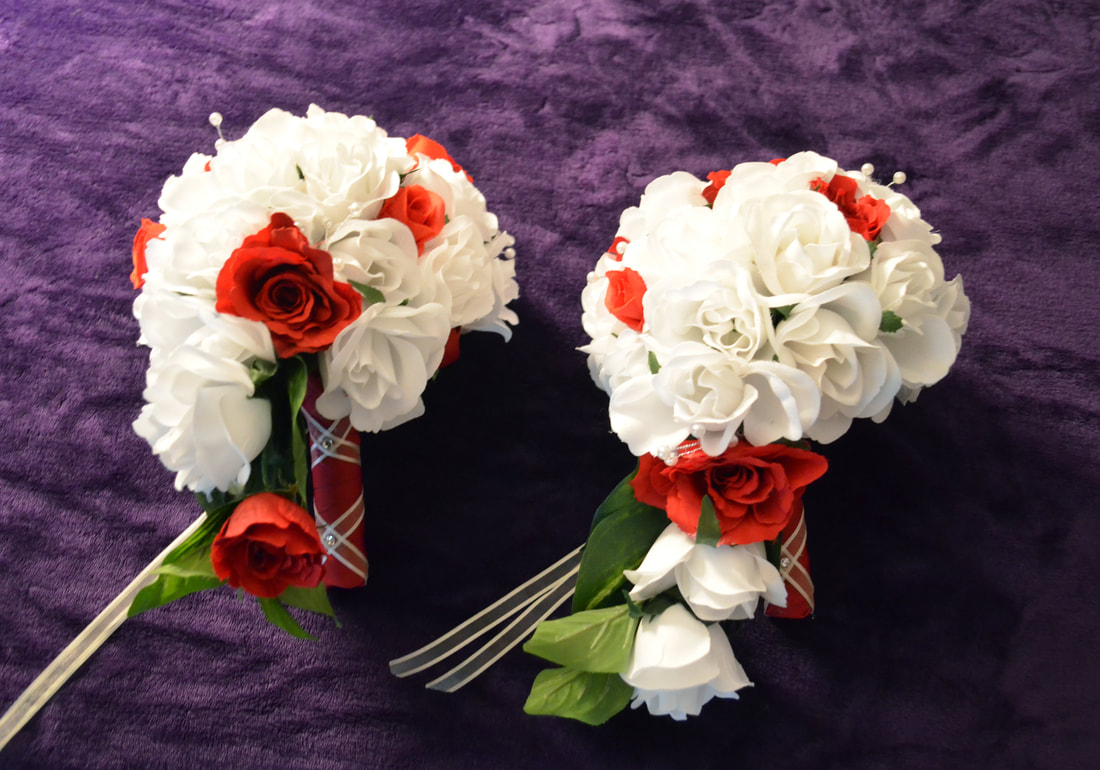 I hope this gives you an idea of what you want to do. I am sorry it's not much help. HOWEVER, I can help with the handle wrapping. When we were deciding what to do with our wedding parties we knew we wanted my little sister and our three nieces to be apart of our wedding. We decided to have a female ring bearer but I wanted her to feel just as special and dolled up as her sisters. Being the eldest niece it seemed fit to give her a junior bridesmaid dress, and a special bouquet. She's way into MCR so to keep things special for her I made her bouquet all red with a black and red handle. For Kalli's we bought a premade red rose bouquet. This is the exact one that we bought from Michaels. (I goofed and forgot to get a picture of it before we altered it.) 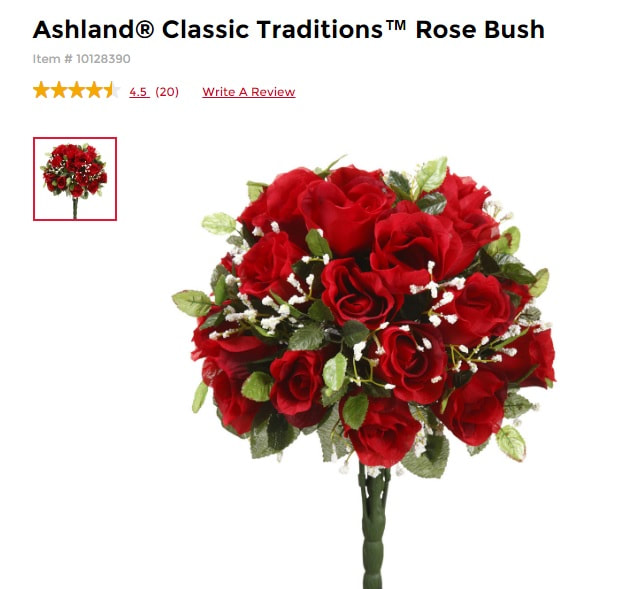 And to include the Ringer Bearer part of this we purchased ring holders shaped like roses. You can find these on Amazon really easily. 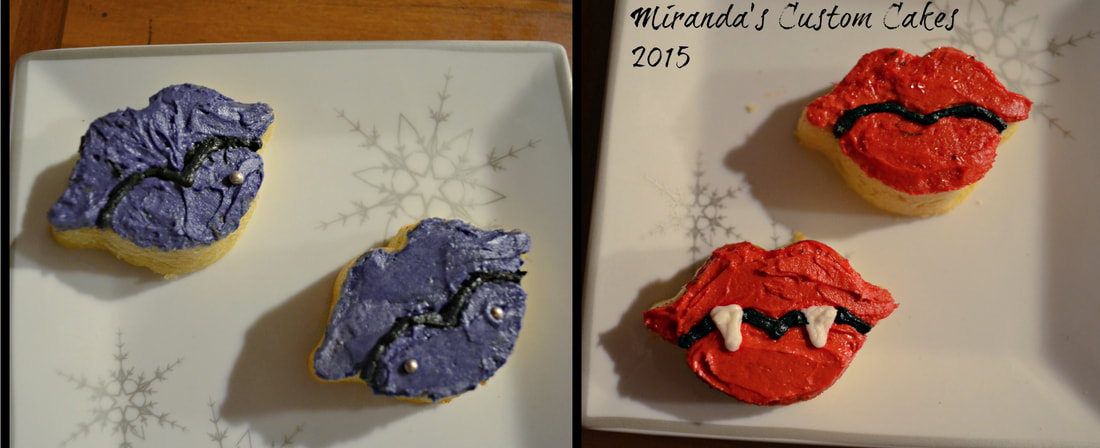 Because I added those to the premade rose bouquet, I didn't have a Styrofoam base to simply glue it to. So I used a little bit of Hot Glue and a rubber band to attach the ring-roses to the bouquet. It is also worth mentioning that the bouquet's stem was VERY long and I had to cut it down for a more realistic size. Because I cut it, the ends flared out and I also had to use a rubber band to hold the end together. 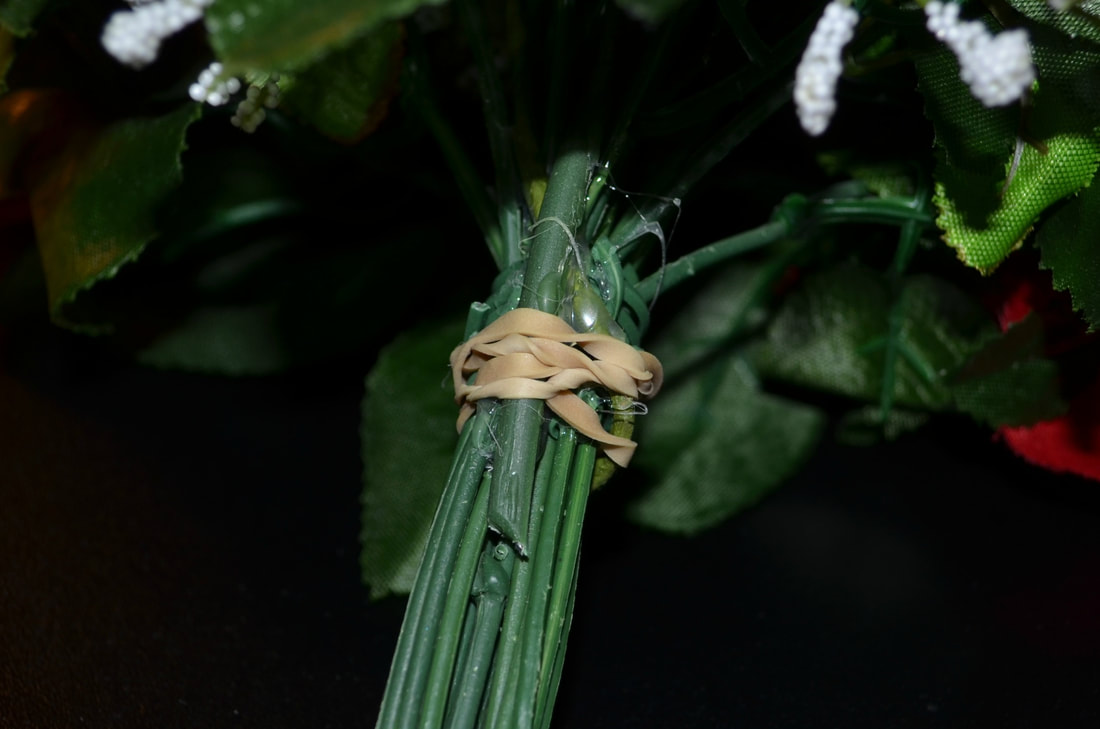 To begin wrapping your bouquet handles you're going to start at the very bottom of the stems. You're going to tuck your ribbon on the backside of the stem and use hot glue to hold it in place. 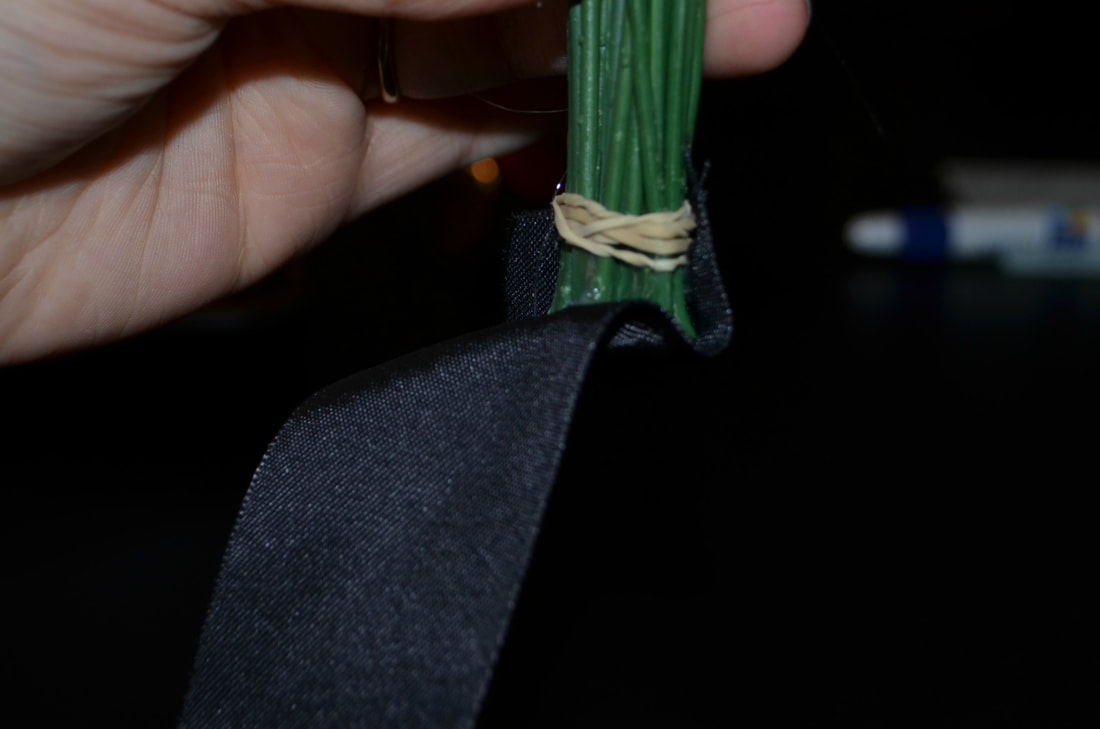 From there you're going to begin wrapping the ribbon around the stem in a spiral motion. 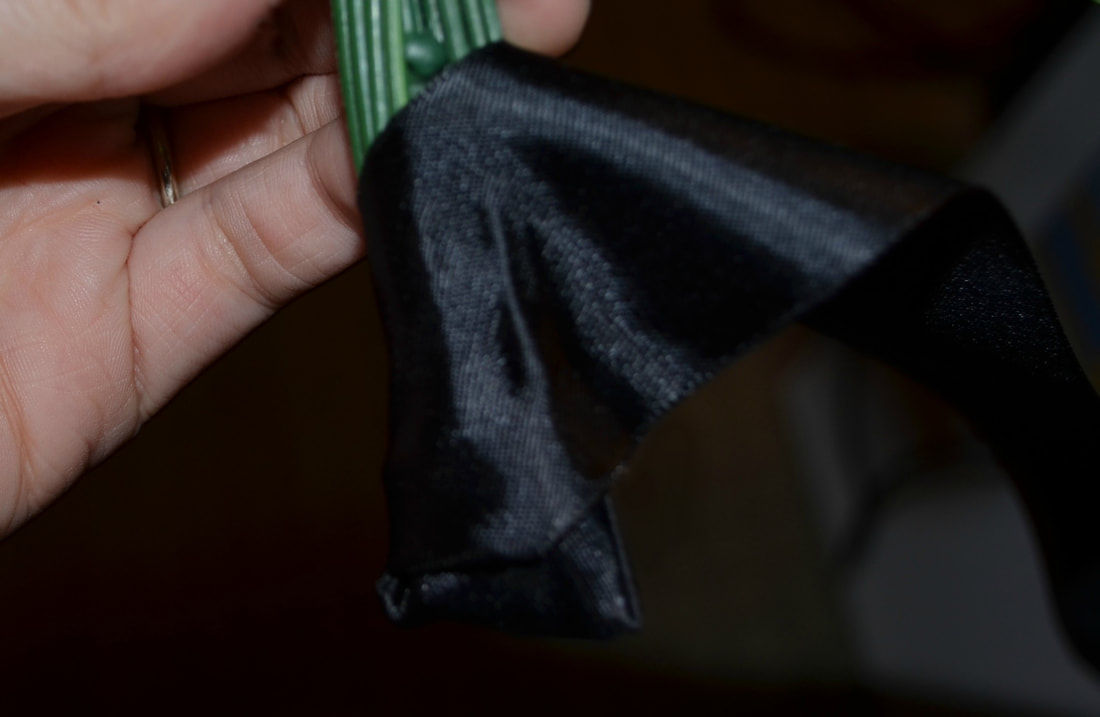 Continue to wrap and glue until you reach the base of the flowers. From there you're going to fold and crease your ribbon to form a tight circle cover of the handle. No green should be showing. 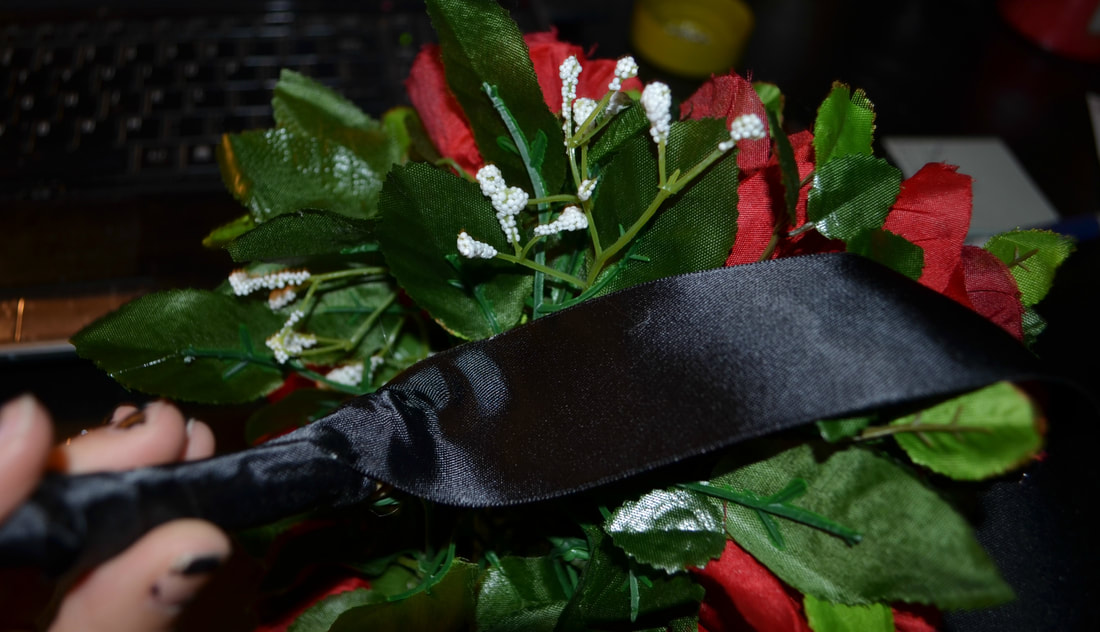 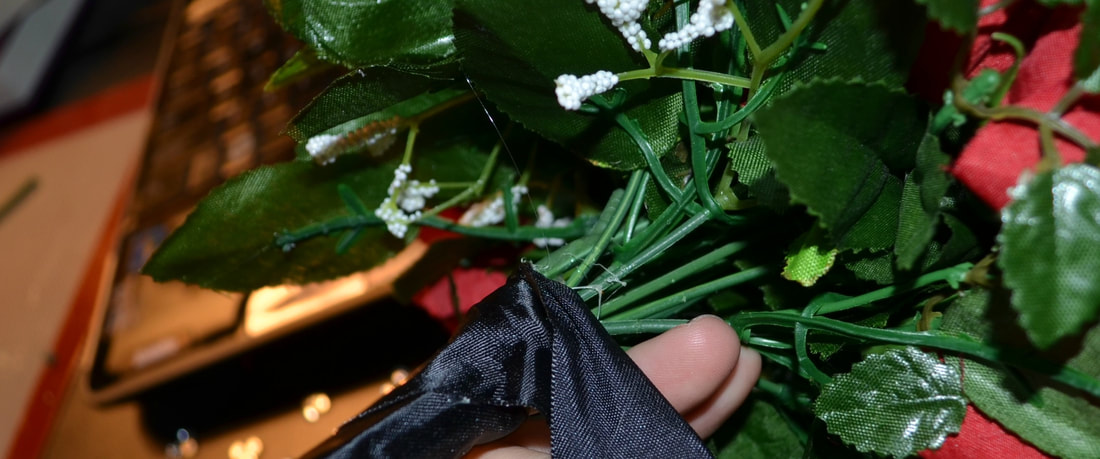 Once you've covered the stem with ribbon, you're going to start making larger creases and gluing them to the base of the flowers and leaves. creating a hexagonal shape. 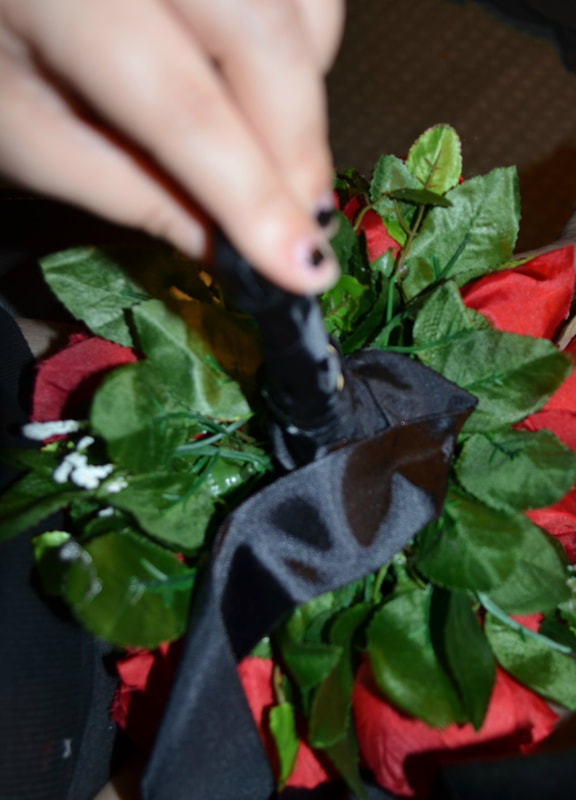 After that you're going to make bow loops with the ribbons. Cover the base of the flowers completely. Depending on the bouquet you're going to make more than one layer of bow loops. 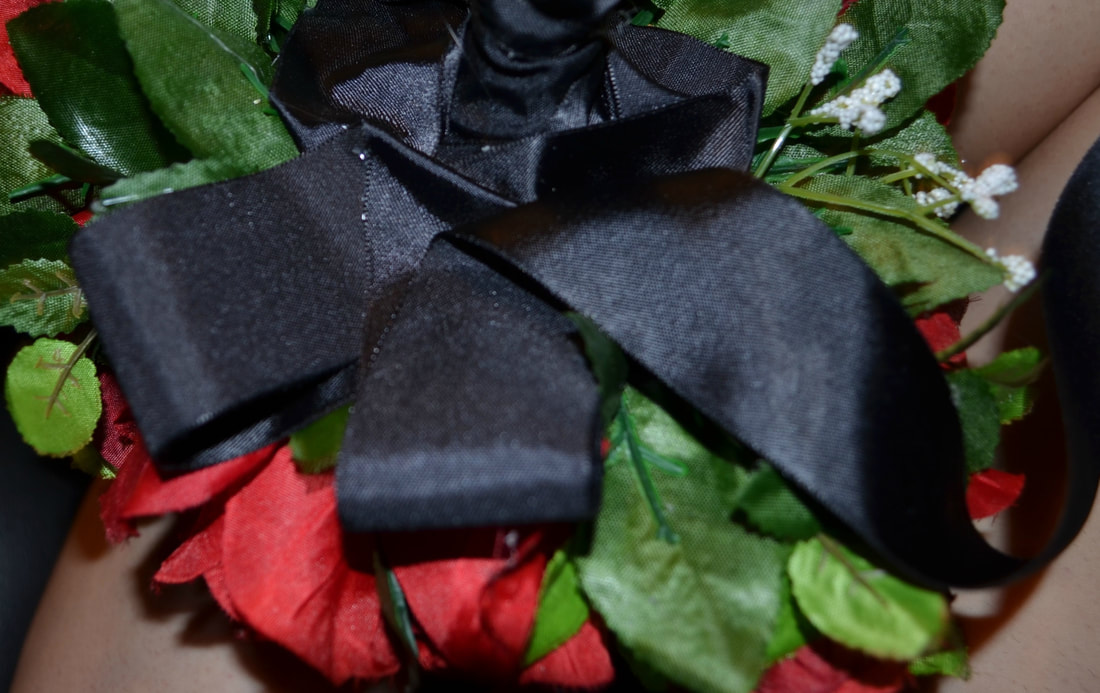 When your base ribbon is set you can add any additional decor you're interested in. For mine I used a thin accent ribbon. For Kalli's bouquet I used a red ribbon but on my bridesmaids I used a sheer gold ribbon. You're going to start with a decent length to work with. Find the center of the ribbon by placing the two ends together and grabbing the middle section. Taking that middle section glue it at the base/towards the back where you started the first ribbon wrapping. Start criss-crossing and gluing your ribbon as you go. I made this pattern all the way up the handle of the bouquets. On my girls I left lots of extra ribbon to have some hanging down. With Kalli's I tied a small bow at the top of the handle. It was admittedly slightly off center- like I've said, I'm not a professional. BUT the good thing, no one is going to see this over the bows and flowers so it's not the end of the world. I also added gem stones to the center of the criss-crosses. 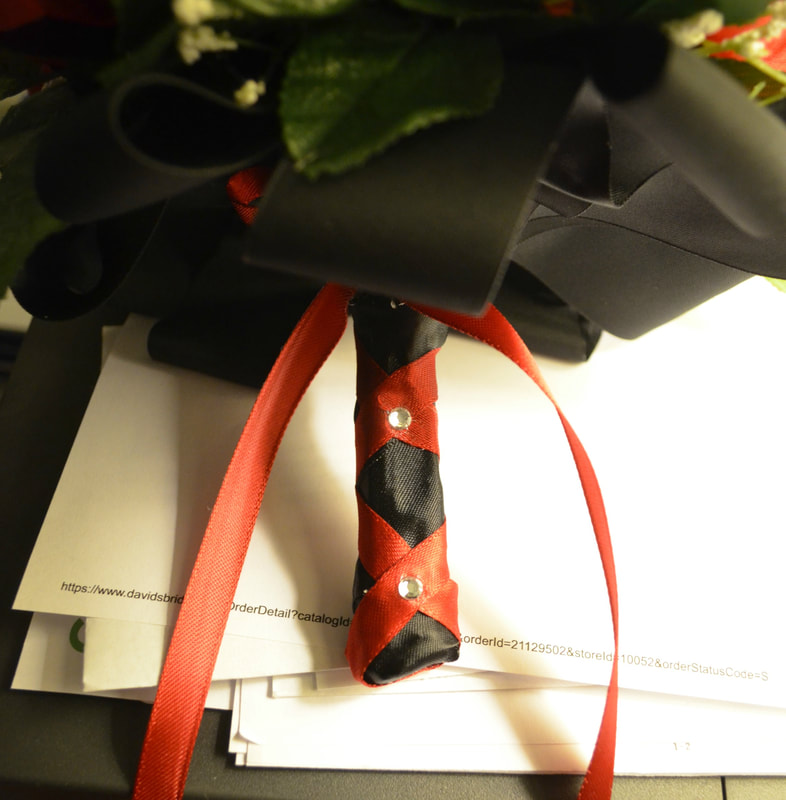 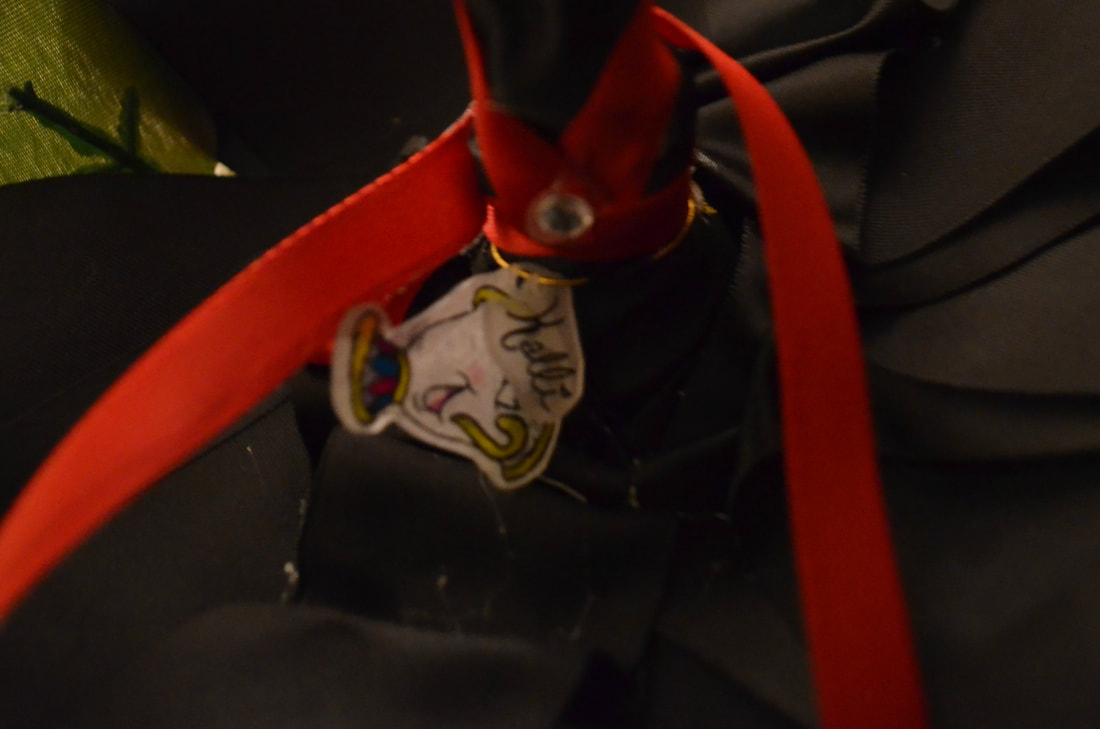 And if you saw the Flower Girl Basket Tutorial you'll see that I did the same personalize-ation on Kalli's bouquet as I did for the other girls. And finally the top of the bouquet I placed a gem stone on the center of the rose that would hold my ring. 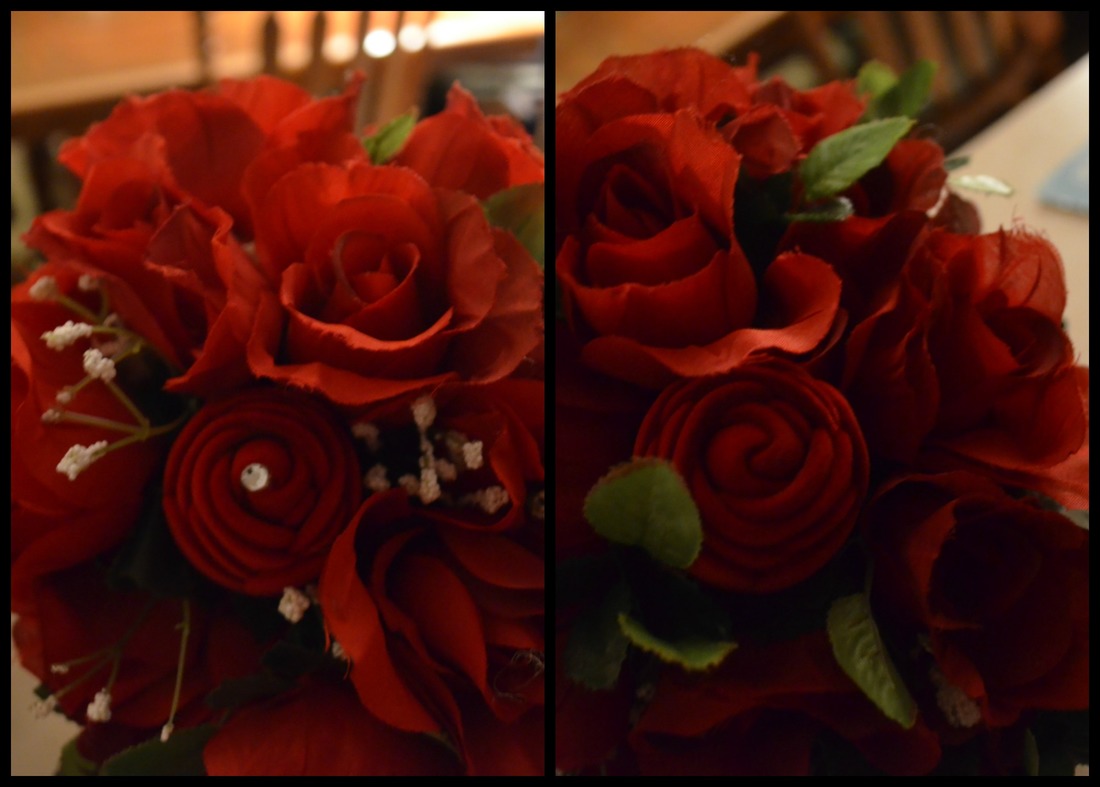 I hope this was helpful to someone out there. Like I said I realized that I didn't get all the steps photographed or worked out any notes for how to explain this. So I didn't think it was worth posting, but ya'll seem to think different! Below I'm going to include all the pictures I can of our bouquets. I wasn't originally going to do an article on how to make your own boutonnieres, but I've been asked by a few people how we made these without going to a florist. As you already know we used silk flowers so take that into account. YOU WILL NEED:
Honestly, these are super simple. So don't panic, just remember there's bound to be trial an error until you get the rhythm. You're going to take your flower of choice and any additional items you want to go with it. Such as decorative pearls, baby's breath, etc. We had several different boutonnieres to make: the groom's, the best men, the groomsmen, the ushers, and the fathers/grandfathers. (We also offered our pastor one, but he declined.) Each set of them were made a little differently. The Best Men and the Groomsmen were almost identical, we just added a little extra gem to the Best Men to distinguish them. So here's how I made theirs. 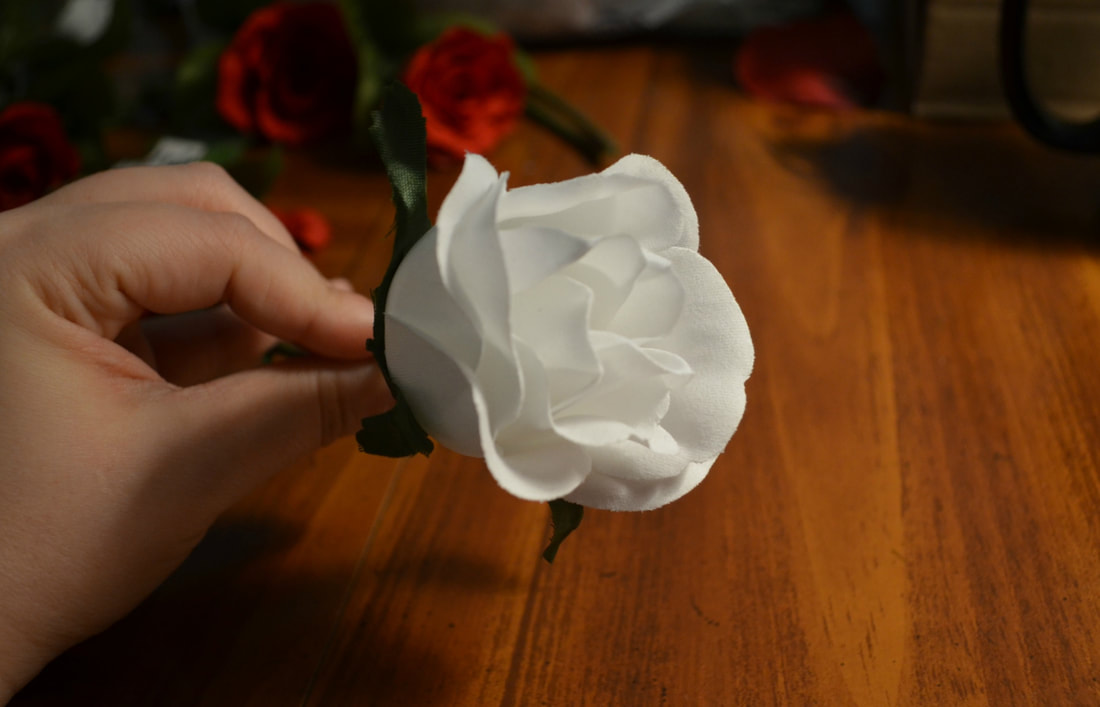 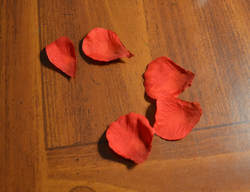 I took a white rose (my girl's bouquets were white and red roses) and some red rose petals to create a multicolored look. 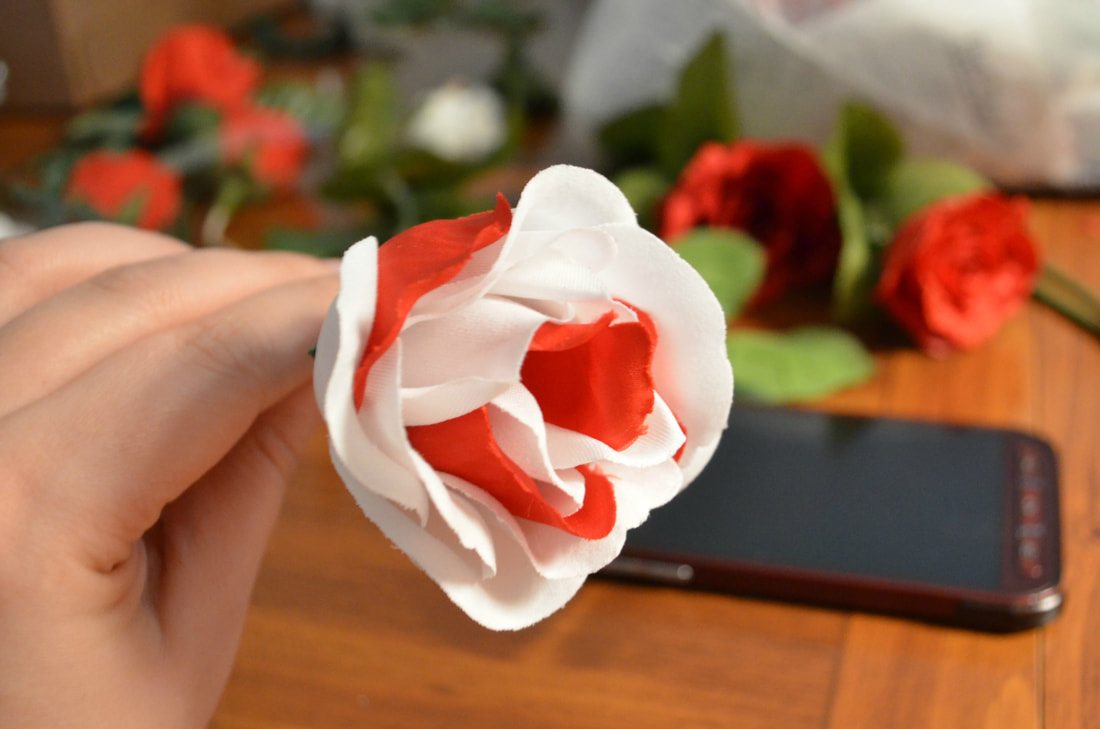 Once I was happy with the placement of the petals I used my hot glue gun to attach them to the white rose. I used those wire pearl picks for some of our wedding floral. (These can be called picks, sprays, accent stems, etc. So don't be discouraged if you go somewhere and can't find them by the name I use. But you should have good luck if you look in wedding sections or explain to a salesperson what it's for.) Since mine are the wire picks I simply wrapped them up the stem of the white roses. 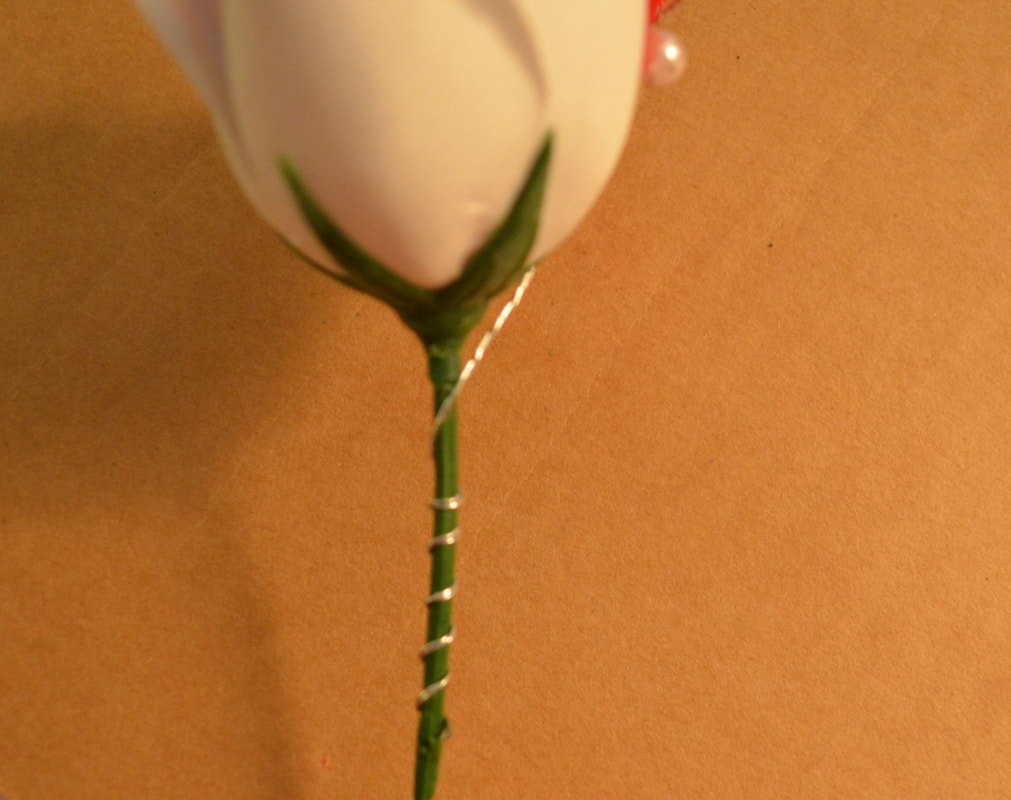 I also took leaves from flower stems and wrapped them in floral tape to attach them to the stem of the white rose. 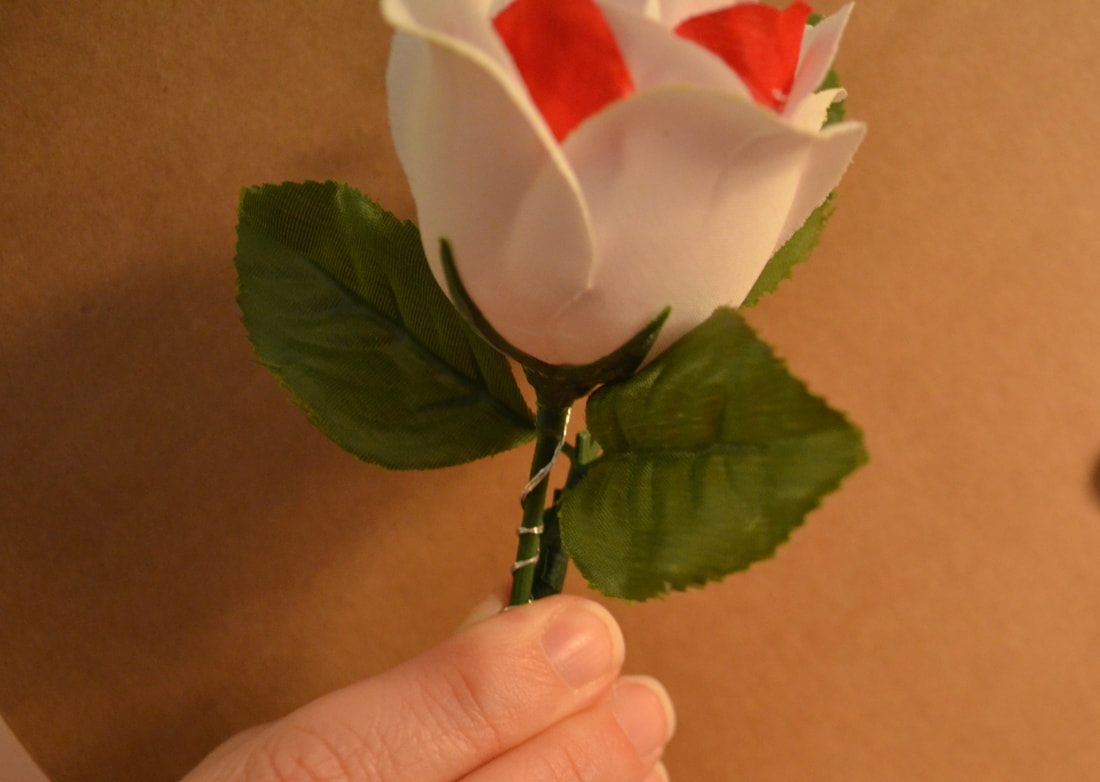 The next part is really the final necessary step. You're going to use your ribbon of choice and your hot glue and wrap the stem. 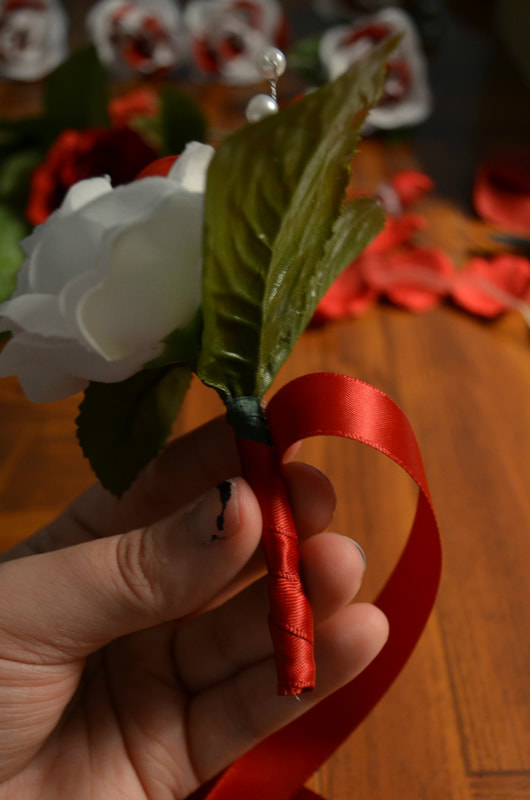 If you want you can make a bow with your ribbon, glue decorative items on, or even add a second ribbon. I did a little bit of all of that. I'll show you how I did the bow as well as photos of the rest of the boutonnieres. You're going to take your ribbon and crease it at the top to create a bow loop, then cross it in the middle (using a dab of glue to keep it in place), and then finish the loop off to create the bow. 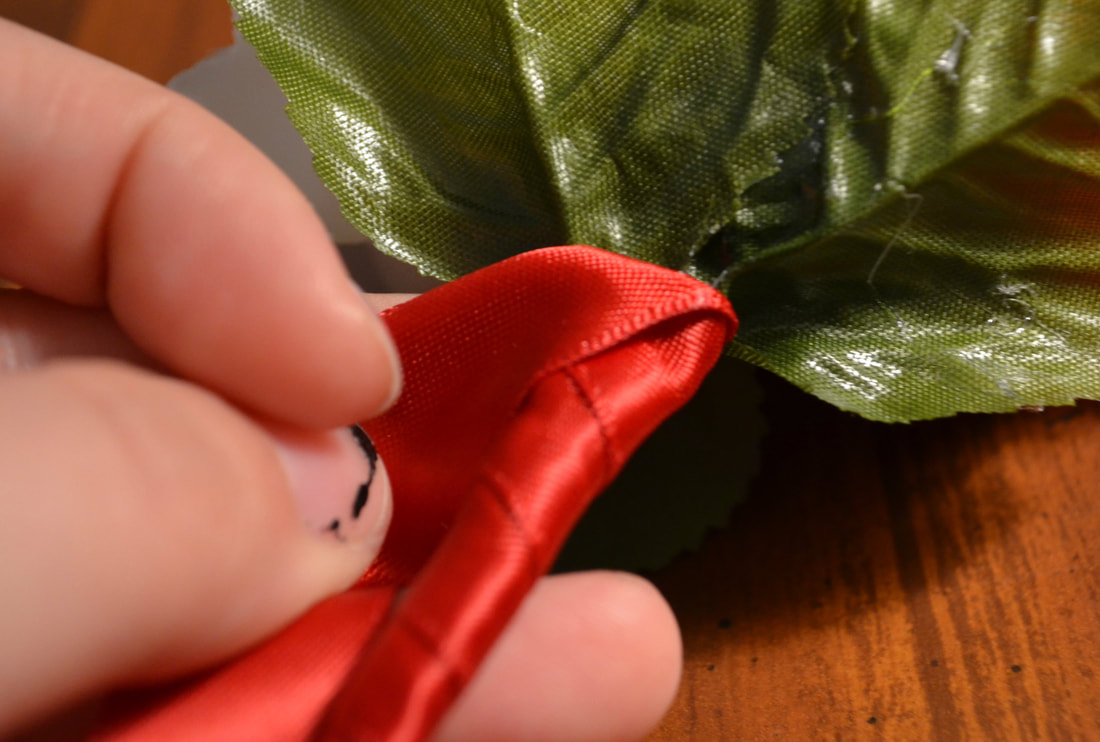 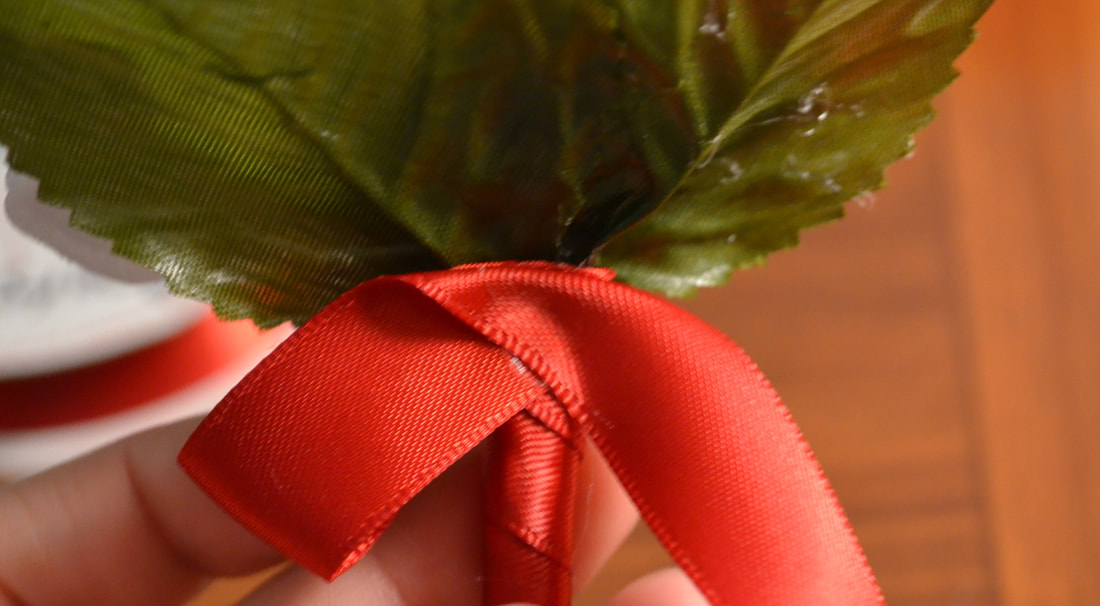 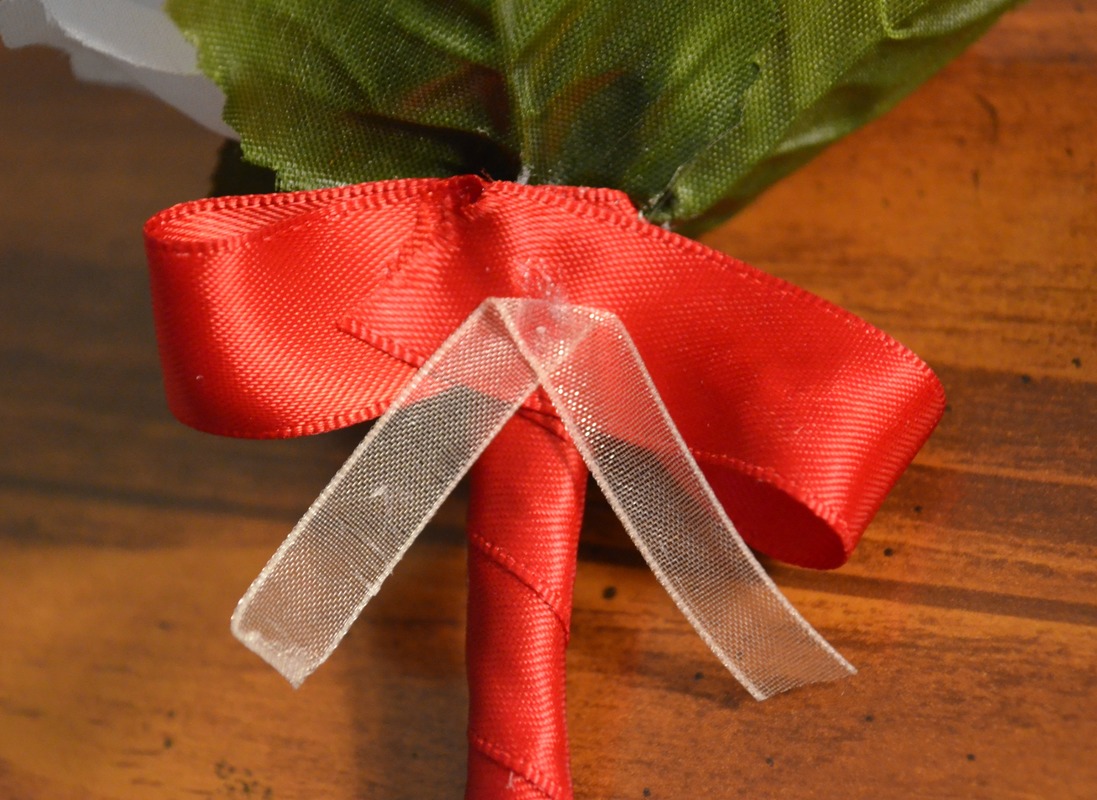 Pictured ABOVE are the steps I took to make the bow. These are seem from behind the stem. The photo BELOW shows the front of the stem. 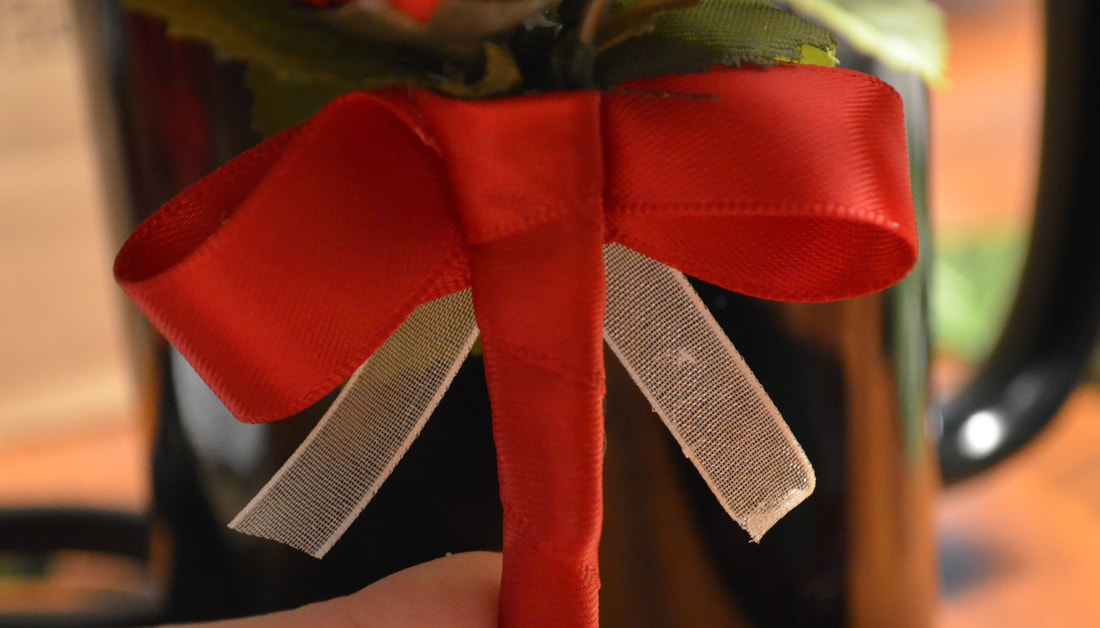 I also chose to take the gold sheer ribbon and wrap it around the stem for an added touch. When you're happy with all the additional touches you want, simply push your corsage/boutonniere pin through the stem. I made the groomsmen all the same boutonniere. But to distinguish the two Best Men we added a smell gem stone to the center of the bow. 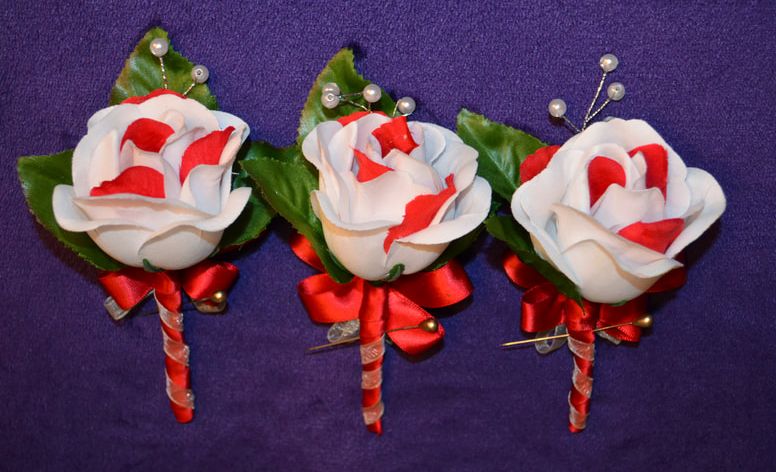 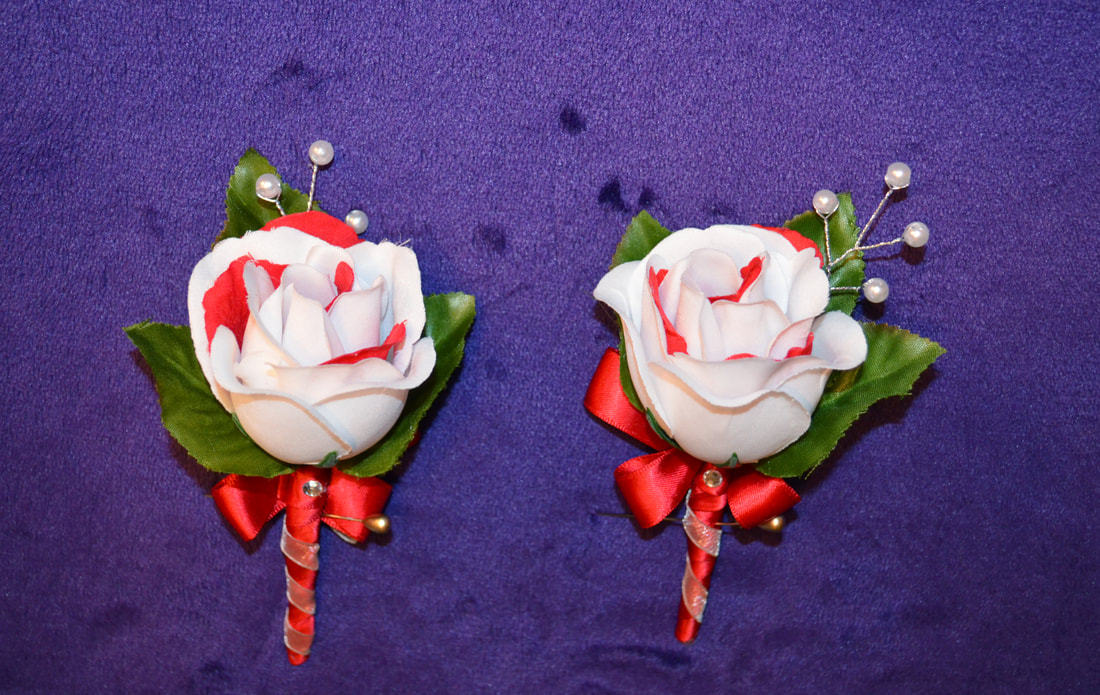 For the Fathers/Grandfathers we took two small white and red roses and wrapped their stems together, and repeated the process of attaching the leaves and pearls. 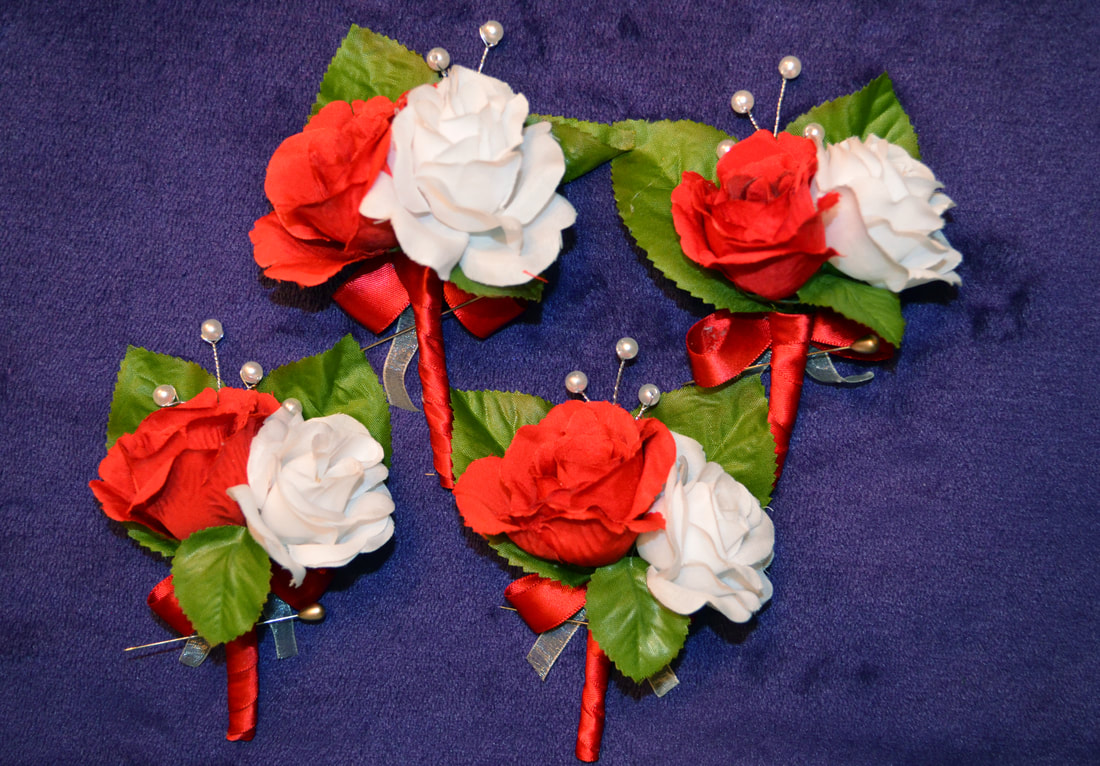 My grandpa walked me down the aisle so he got a special boutonniere. We made his similar to the Groom's. Most of the roses in my bouquet were velvet so we made sure to find a mini velvet rose for his boutonniere. So we also gave my grandpa one AND keeping with the two headed roses for the Fathers we also gave him a small white rose. 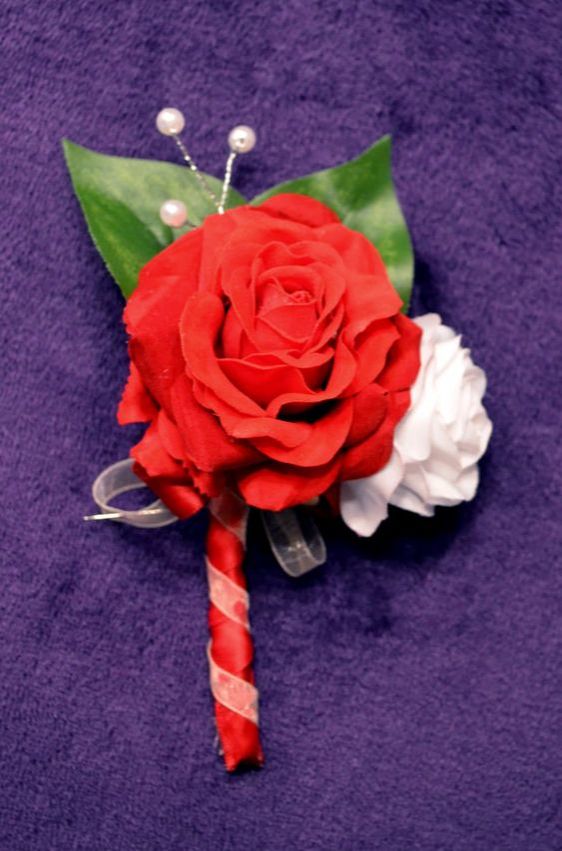 For our Ushers we used White and Red Rose Buds but we wrapped them in a gold ribbon for the base of the stem. 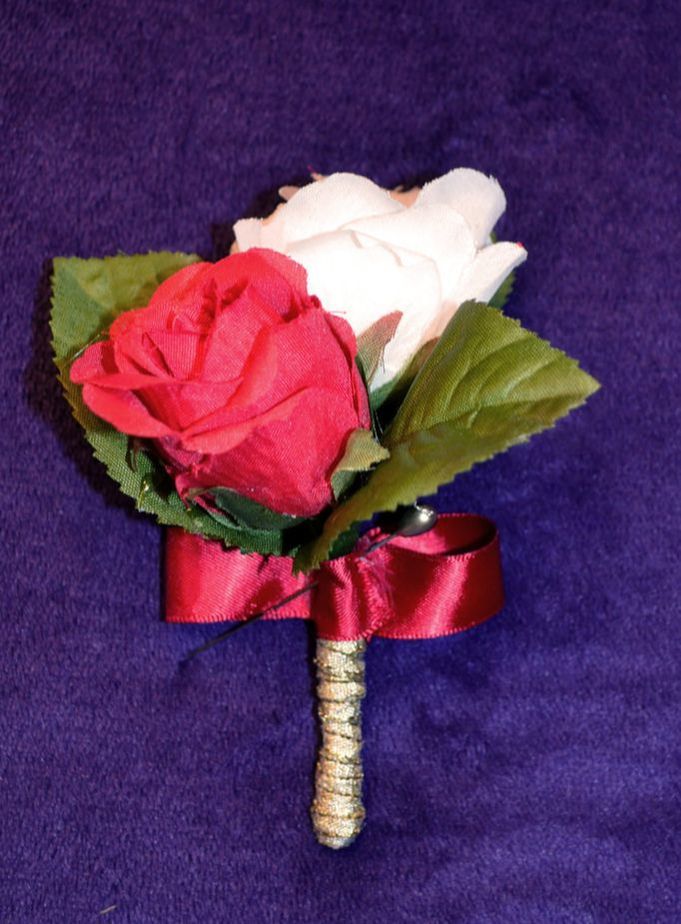 I can't find the photo I took of my husband's when I was making them. Not that it matters because these are terrible photo quality. The light in the house was working against me all that day. BUT I have a GORGEOUS photo our photographer took! (Shout out to or photographer @ Gena Loy Photography) 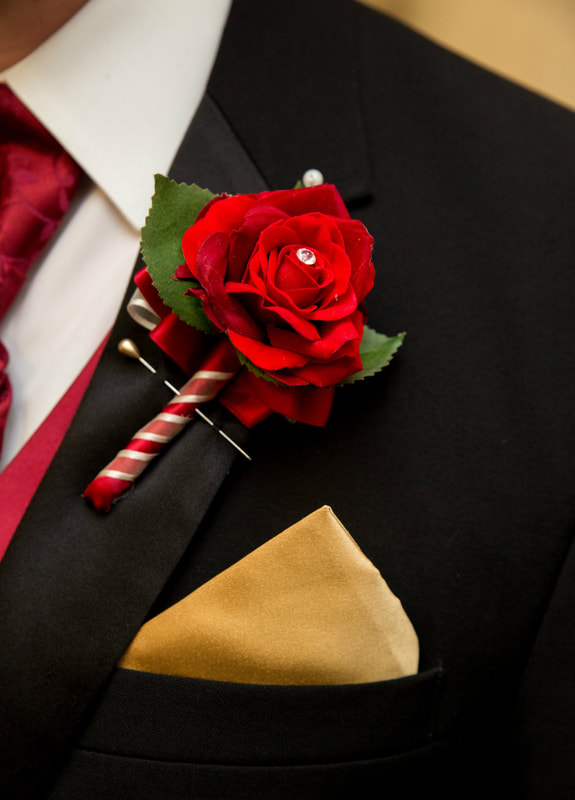 And as I said, his was made to match my bouquet. The rose was velvet and we even included the little diamond in the center of the rose, like many of mine had. 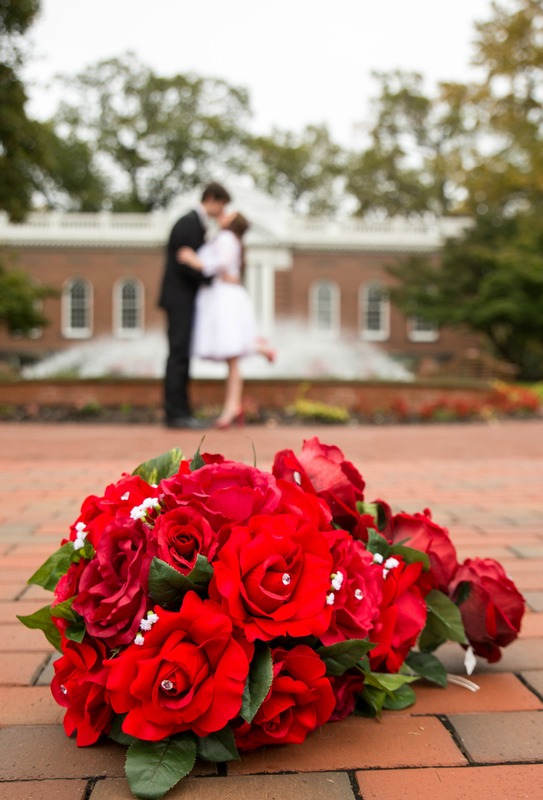 All of the photos in the DIY and several others will be included below for you. And I really hope this helped you to make your boutonnieres. I'd love to see the colors and flowers ya'll use. This is such an exciting time in your life and from one bride to another- you got this! I originally wasn't going to post how I made my shadow box because it is super easy, but I've had so many people ask about it! Thank you to everyone who thought it was beautiful and wanted to know more about it. It's super simple and I have kept it to hang in our home as a "fund" box where we put loose dollars to help save money here and there. YOU WILL NEED:
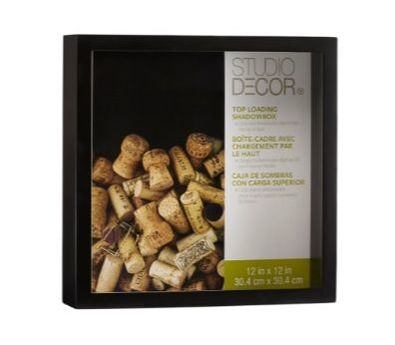 I forgot to get a picture of this shadowbox before I started working on it so I took this one from online. This is the exact size and brand of shadowbox I used to make my card box. What I did was take the cardboard baking off of the shadowbox. I cut a piece of paper to match the size of the backing and drew a design on it. I used the backing because this way I could slide it inside the shadowbox and tape it to the glass. 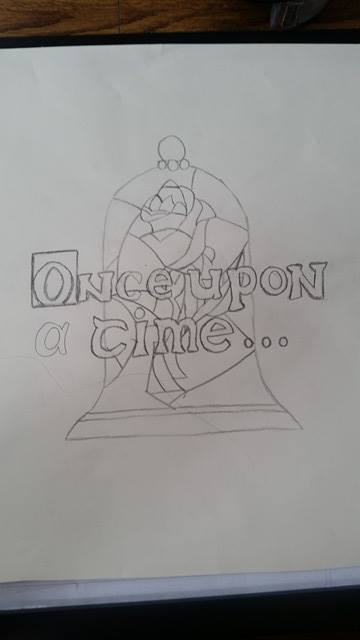 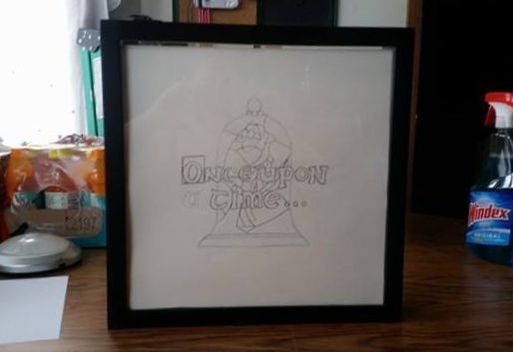 This is also why I mentioned having a printer. A lot of people tell me, "But I can't draw!" Well, with this project, you could just print out a picture and tape it to the inside of the glass. But once you have your design you're going to take your enamel paints and paint in the design. 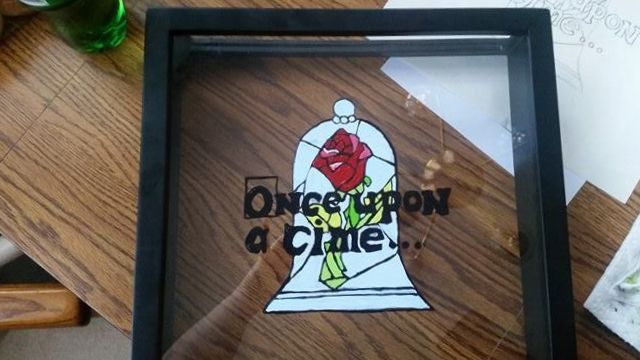 I used tape-runner, but you can also use glue sticks, hot glue, decoupage, etc, to attach a sheet of card-stock to the cardboard backing of the photo-box. This will show behind the design you painted and just give it a little extra dimension and style. I went with a "script" themed paper to help continue using the book theme in Beauty and the Beast. 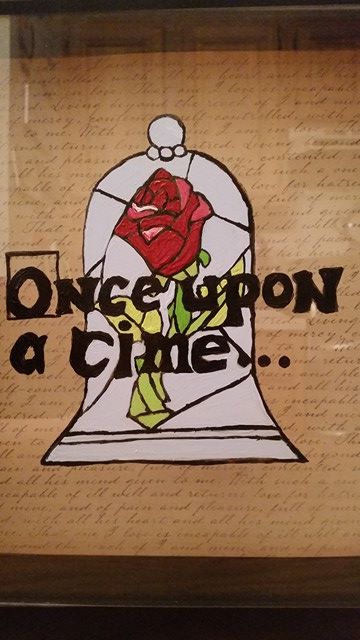 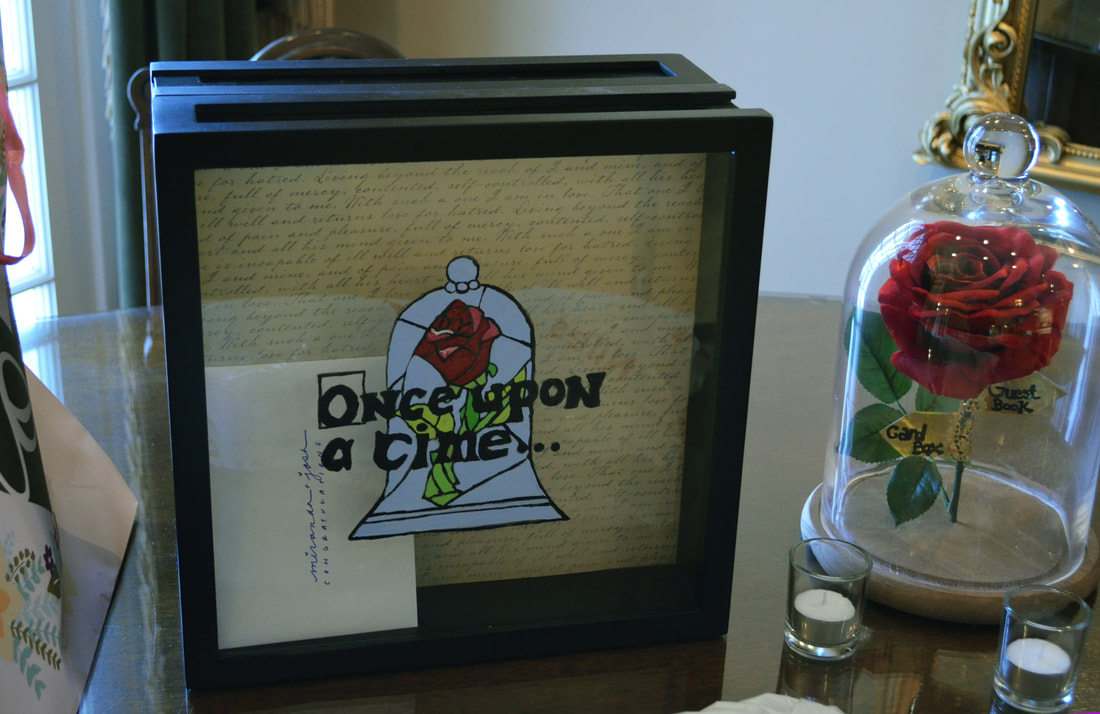 Now, in the photo from the wedding reception, you may notice that there are actually TWO shadowboxes there. Well, when I told people what I was using for my card box everyone said it was going to get filled too quickly and that we would regret it. SO, I got a second one, and did the same thing (just a different design) and then using extra strength velcro, I attached them back to back. What this did was allow my shadowbox to stand without fear of it getting knocked over AND made sure that should the first one fill up, the slit could be opened and turned around so that the second shadowbox could be filled. I couldn't find a photo from the wedding but here's the second cardbox. 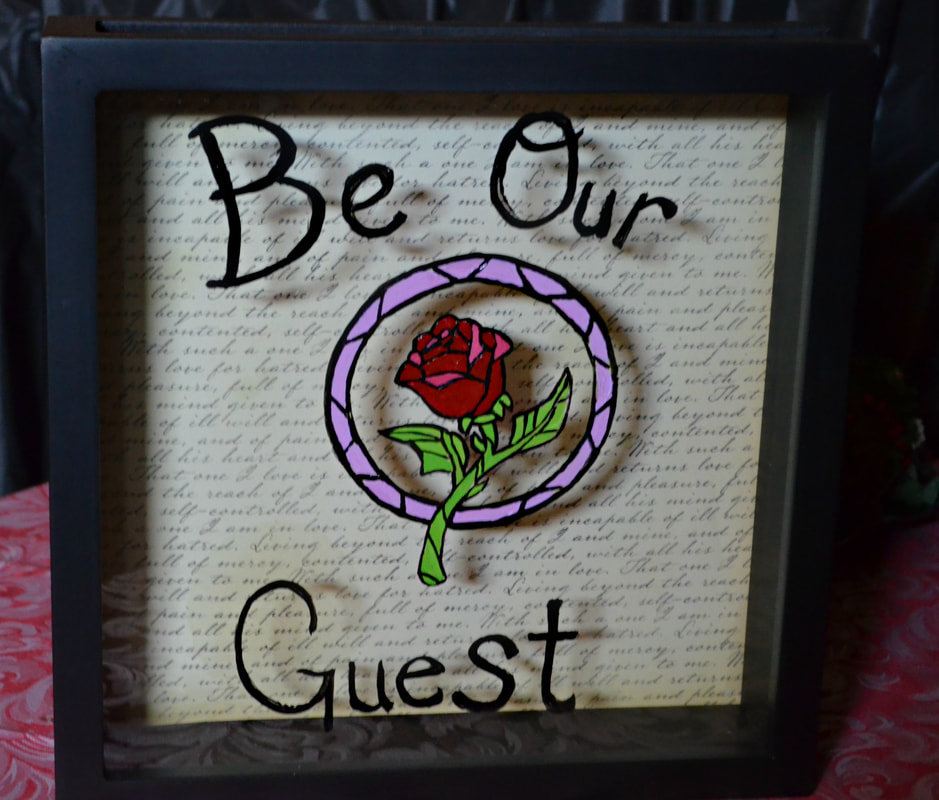 So you're officially engaged! That alone is very magical, it's something you will always remember. But, with it, comes a lot of stress. Especially from outside parties. If you and your partner are not already a united front against the world- NOW IS THE TIME. Everyone and their brother is going to include themselves in your planning. And most of it, is with good intentions, but that doesn't make it any less stressful. People are going to ask for your date IMMEDIATELY. I mean, we were engaged less then two hours, had JUST given the news to our families, and people were already sending us Facebook messages asking for the date. For my partner and I, we knew we were going to have a long engagement, so having a date set was out of the question. And plenty of people, including our pastor, thought it was their place to tell us whether or not we should have a long engagement. But you have to do what is best for the two of you. However, a bonus to a long engagement, you really get to build up a fund, lol. Which brings me to what every blog seems to say: (1) Pick the date (2) set a budget. We were engaged for months before we picked a date and we never REALLY set a budget. We knew what we could afford, priced things out and saved money every chance we got between sales and coupons. I'd also like to mention that we paid for our wedding ourselves- minus the cake, which my grandparents insisted on paying for. (Something about a family tradition.) So it's not like we just didn't care about the budget because we were spending other people's money. But what we did do was look at the national average costs of things and see how much less we could spend or where we'd rather put more money towards. For instance according to The Knot the average wedding dress price in 2016 was $1,564. My Ceremony Dress was $168 and my Reception Dress was $52. That's over 1300 in savings right there. (AND I only caved and got a Reception Dress because my wedding dress was a little itchy and I overheat very quickly.) So, while we strayed from what seems to be the most common advice on the internet, here's how we did start our planning. We picked a theme- not necessary but we wanted one to help with decor and favors. From there it made picking our colors easy. We decided to go with Beauty and the Beast, my favorite fairy tale of all time. And believe it or not, I actually almost love the Christmas story more than the original Disney movie. So we went with Burgundy and Gold for our colors. They're classic, gorgeous, make for lovely dresses and decor, and allowed roses to be a central theme in my floral decor. Now, mind you, this was a FAR leap from the purples I was originally looking at, knowing my grooms favorite color. He actually suggested the Beauty and the Beast theme and it made our planning such a breeze from there! Once you have that in mind you need to decide what type of wedding you want. Are you formal or informal, are you religious, do you want a park wedding or a Party Center type wedding. This is actually REALLY serious because this all will have an effect on the number of people you CAN invite. Forget want to invite. CAN invite. And I'm not even talking about the budget right now! I'm talking about maximum-capacity laws. For instance when my fiance and I got engaged we sat down and made a family tree on our dining room table, labeling relatives first and decided who we wanted and who we HAD to invite for formalities sake. Because I have a large family and he has three sides to his, we had over 300 people initially written down. And it's painful but we had to cut the list down to find a place that could house even 200 people for a reception. When we finally did find places that could house at least 200 we started pricing. (And btw our reception hall COULD accommodate that many... but it would mean removing the dance floor. So then we had to cut it back even more. We ended up cutting it down to 150 on our invite list.) So now you have an idea of how many people you can house where. Now, the problem is a majority of the Party Centers and typical reception venues do not own their own flatware and tables, so you're ONLY paying for the building. And then you still have to rent all the other stuff from another venue- WHICH ADDS UP FAST! For instance the big party rental place by us rents the size tables we needed at $13.95 per day. Which comes out to $200 something to seat 150 people for one day. That still is without the table clothes, dishes, caterers, etc. When we started pricing places we took into consideration what all they rented to you. This will REALLY help you- trust me. Now for us we had a formal wedding and still saved a ton. So if you are sticking with me. Let's get into Prices. This is a picture taken from an article on The Knot 's website. article: https://www.theknot.com/content/average-wedding-cost-2016 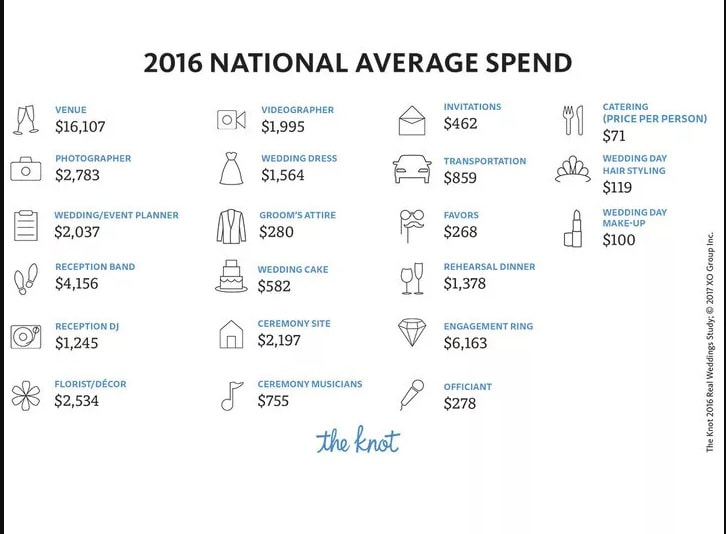 As I said, we had a formal wedding. For the Ceremony Site- we chose to have that separate from our reception venue. We are both religious and actually met at our church in Sunday School when were really little. So getting married at our church was important to us. Because we're both members, it didn't cost us anything to have our ceremony there. The only thing our church asks for is $75 for the custodian, whatever you feel like paying the pastor for his time, and then whatever the organist is charging. In our case the organist was the Groom's grandmother and she refused to let us pay. But I remember it being close to $150 if you did have to pay the organist. So where it says "Ceremony Site" on the chart above we saved about $2000 (because I know what we actually paid the pastor and the janitor). If you're not religious there are still ways to save on your ceremony site, like I said, have it at the same place as your reception. You're already booking the place, why not double dip? But if you are, however, religious- check with your church or your family's church and see if it can save you money! And that also knocks the "Ceremony Musician" and "Officiant" fees right off the chart. That's another 1000 the national average pays for. Now, there are still things revolving around the ceremony that are on that list. Let's start with the engagement ring.... JUST SCRATCH THAT FROM THE CHART ALL TOGETHER!!! I'm not trying to piss off a whole bunch of brides here but we need to remember it's not about the pebble it about the penguin! (I sincerely hope someone else gets that reference, lol) And the only reason your engagement ring would be a part of this, is if it's such a ridiculous ring that your fiance is still paying it off! However, your WEDDING rings should be in this budget. I'm not sure why they're not listed on that chart! But according to an article on Long's Jeweler's website, "couples spend an average of $1417 on the Bride's band and an average of $558 on the groom's band." http://blog.longsjewelers.com/wedding/average-price-wedding-ban That's insane to me, personally, but I'm also not big on jewelry. I want something really simple that goes with everything. So we decided to go with plain silver bands... and my husband MADE our wedding bands! They're made from stainless steel, something he was able to get from his work and made on his lunch breaks. It will forever hold a special place in my heart that he made our bands. BUT if you want something more flashy, that's totally up to you. I simply suggest remembering that you have the rest of your lives to upgrade. I know many HAPPY couples who couldn't afford expensive rings when they got married and then ten years later upgraded their rings when they could afford to. Just keep it in mind. Onto the photographer, I actually went to school to become a photographer. But unfortunately, where my heart lies in photography is with animals and to peruse that means traveling the world. It's just not in the cards for me. I get homesick after one day. BUT I know a thing or two about photography, I even did our engagement photos, and so I know that photographers are generally fair for their prices. What I will say is LOOK at their portfolio, speak to clients who have left reviews on their website, and meet with the photographer. Make sure it's someone you're comfortable around. We met a local woman out here who charged us $1155.60. That got us 9 and a half hours, unlimited photos, two photographers, and also some sort of print. I think she's doing a USB but it could be a disc. Either way that's a steal and she was WONDERFUL to work with! So we saved about $1600 there. And while we're on the topic of preserving the wedding in photos and video. HONESTLY, are you going to watch the ceremony tape that often? Does it need to be a pristine video quality? If the answer is no, then just find someone in your family with a video recorder and see if they'll record the ceremony for you. Our roommate took my parents recorder and got our ceremony on video, our church exit, and our first dance. It cost us nothing. That's $1995 saved by NOT booking a videographer (which by the way we did price out and it was going to cost a minimum of $1500). Your Florist is the next decision. Do you want real flowers or fake. Both add up. We went with fake however, so that I could make our bouquets, boutonnieres, centerpieces, etc. And I could do it months in advance and know that the flowers weren't going to die. Now this is where my numbers get dicey. I KNOW we didn't spend anywhere near the average cost for floral. Here's how I know. If I had gone to Micheals and had their floral designer make my bouquets, my bridesmaid bouquets would have cost around $80 per girl. Which means my maid of honors (yes I had two) would have been AT LEAST that. And mine would have been 100 or more, since I did a red rose cascading bouquet. That right there adds up to: approximately 500. Just in the bouquets! But instead, my mother and I made all the floral stuff. We used sales and other discounts to buy silk flowers, and between ALL the floral that had to be worn or carried, the centerpieces, and the ceremony decor, and the toss items, we probably spent close to $400. That's over $2000 in savings. Hair and Makeup! The national average according to that chart is over 100 for hair and 100 for makeup. YIKES! Now, I had a hair dresser who kept flaking on me, she canceled every appointment and when we were TEN DAYS FROM THE WEDDING. I started panicking and scrambling to find someone else since CLEARLY this person wasn't reliable. Thankfully though, we had a family friend pull through. She did my hair and makeup for $66 (she also helped me apply my jam-berry nails) which was a STEAL. But she did a killer job! She works at a salon right down the road from my church and they charge 60 and up for a bridal hair styling and 35 and up for a bridal makeup session. If I had just gone to their salon I was looking at about $115 minimum. Which is still a steal when you think about it, but I was very blessed to not have to come up with a big makeup budget last minute because my original stylist flaked on me. 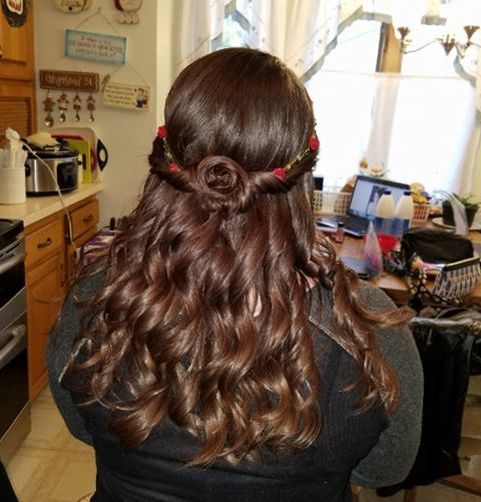 This photo is from our tester appointment. (I haven't gotten any of our actual wedding photos back yet.) BUT you can see what a FABULOUS job Stephanie did with my hair. Especially since my hair doesn't corporate for anything! NOW, let's discuss the Reception. The average Venue cost is 16,107. Which you will easily pay by the time you rent a place and all the things they DON'T provide. We had our reception at a FABULOUS historical landmark fifteen minutes from our house. Mooreland Mansion is STUNNING. It fit our decor and our traveling radius like a charm. But even better, you rent basically everything when you rent Mooreland.
And what did this cost us????? A little over $2000 to rent all of the above. Then when it was time to do catering (THEY WERE DELICIOUS BTW) it was about $34 per plate (once you add in the tax and service charge prices.) In the end we rented the whole building and gardens, all their equipment and staff, fed over 100 people, plus had a rather large bar package (I'm Scottish and Irish, if we didn't have a bar my family would have come for me, lmao!), and rented heaters for the veranda for a grand total of $9,482.40. LITERALLY the most expensive thing about our entire wedding was the location and food of our reception. Everything else we got at a steal. And we still saved over $6000 on our reception venue! Here's some photos of Mooreland when we had our tour their to decide if we wanted to rent it or not. If you're still with me, have you been adding up all the savings we've gotten along the way? Here's what we've saved according to the national average thus far: $14695. That's only looking at the ceremony, photographer/videographer, florist, makeup, and reception venue. What's left as the BIG thing for the reception- a DJ. We didn't do a band so that can be crossed off our checklist for the national average. The DJ we went with is a family member of mine, a second cousin whom I love dearly. We called him and asked him if he'd rather be a guest of a DJ and intended to sign a contract with him. NOW, he said his most expensive wedding package was 1000-something. So he probably fits RIGHT in there with the national average. But he and his wife insisted on doing this as a wedding gift to us and so we were only allowed to tip him. That saved us $995 right there. I KNOW not everyone can be so lucky! BUT I still have some SOLID advice on finding the right DJ. You need to know if you want one that's going to be loud and boisterous or one that's going to be quiet and more formal- only making announcements when necessary. Your DJ sets the tone and you need to find one you can comfortably work with and who can keep the night moving on time. For instance I went to a wedding where the DJ was making crude comments that were NOT appropriate for a formal affair and it was so bad I almost didn't get a DJ at all! And I know we all want to find one with a solid website and a big reputation. But sometimes the small local DJ's are going to do a better job than the one who charges thousands to show up and yell into a mic all night. Just a thought. Wedding Cake! Once again it's one of those items that it's worth really putting some thought and effort into. Do you want one that's going to be gorgeous but taste like trash or do you want one that's good quality but not as overdone. I am a cake snob, since I make cakes all the time. I wanted one that was going to be gorgeous but also edible. We found a local cake shop, who has actually been on Food Network... so we knew they were probably going to be expensive, but we also knew they were going to do a great job! Their three-tiered cakes cost $500 and at the time we thought we needed more servings so we also bought a sheet cake on the side. This ended up costing us $600 something for the cakes plus $150 for delivery. So we went over the national average BUT the quality, the delivery, and the overall service we received from them was 100% worth it. We had each tier a different flavor with a different filing, they did the icing to our color scheme, and they even took some money off the charge of the cake stand we rented because it was tarnished (which was why we liked it... BUT OKAY!) OH and as far as taste- this is done entirely in buttercream so it was all delicious! 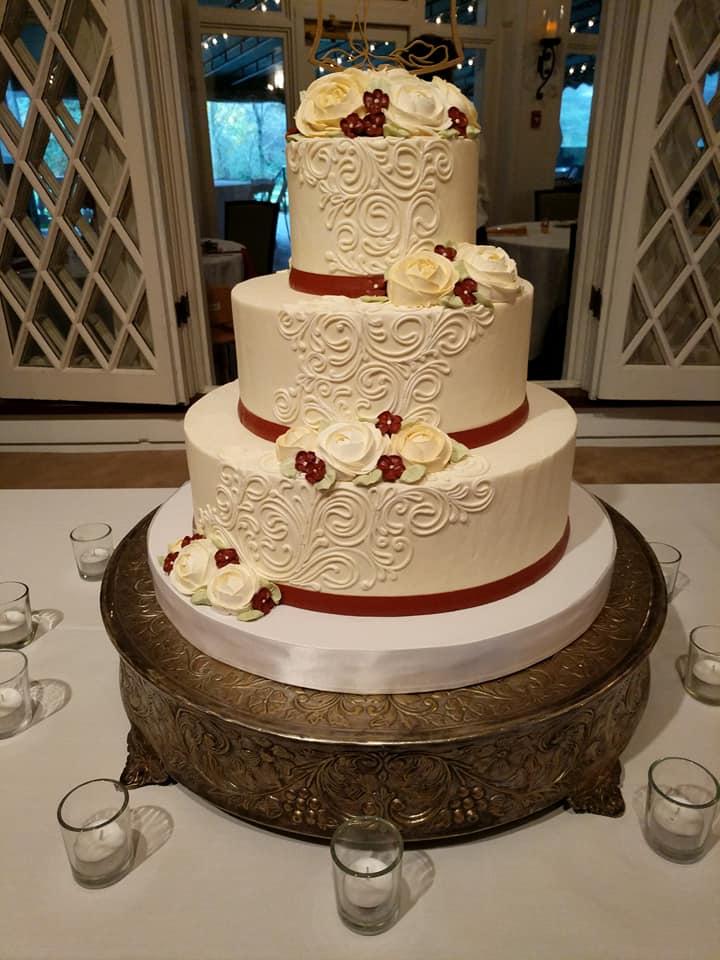 To the things I didn't address on the chart. The wedding planner- sure they might have some ideas but this means trusting another person with all the details of your wedding. For some this may be less stressful, but for me I couldn't have imagined handing over the reigns and having to make all the decisions through another person. So we didn't hire one and that saves us a ton there! The grooms outfit cost about the national average, I think it was like $250 to rent his tux, he owned his shoes, and then we bought his tie so he had a special one. (And I was able to iron a little note onto it without him knowing till the day of the wedding.) We decided that having wedding transportation didn't make any sense because of where we were doing our photos and how close everything was, so our wedding party just drove themselves wherever they needed to be. We were all fine with that AND the we didn't have to pay almost $900 for a limo.
Where does this leave us? Well we still have favors and invites. But for those are two, I'm sure in the long run I left the national average to make them exactly how I wanted. And this is what I was talking about. We ended up saving thousands in areas where it wasn't as important to us in order to put a little bit more towards the things that we did find important. For us, a lot of the beauty is in the details. I handmade everything I could. And I'm going to show you how to hand make some of those items as well! So stay tuned because I'm going to show you how we made our wedding so special by doing it ourselves! And even if you don't use these crafts for a wedding, you may use them for something else later on. |
AuthorNow that the weddings over I'm a far less stressed woman and here to share the journey. Archives
February 2018
Categories |
 RSS Feed
